How to view individual Azure DevOps work items in Confluence
The how-to guide on how to add and view individual Azure DevOps work items in Confluence pages
The Azure DevOps Connector for Confluence provides three Macros which allow you to view Azure DevOps Work Items in Confluence, the Work Item macro, the Work Items Text Search macro and the Work Items Query macro.
Using the Azure DevOps Work Item Macro
This macro aims to provide clear and easily accessible information about individual Azure DevOps Work Items.
You need to ensure the Query/Work Item/Project can be accessed by the user who created the personal access token.
Quick Guide
Copy the Azure DevOps Work Item URL
Paste the Work Item URL into a Confluence page
Detailed Guide
Here is an example of how the macro looks in Confluence:
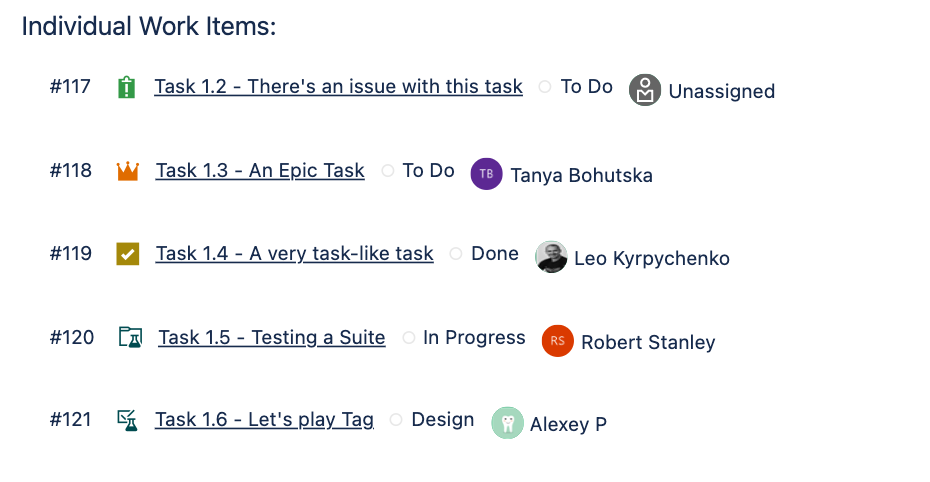
To add a Work Item macro to Confluence, you require the Work Item URL from Azure DevOps.
Go to your Work Items in Azure DevOps and select the Work Item you wish to populate in Confluence as shown below, then copy the URL from the browser.

The URL should be in the following format: <BASE_URL>/<ORG>/<PROJECT>/_workitems/edit/<ID>/
If you are using Microsoft Azure DevOps running On-Premise, you need to make sure you are using the URL accessible from the Internet.
Once you have the Work Item URL, go to the Confluence page in question, edit the page so you can add new content, then just paste the URL from Azure DevOps and the macro should automatically populate with the work item in question as shown below:

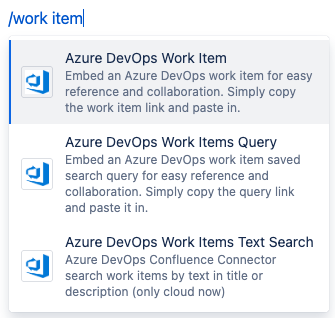
Alternatively, by typing / followed by the Macro name (e.g. /work item), you can then select the Macro from the list that populates
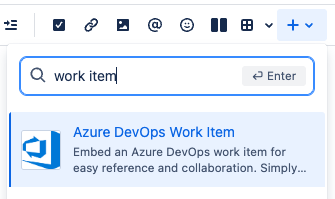
This can also be achieved by using the ‘insert element’ drop down and typing the macro name
Both options will add the Work Item macro to your Confluence page as shown below:
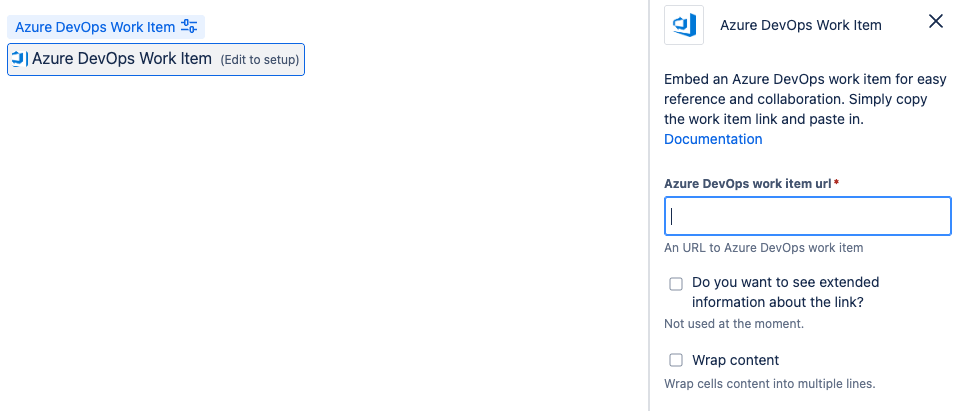
Now simply paste the previously acquired Azure DevOps Work Item URL and the Work Item information will populate where the Macro is.
Editing Existing Macros
When mousing over a macro a button will pop up at the top of the macro as shown

Clicking this button, will pop up another three buttons, allowing you to Edit, Copy or Delete the macro

When selecting Edit, the macro details will populate on the right of the screen, allowing you to change the Azure DevOps Work Item URL.
Viewing Elongated Work Item Information
When viewing a Work Item that has a lot of information, similar to the one below, the details at the end may be cut off.

To address this, click on the Work Item macro and edit it using the steps mentioned previously, then select the Wrap content option

Now the elongated information will wrap, displaying all the details.

Demo
You can find a demo of the Work Items macro from YouTube below:
https://youtu.be/KxhlLq2aDro?feature=shared&t=12Updated:
