

Autodesk Inventor Place Fasteners application helps add bolts, screws, nuts, rivets, and washers to your designs.
Description
Autodesk Inventor Place Fasteners is a desktop add-in application for Autodesk Inventor allowing users to automatically insert fasteners into 3D modelling space with automatic size selection based on the sizes of the holes or slots.
Fasteners can be sourced from the user's custom library or Content Center. Supports 5 material types for each fastener.
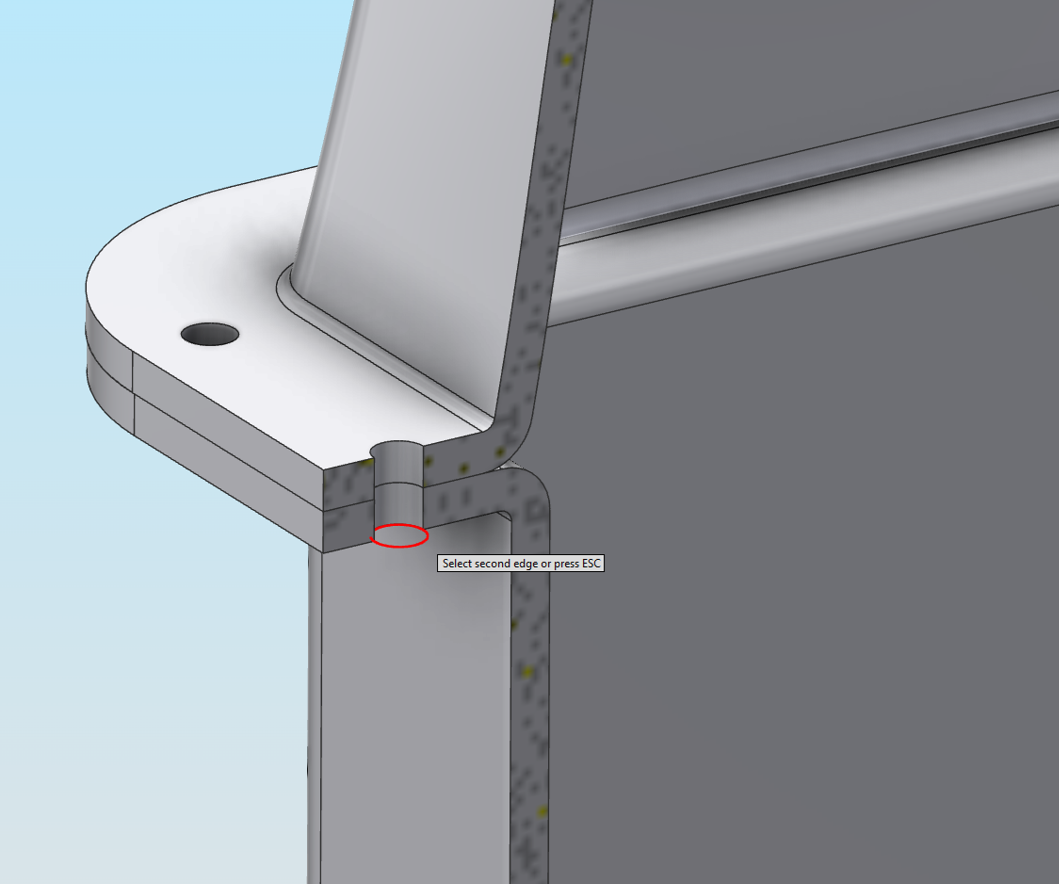
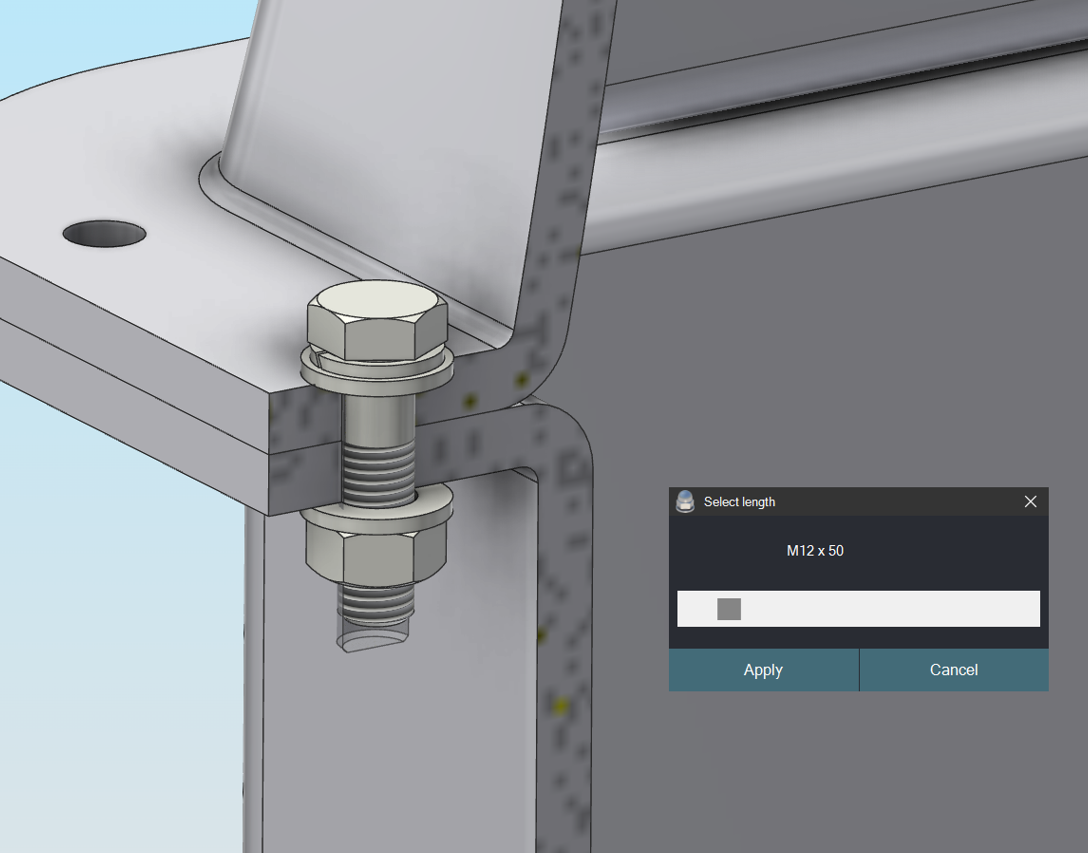
To add a bolted connection, the user selects only two edges, allowing the application to determine the diameter and length of the inserted fasteners.
Place Fasteners on Autodesk App Store
https://apps.autodesk.com/INVNTOR/en/Detail/Index?id=713745016472190898&appLang=en&os=Win64
Video tutorial
App Functionality
-
Supports both metric and imperial fasteners.
-
Compatible with all custom libraries and part types and Content Center, including integration with Autodesk Vault.
-
Allows selection from 5 material types per fastener item.
-
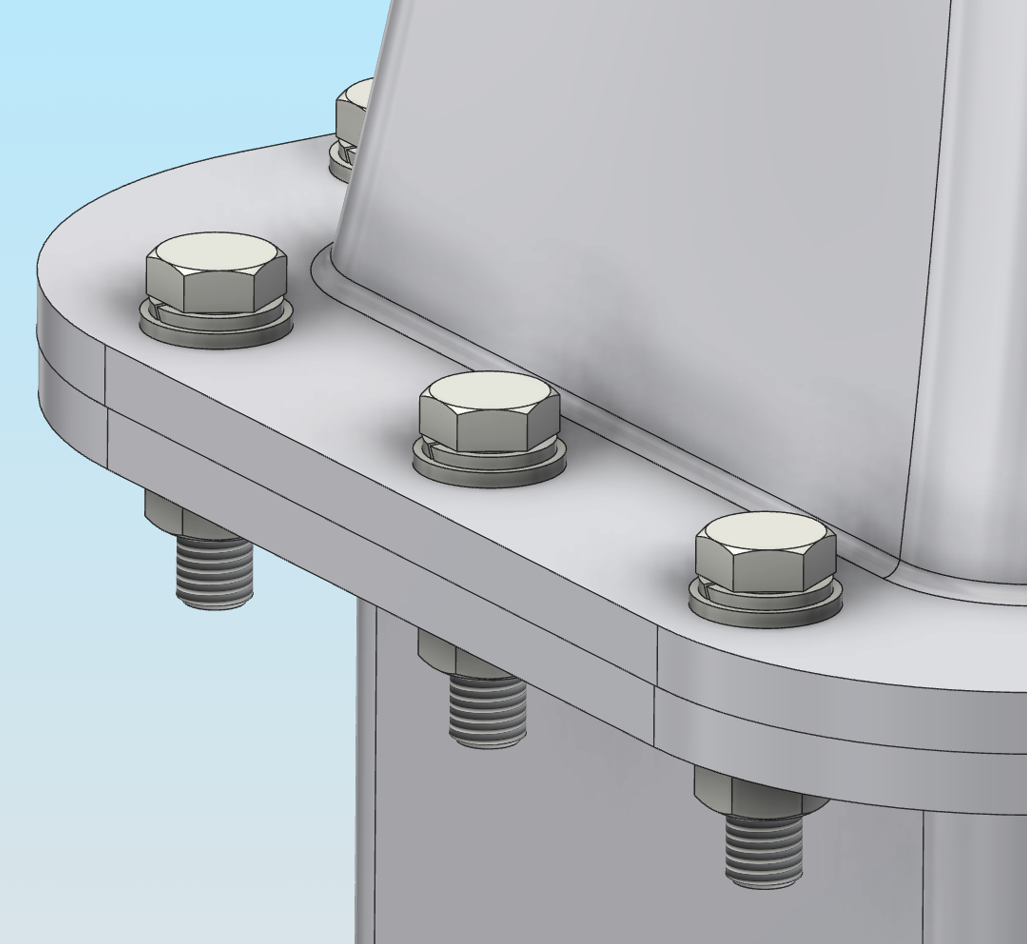
Can insert fasteners into both round and slotted holes.
-
Automatically validates the model for inconsistencies. For example, if a smooth Ø8 mm hole is selected alongside an M10 threaded hole, a relevant warning is displayed.
-
Detects interference between fasteners and the model.
-
Fasteners are highlighted in red if a collision is detected.
-
Fasteners are highlighted in yellow if placed in holes with no clearance (e.g., inserting an M8 fastener into a Ø8 mm hole).
-
-
Automatically enables a half-section view state for improved visualization.
-
Supports placing fasteners into folders, with customizable folder names.
-
Supports placement in free space without constraints.
-
Allows toggling between fully and partially threaded hex head bolts.
-
Enables propagation of fasteners across multiple faces simultaneously.
-
Supports insertion Content Center items as custom parts into specified folder.
Usage Instructions
Download Place Fasteners application from Autodesk App Store. Run the application installer and follow installer instructions.
After installation is done Place Fasteners command appears under the "Assemble" ribbon panel of the Assembly environment.
Before you can start placing fasteners, the application has to be configured.
Place Fasteners Configuration
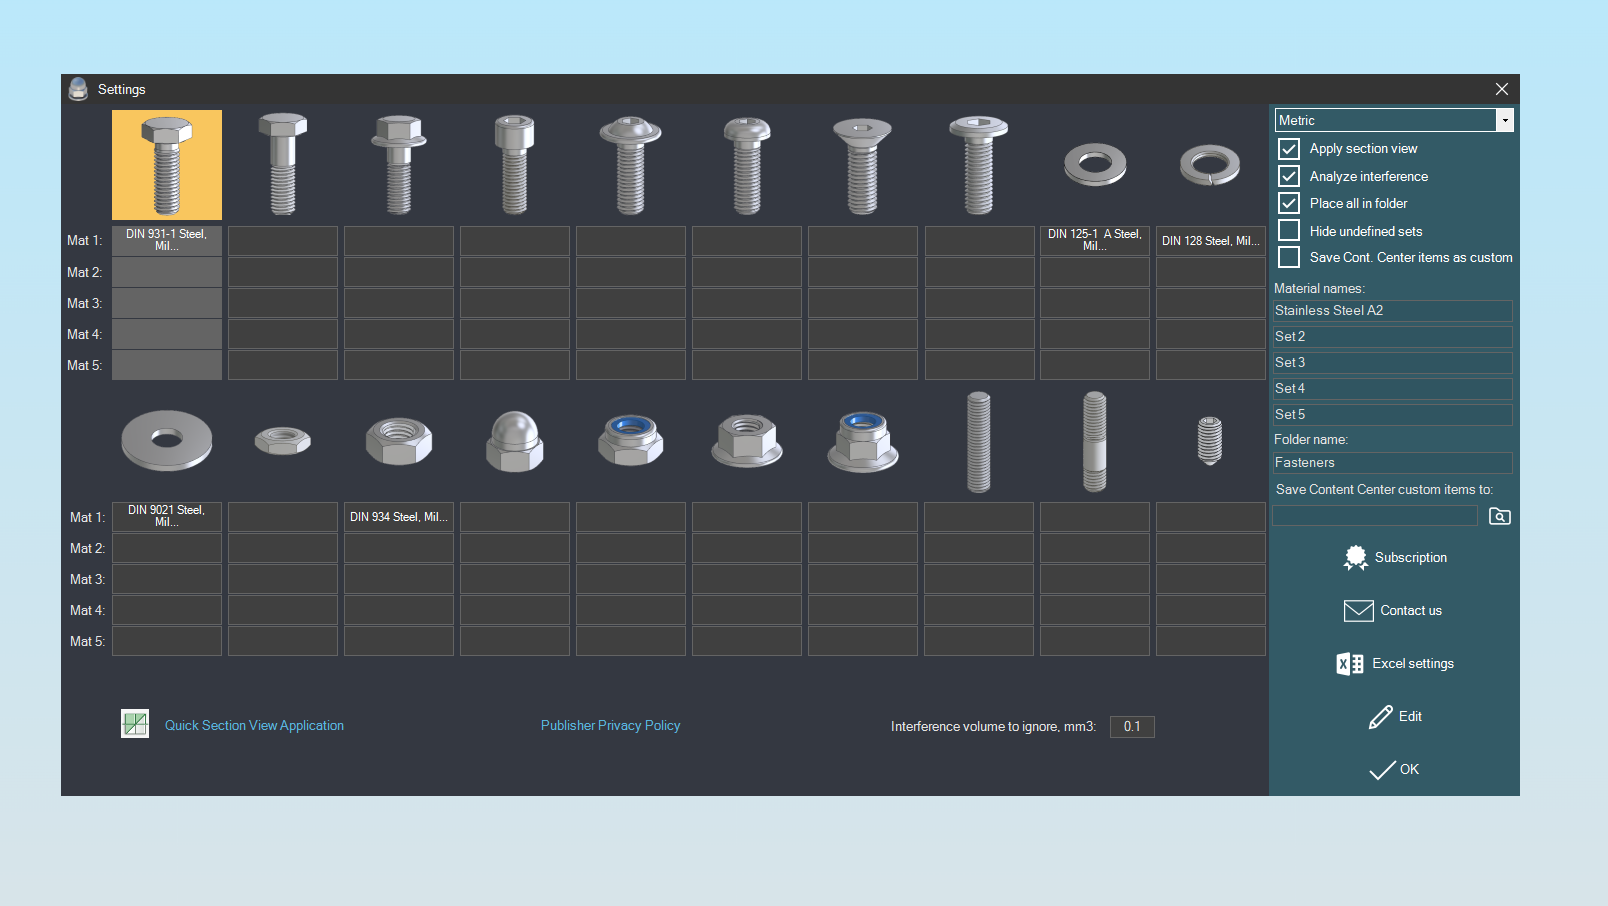
Run the application, on the "Main window" click "Settings" and select your units of measure: metric or inch.
Then select the fastener item you want to modify and click "Edit". Family Customization window will appear on the screen.
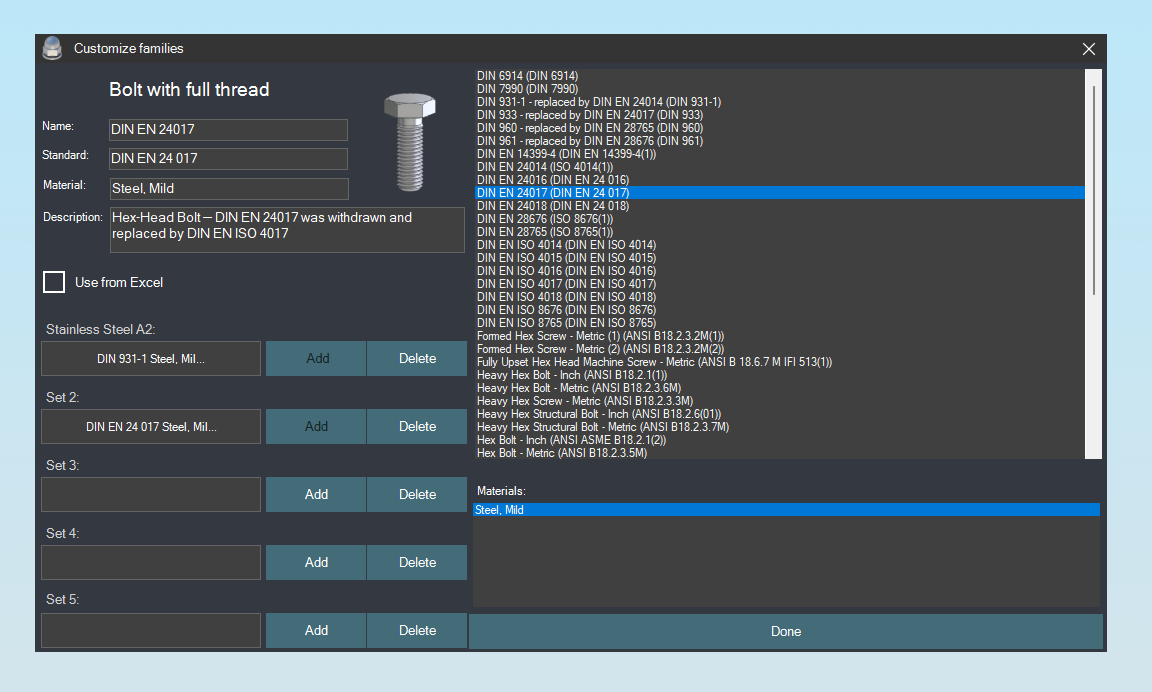
There you have two main options for defining the fasteners. First is to use Content Center, second is to use your own custom library files.
A list of all available Content Center families for selected fastener types is shown at the right side of the window.
The application supports 5 different materials for each fastener type. So there are 5 "Add" buttons at the left side of the window.
Each button corresponds to a particular material number. If you are going to use Content Center fasteners, then select a family in the list and press one of the "Add" buttons.
Setup Custom Library files
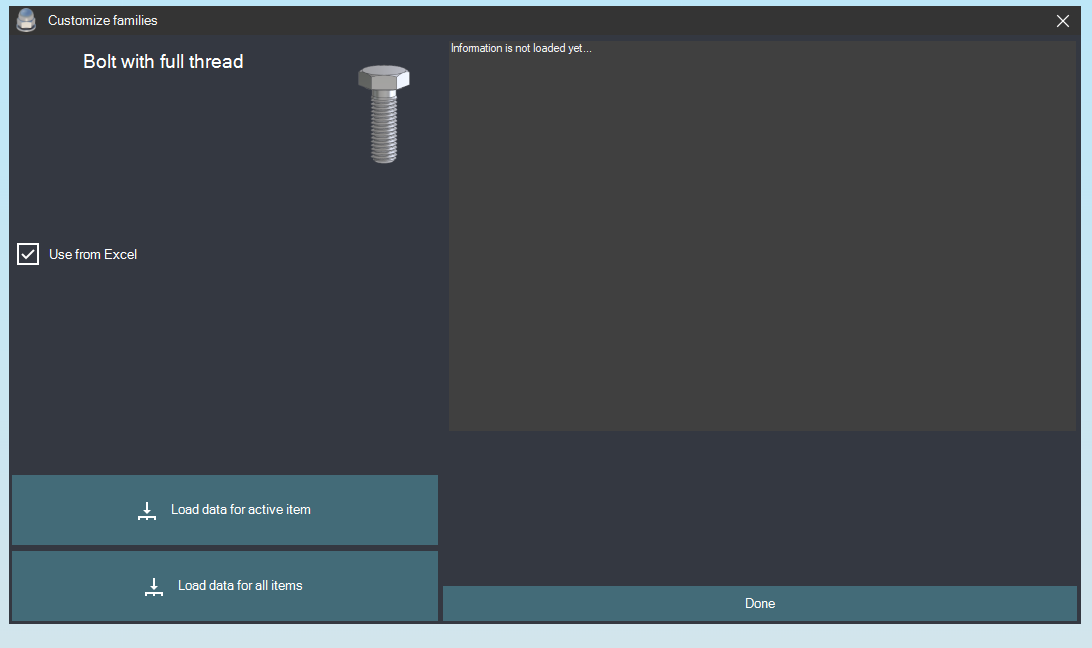
If you want to use your own library files then enable "Use from Excel" checkbox. There you will be displayed with two extra buttons.
Click "Load all data for active item" to load all information about your local library for the selected fastener type.
To access the Excel document, go back to the "Settings" window and click the "Excel settings" button.
In the new window, you can open the Excel document or change the link to another file.
The Excel document consists of a number of pages, where each page represents a certain fastener type.
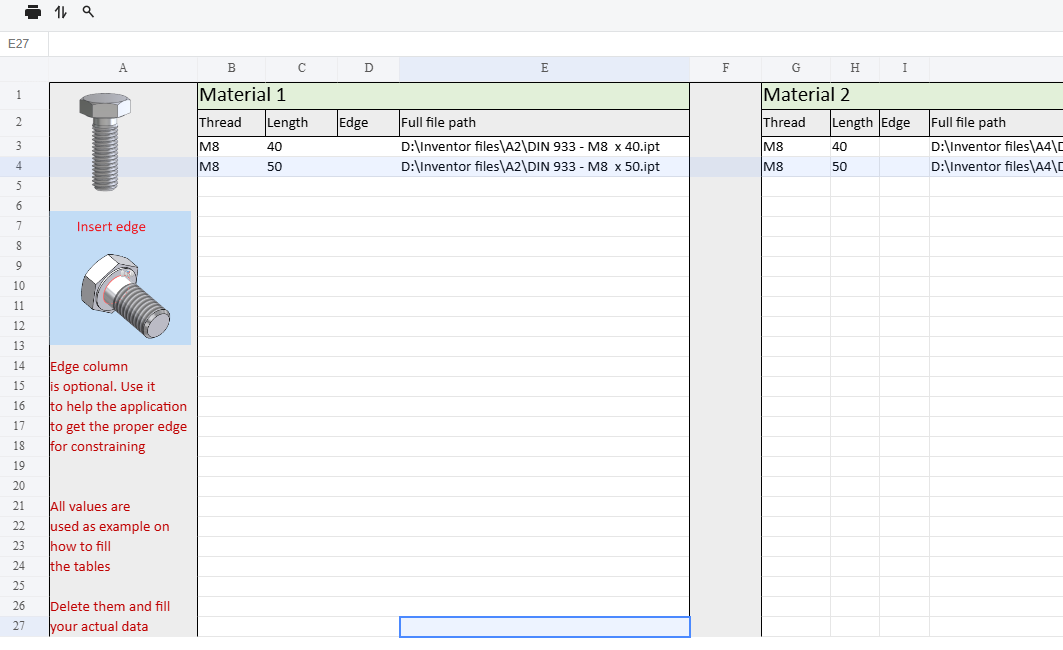
Each page contains 5 column groups for 5 materials. For bolts or screws, you must provide the information about the thread size, length and file full path. The edge column is optional.
You fill it only when the application fails to select the proper edge for constraining the fastener. To do that go back to "Excel setting" menu and click "Select edge" button.
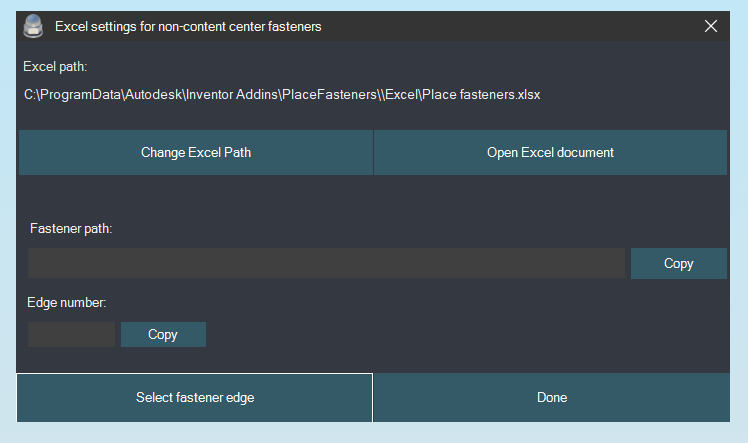
Then, in the Autodesk Inventor window select the fastener edge. The application will show you the corresponding edge number, which has to be copied to the Excel document.
Now the application will use the edge you selected for constraining the fastener. For washers and nuts you have to provide the thread size and file full path only.
The height and edge columns are optional. Use "Load data for all items" to load all available information from the excel document.
Start adding fasteners
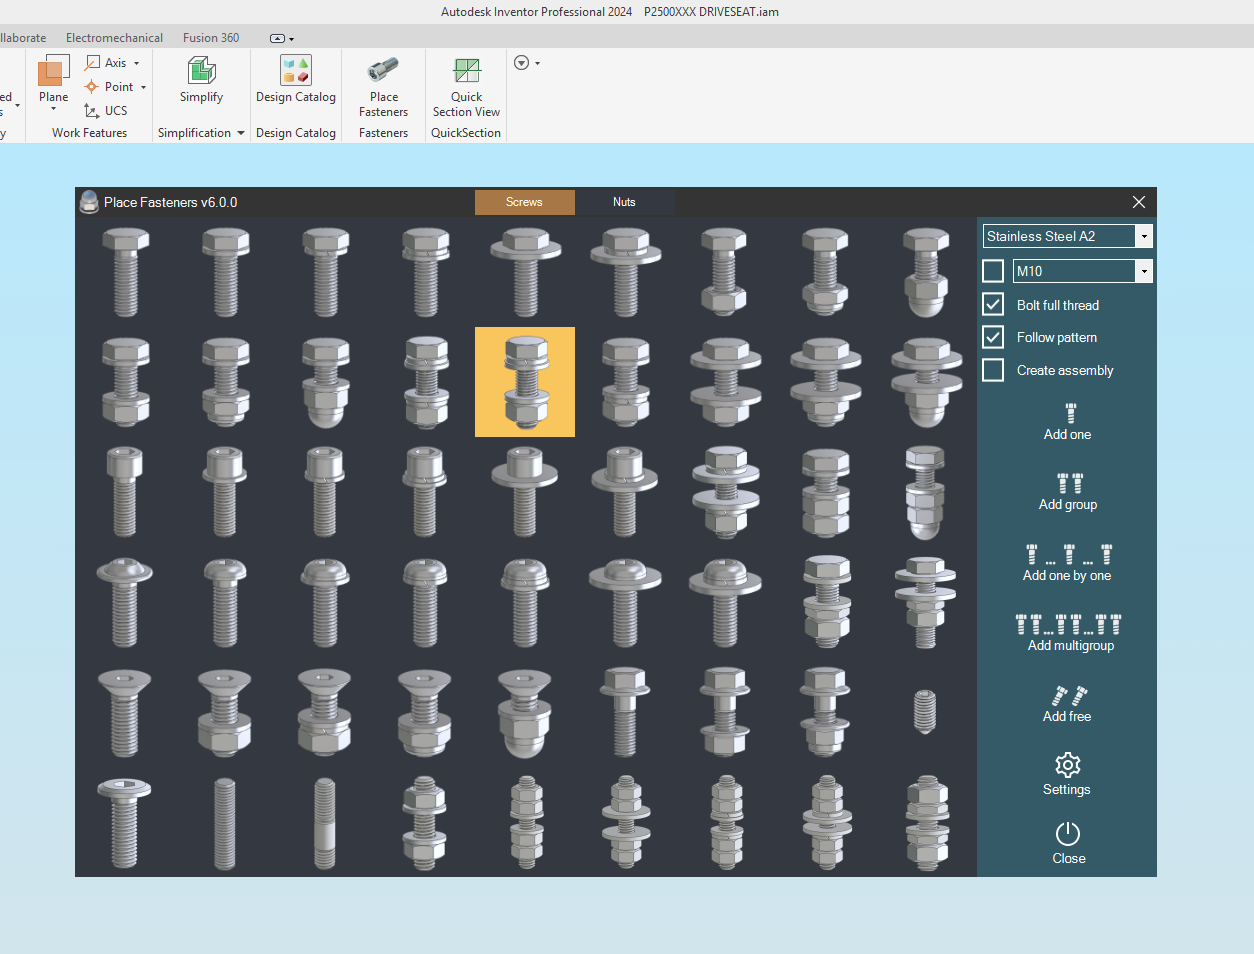
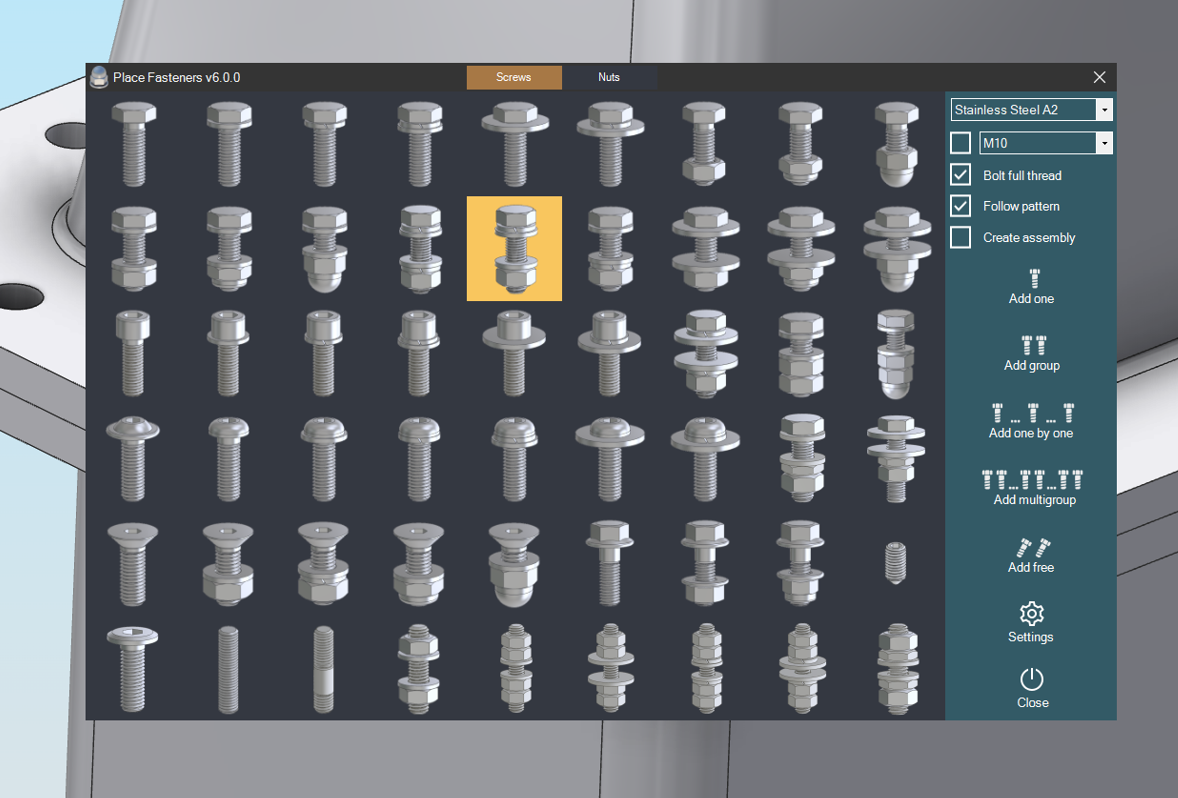
When you are done with the app configuration, select the type of the fasteners set in the main window and the material from the drop-down list.
If you want to disable automatic thread size selection, just get the size from the drop-down list and enable the check box next to it. Then the fasteners will be placed with the size defined by the user.
"Bolt full thread" toggles between bolt families with full thread and partial therad.
"Follow pattern" checkbox allows you to pick an existing hole pattern and create "Feature-based pattern" of fasteners.
"Create assembly" places fasteners set as an assembly unit.
"Add One" - inserts one set of items for the selected hole. The user selects first edge (top) and second edge (bottom). The application automatically identifies the thread size and the bolt length. Of course, length can be changed by the user when fasteners are placed.
"Add One By One" - after the first fastener set is placed the user can select other holes and the app will copy the first set and constrain it to these holes until "Done" button is pressed.
"Add Group" - the app places fasteners set for each hole of the same size as the first hole selected by the user on the current face.
"Add MultiGroup" - works the same way as "Add Group" but the user can select multiple faces.
"Add Free" - the app places fasteners set just in free model space without constraining to the model.

How to add fasteners in 4 screenshots
|
|
|
|
Notes
Only standard (coarse) thread pitches are supported; fine threads are not available at this time.
-
Supported metric fastener sizes include the following recommended thread sizes:
M2, M3, M4, M5, M6, M8, M10, M12, M16, M20, M24, M30, M36, M42, M48, M56, M64
(e.g., a Ø16 mm hole will automatically use an M12 bolt) -
Additional sizes may be included in future releases.
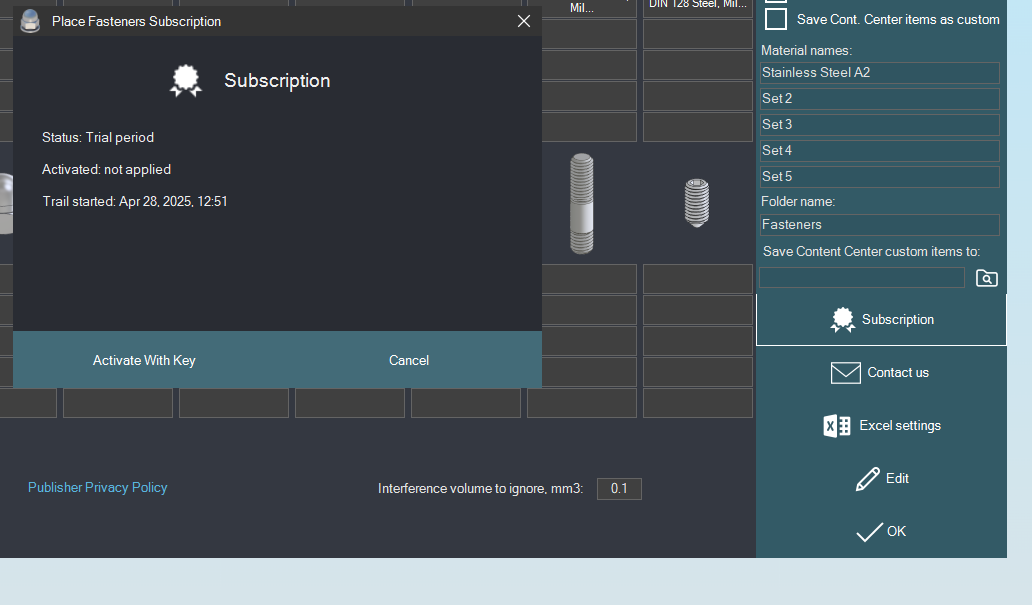
Trial and Subscription Description
The app provides a 30-day free trial with full functionality.
After the trial period expires the subscription has to purchased via Autodesk App Store or with an invoice.
Subscription information can be viewed from Settings window => Subscription
Updated: