

The get started guide for the end user of Jigit - GitHub, GitLab, Azure DevOps integration for Jira helps people use the app on the Jira issue view screen.
This guide is for Jigit - GitHub, GitLab, Azure DevOps integration for Jira available on Atlassian Marketplace for Jira Server and Data Center.
About Jigit
Jigit is a Jira application for Jira On-Premises (Server and Data Center) that provides an issue view tab, which displays all commits and pull/merge requests referencing the issue key from connected Git systems like GitHub, GitLab, Azure DevOps and Gerrit Code Review.
Azure DevOps integration available since version 9.03.23.
The development panel displays issue-related branches and permits creating a new feature branch directly from the issue view.
Jigit allows you to collect commits and pull requests from GitLab, GitHub and Azure DevOps. Jigit queries Git servers using their public REST APIs and saves commits and pull requests into a Jira database, so no code access is required. The app uses only the commit history.
The App does not have access to your source code. It doesn't clone your repositories, so no disk space is used to store sources. It uses REST APIs to query data.
This guide assumes that your Jira or project administrator finished the Jigit application configuration and connected to one or multiple Git systems.
Please reach out to your Jira administrator if you need any assistance or learn more in our guide:
Video course
A good place to start is to review Jigit Tutorials video course.
Jigit tab
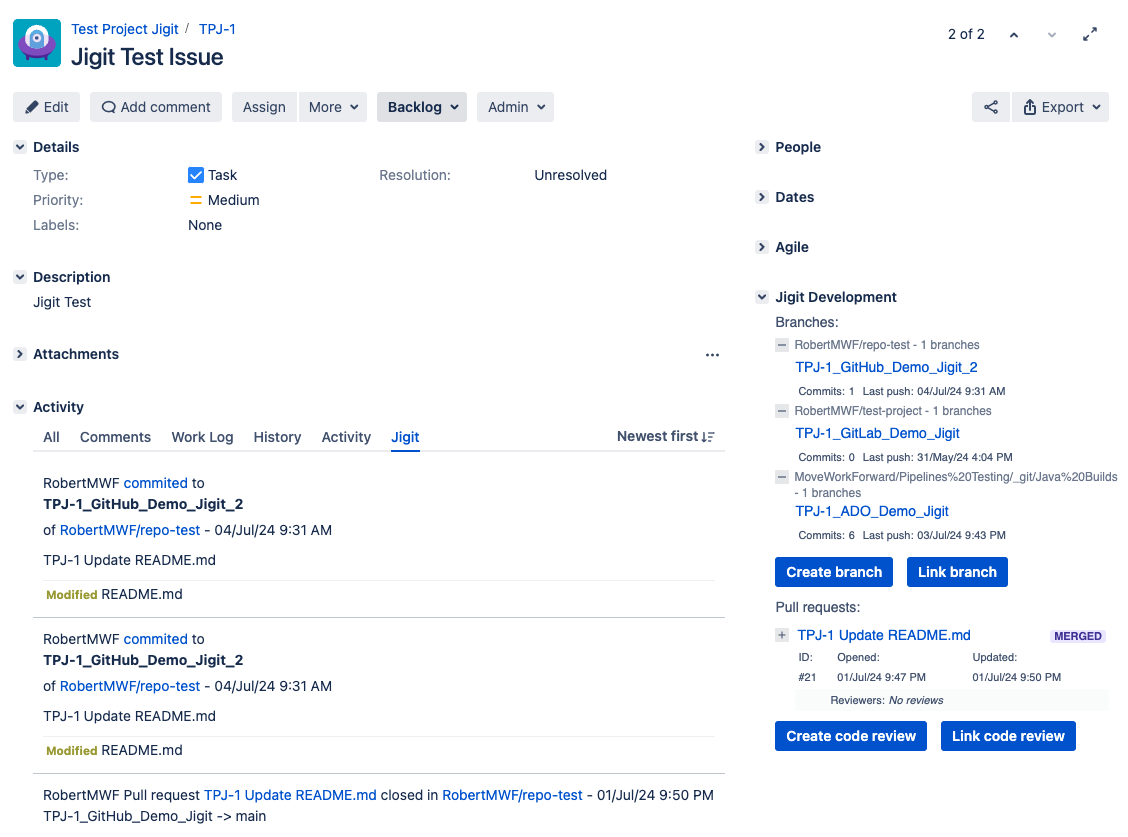
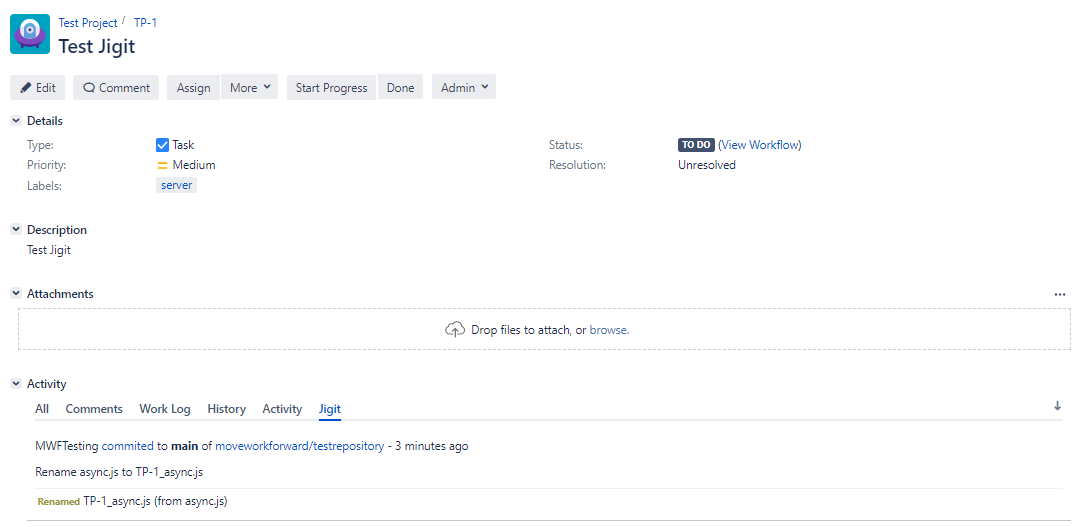
The Jigit tab on the issue view screen displays information related to commits, merge requests or pull requests associated with a particular Jira issue with the help of the Jigit app. This includes details such as the status of the merge request or pulls request, the branch being merged, and any associated comments or details.
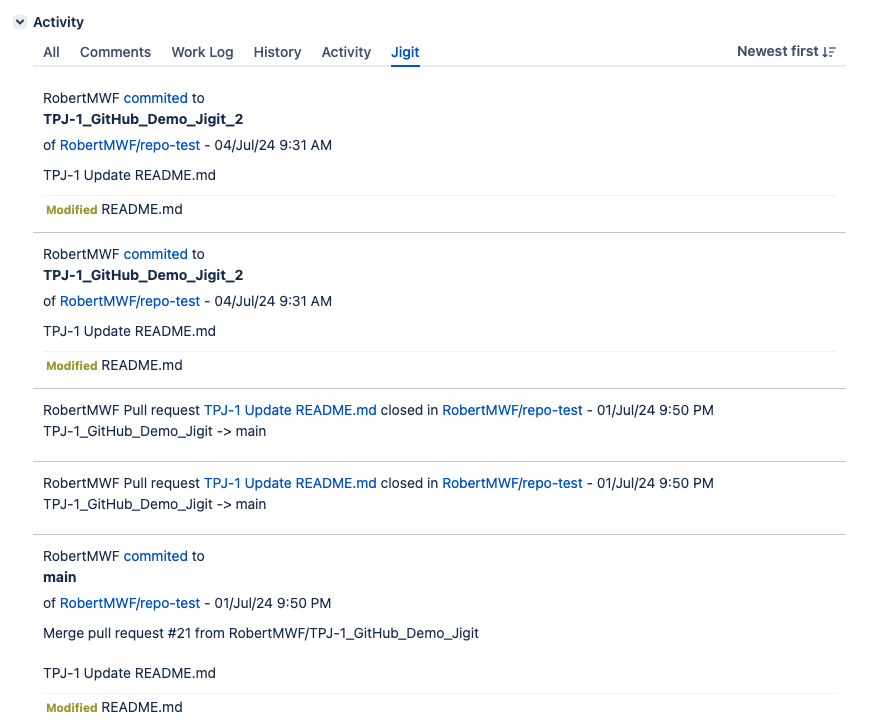
Associate Git entities with Jira issues
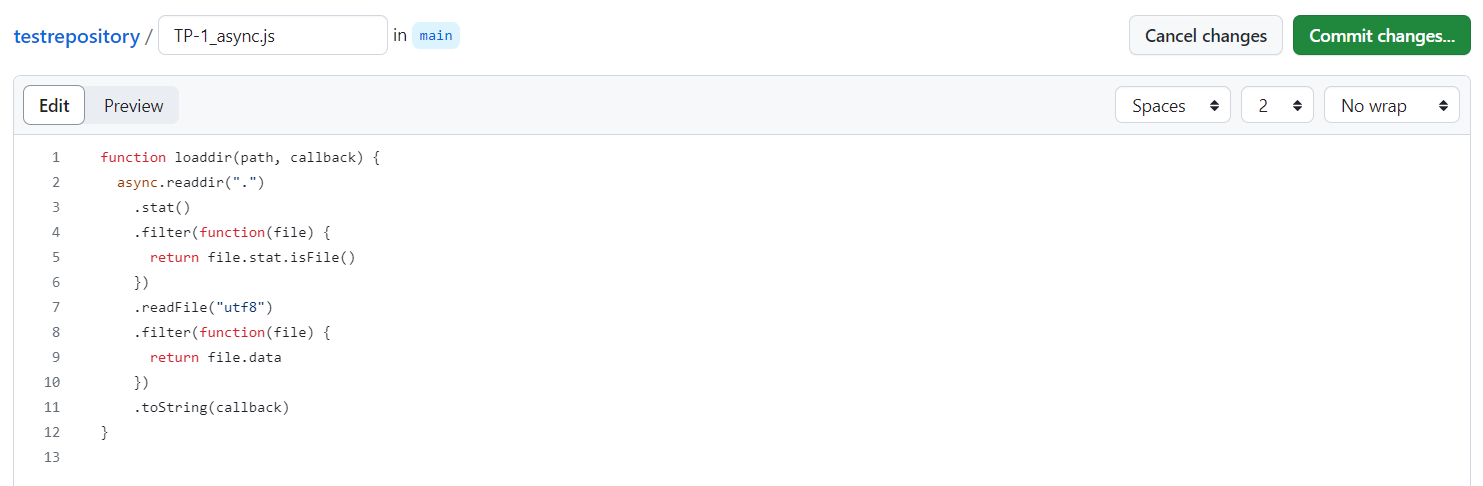
Once the Jira administrator configures the repository, you must associate Git branches, commits, pull and merge requests with Jira issues. Jigit uses Jira issue keys (for example, TP-1) to link Git entities to specific issues:
-
In your Git commit messages, the pull and merge request summary or title field includes the Jira issue key(s) that the Git entity relates to. The branches to be shown must contain the issue key in the branch name.
-
A Git entity can contain more than one issue key. In this case, it will be displayed on the tab of every mentioned issue.
-
Once the Git entity is created and saved, you should see the information related to it on the Jigit tab.
The issue key should match exactly.
For instance, the following Git-commit messages will be linked to the Jira issue TP-1:
Jira issue view
Smart commits
Available since 3.04.01
Smart commits are special commit messages that allow you to perform specific actions in Jira through your Git commit messages. Jigit supports smart commits for transitions.
This feature will be available if only it is enabled in the configuration settings on the Configuration page by the Jira administrator. To find out, please contact your Jira administrator.
For example, if you write the commit message in the form #in-progress (hash, status name without spaces), the issue will be transitioned to the status In Progress.
The smart commits work similarly to the Bitbucket Smart Commits.
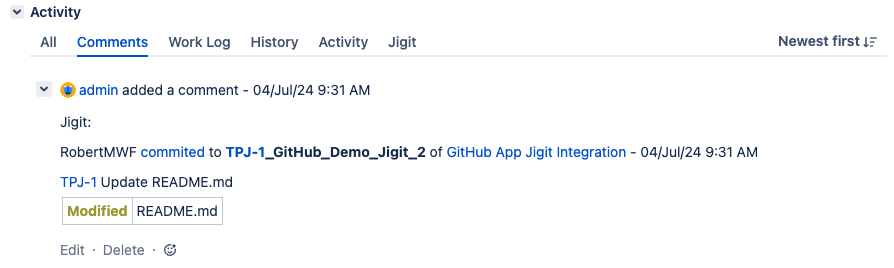
Comments tab
Besides the Jigit Tab, Git activities could be displayed on the Comments tab (if the Jira admin selects to use the comment tab, not a standalone Jigit tab).
This feature will be available if only it is enabled in the configuration settings on the Configuration page by the Jira administrator. To find out, please contact your Jira administrator.
The app does not provide the mapping between Github/Gitlab/Azure DevOps and Jira users. As we need to specify the user on which behalf we add the comment, we use Assignee or the Creator (if the issue is not assigned) as the comment author.
GitHub App Jigit Integration is the alias of the configuration created by Jira administrator. Its link navigates to the relevant GitHub/GitLab/AzureDevOps repository.
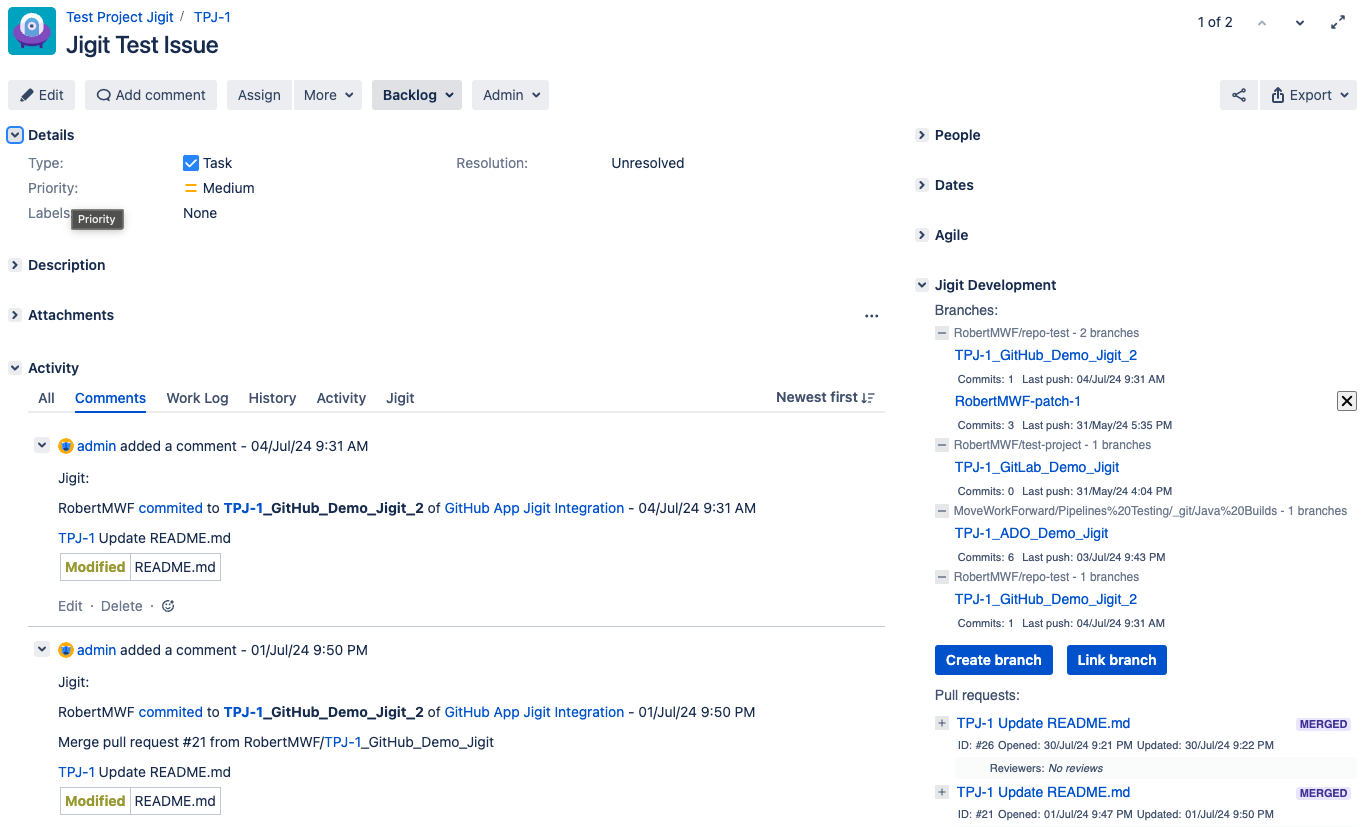
Jigit Development Panel
Available since 5.02.23
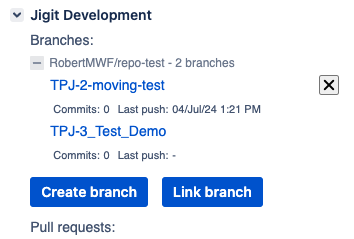
Jigit Development Panel is available on the issue view screen where you can see related branches and create a new branch in the configured git connections. The Jigit Development Panel provides information about branches and pull requests whose names include the issue key.
This feature will be available if only it is enabled on the Global configuration page by the Jira administrator. To find out, please contact your Jira administrator.
The Jigit development panel is shown on the right side of the Jira issue view and displays:
-
branches count in a repository;
-
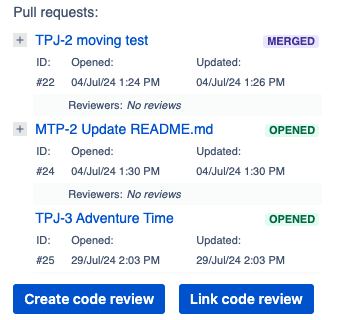
pull requests with the status;
-
the action buttons:
-
to create the feature branch;
-
link branch;
-
create a code review.
-

To сreate branch, link branch to Jira issue, and сreate a code review using Jigit Development Panel your Jira administrator needs to enable parameter Display repos in the development panel during Jigit Plugin Configuration. To find out, please contact your Jira administrator.
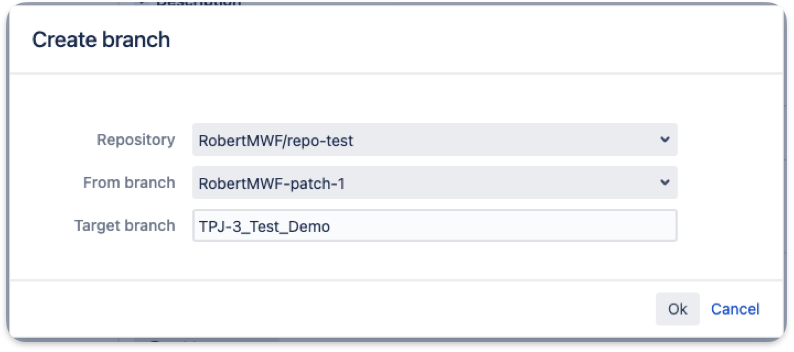
Create feature branch
Instead of switching between different tools or command-line interfaces, you can initiate the feature branch creation process within Jira, saving time and effort.
To create a feature branch using the Jigit Development Panel, you can follow these steps:
-
Go to the Jira issue corresponding to the branch you want to create.
-
On the Jigit Development Panel, click the Create branch button to open a dialogue window.
-
In the dialogue, select the desired branch from which you want to create a new branch and the branch name (should include the issue key to be displayed on the Jira issue view screen).
-
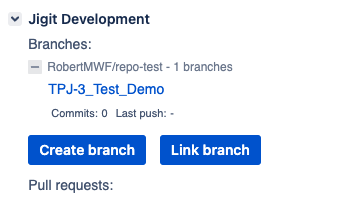
Confirm the selection and the branch will be created and visible on Jigit Development Panel.
Remember to use the issue key otherwise, the newly created branch won’t be visible on the development panel.
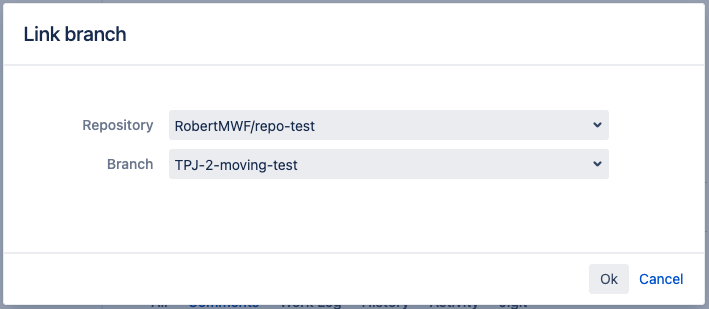
Link branch
Link branch allows you to link an existing Git feature branch from your Git repository to the Jira issue.
The purpose of the Link branch option is to associate an existing branch in your repository with the specific Jira issue you are working on. This linkage provides visibility and context within Jira, allowing you and your team members to easily access and track the branch associated with the issue.
To link a branch to a Jira issue using the Jigit Development Panel, you can follow these steps:
-
Go to the Jira issue corresponding to the branch you want to link.
-
On the Jigit Development Panel in the Jira issue view, click on the Link branch option to open a dialogue window.
-
In the dialogue, select the desired branch from your Git repository to link to the Jira issue.
-
Confirm or save the selection; the branch will be linked to the Jira issue.
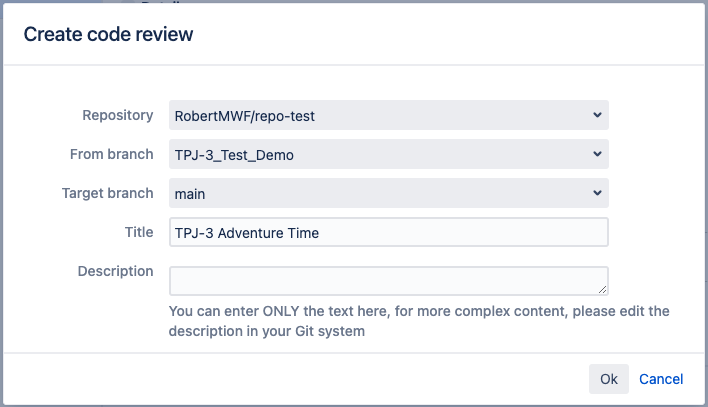
Create a code review
By creating a code review using the Jigit Development Panel, developers can quickly identify any issues or potential problems with their code and make the necessary changes before merging it into the main branch. This improves the code's quality and helps prevent bugs and other issues from occurring later on.
To create a code review using the Jigit Development Panel, you can follow these steps:
-
Go to the Jira issue corresponding to the code review you want to create.
-
On the Jigit Development Panel, click the Create a code review button to open a dialogue window.
-
In the dialogue, select the desired branch from which you want to create a new code review, the target branch and the title (should include the issue key to be displayed on the Jira issue view screen).
-
Click on the Ok button, and the code review will be created and visible on Jigit Development Panel.
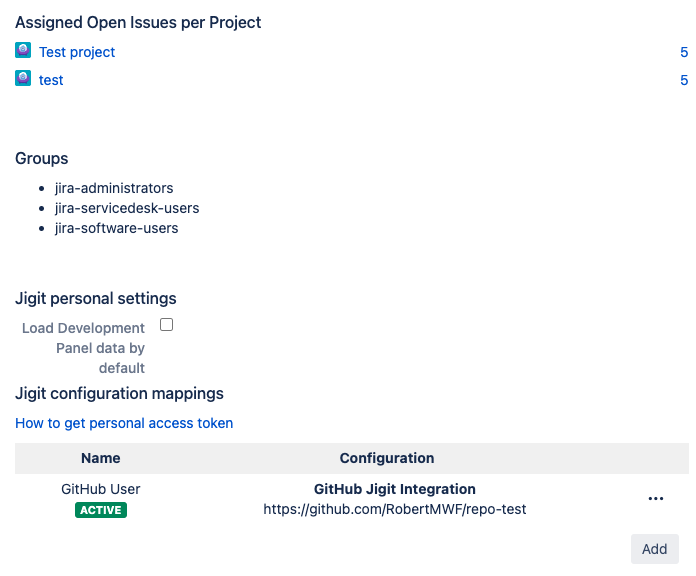
Set up a personal access token for the Jigit Development Panel
To configure the personal access tokens - visit the user profile settings and manage/create them in the Jigit section.
GitHub DependaBot integration
If you want to see the GitHub DependaBot vulnerabilities in the Jira project and link them a new or existing Jira issue, check out - How to integrate Jigit with GitHub Dependabot
Gerrit Code Review tab
Jigit - GitHub, GitLab, Azure DevOps integration for Jira supports integration with Gerrit Code Review, allowing you to link Gerrit changes and reviews with your Jira issues. Gerrit change should include the issue key to be displayed in the Gerrit tab.
This feature will be available if only it is enabled on the Global configuration page by the Jira administrator. To find out, please contact your Jira administrator.
This enables you to seamlessly bridge the gap between code reviews and project management in Jira. When the Gerrit is integrated with Jira using Jigit, it shows the data in a separate Jira issue view tab.
Associate Gerrit Code Review entities with Jira issues
After completing the configuration and establishing a connection between Jira and your Gerrit instance by the Jira administrator, you can start linking Gerrit changes with Jira issues:
-
In Gerrit, include the Jira issue key in the commit message or change description when creating or updating a code change.
-
The Gerrit integration plugin will automatically detect the Jira issue key in the commit message or change the description and establish the link between the Gerrit change and the corresponding Jira issue.
-
Details about the Gerrit change will be visible on the Gerrit tab, and the Gerrit panel will be shown on the right side of the Jira issue view.
%20upd.png?cb=a45553141e5cefa5b86536eac4b0a89c)
Jira issue view
upd.png?cb=162683361ea576eddd1ef899196df363)
Gerrit JQL functions
In Jigit - GitHub, GitLab, Azure DevOps integration for Jira, the JQL (Jira Query Language) function is available for filtering changes in Gerrit. Jigit leverages the Gerrit REST API to interact with Gerrit and perform JQL-based queries. The JQL function narrows down the Jira issue search result by limiting the number of commits associated with an issue.
In the search query, you need to use the command gerritStatus.
Examples of search queries you can modify to meet your needs:
-
issue in gerritStatus(PROJECT_KEY, STATUS):
issue in gerritStatus("TEST", "open") issue in gerritStatus("TEST", "abandoned") issue in gerritStatus("TEST", "new") issue in gerritStatus("TEST", "merged")
-
issue in gerritStatus(PROJECT_KEY, STATUS, CHANGES_AFTER_DATE):
issue in gerritStatus("TEST", "closed", "2022-10-25"), where date means “since“/”after”
Troubleshooting
If you have issues with Jigit, you must involve your Jira administrator.
Updated: