How to generate Access Token in GitLab?
To connect your Jira and GitLab instances, you need to obtain an Access Token.
GitLab provides options to use GitLab project access token or GitLab personal access token.
Create a project access token
To generate a Personal Project Token in GitLab, you can follow these steps:
On the top bar, select the Main Menu and Projects section. Find your project.
On the left sidebar, open the Settings dropdown and select Access Tokens.
Provide a name for your access token in the Token name field. This will help you identify its purpose later. The token name is visible to any user with permission to view the project.
Enter an expiry date for the token.
Select a role for the token.
Select the desired scopes for your access token based on the permissions you need. Jigit uses only API scope to read commits' information.
Click on the Create project access token button at the bottom of the page.
Create a personal access token
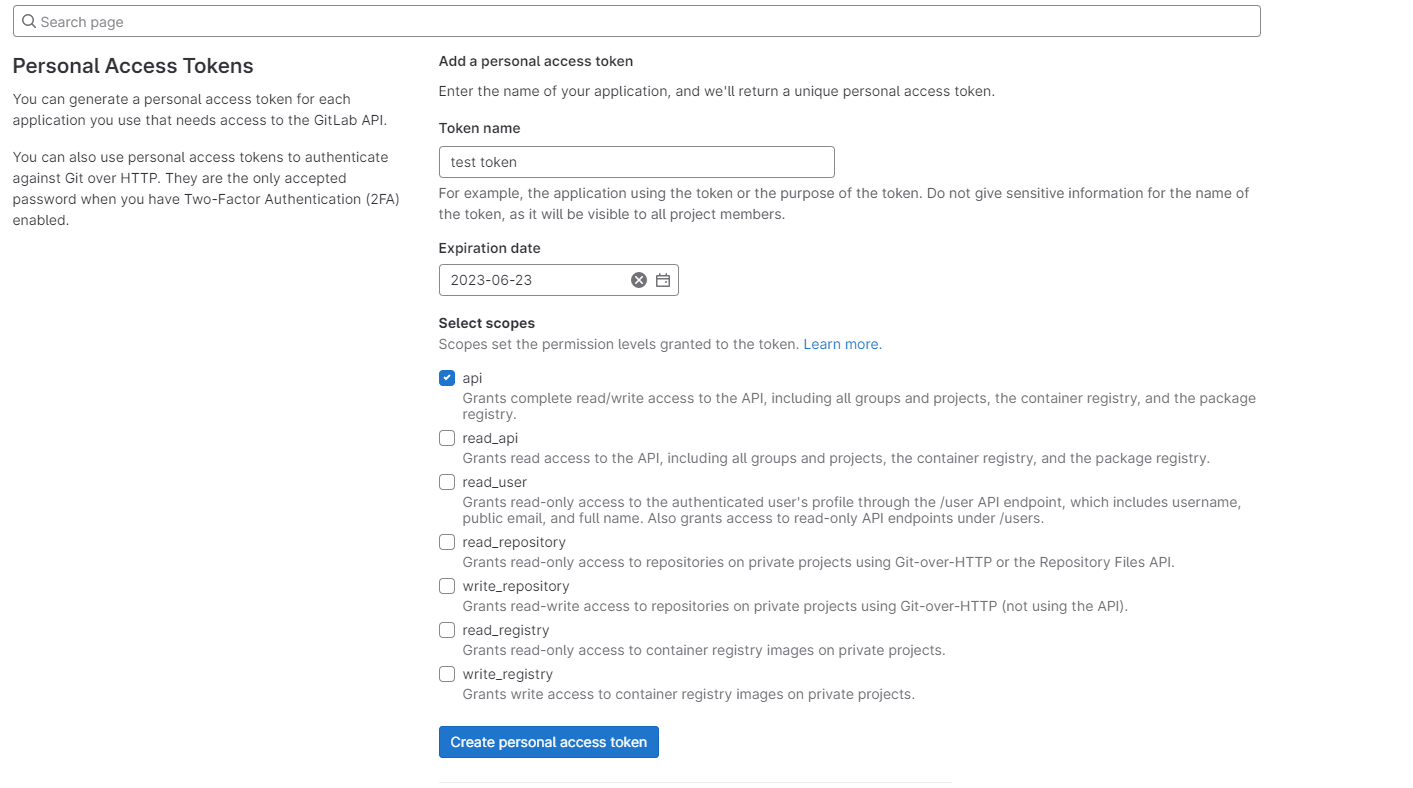
To generate a Personal Access Token in GitLab, you can follow these steps:
Click on your profile avatar in the top right corner and select Edit profile from the dropdown menu.
In the left sidebar, navigate to Access Tokens.
You may be prompted to re-enter your GitLab account password for security purposes.
Provide a name for your access token in the Token name field. This will help you identify its purpose later.
Provide an expiration date for the token.
Select the desired scopes for your access token based on the permissions you need:
read_api scope to read commits' information.
API scope to read commits' information and create Git entities using Jigit.
Click on the Create personal access token button at the bottom of the page.
After you click the button, GitLab will generate a personal access token for you. Make sure to copy and securely store the token since you won't be able to see it again.

Alternatively, you can read about how to create an Access Token in GitLab documentation:
How to set up GitHub or GitLab integration?
Updated:
