How to create branches in Azure DevOps On-Premise
This guide covers branch creation when using Azure DevOps On-Premise with Jira.
Create Azure DevOps branch
To create a new Azure DevOps branch follow the steps:
Got to the Jira issue where you wish to create the branch.
Go to the development panel under the details section on the right.
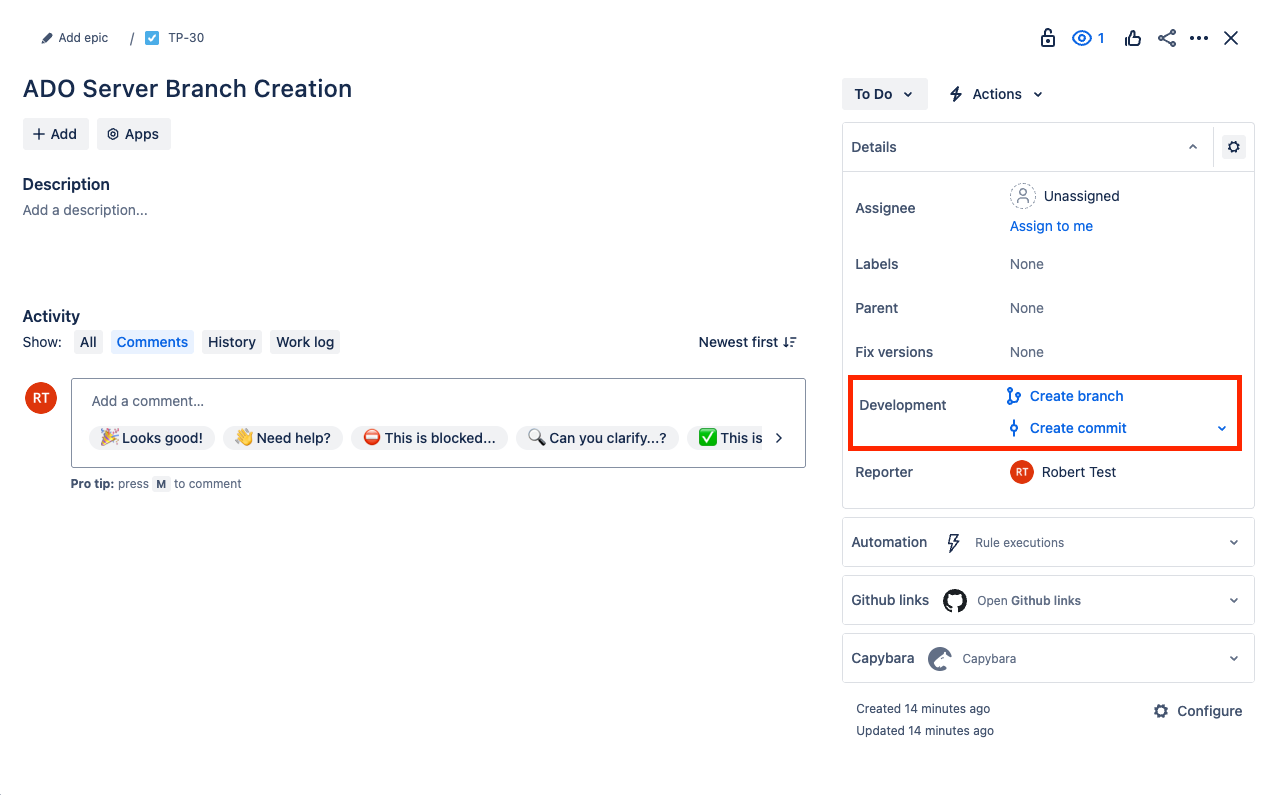
If no branches are connected to this issue, click the Create branch button.

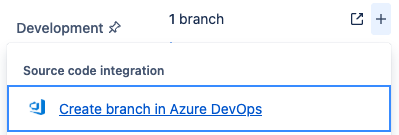
If any branches are already connected to this issue, hover over the number of branches and click “+." Then click on Create branch in Azure DevOps.
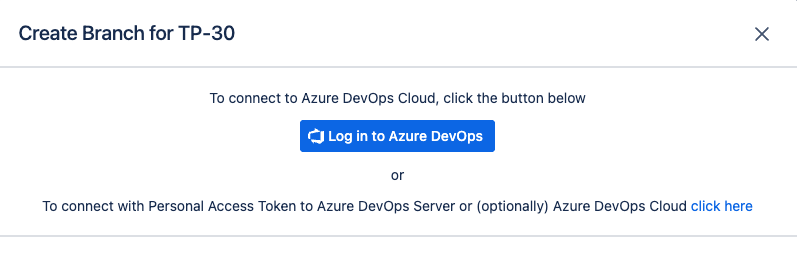
On the branch creation page, click on click here at the end of the second line to connect with a Personal Access Token for Azure DevOps Server.
Provide the Personal Access Token with the Code (Write) scope of access, then provide the Azure DevOps Sever domain url, and if applicable, the Azure DevOps Organization Name
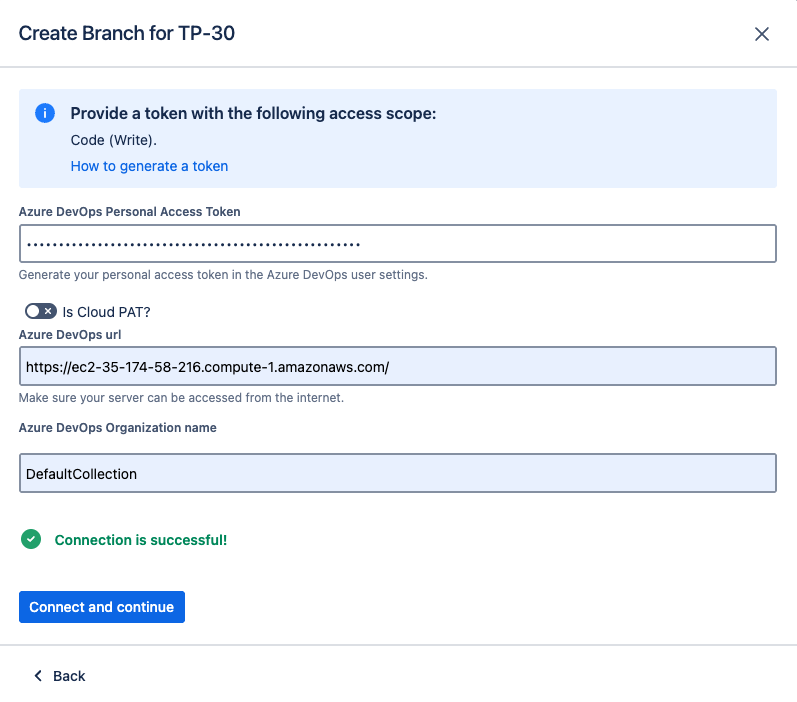
After the validation, click Connect and continue to proceed.
Select Azure DevOps project, repository and parent branch.
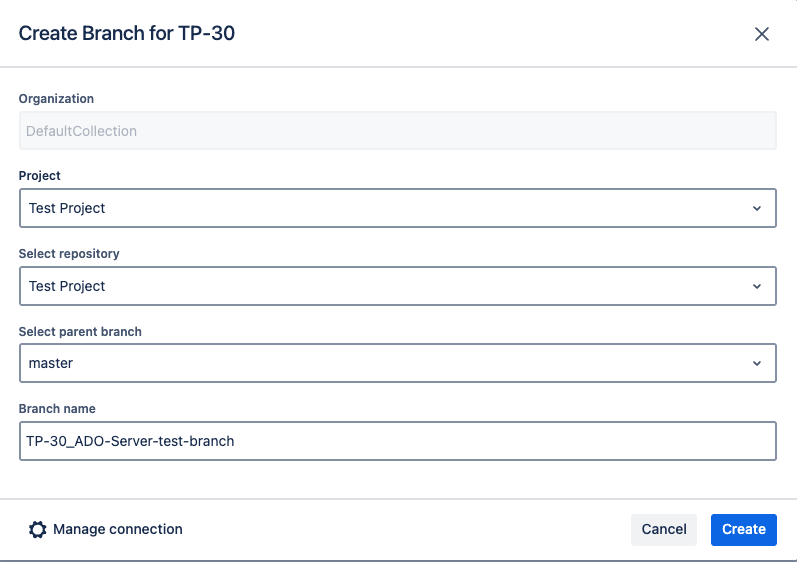
Name your branch. Including the Jira Issue Key (TP-30 in the above example), will ensure the Branch is linked to the Jira issue and shows in the Development Panel.
Click on Create to confirm the creation of the Azure DevOps branch.
Check the Azure DevOps repository to verify that the new branch has been created.
Updated:
