

Azure DevOps for Jira supports Work Item Synchronization in either direction:
-
Azure DevOps → Jira
-
Jira → Azure DevOps
This guide explains how to configure the integration and set up synchronization between the two platforms.
Integration Set up
Before creating synchronizations, an integration must first be configured.
-
From the Jira admin settings, navigate to Marketplace apps.
-
Select Azure DevOps Sync.
-
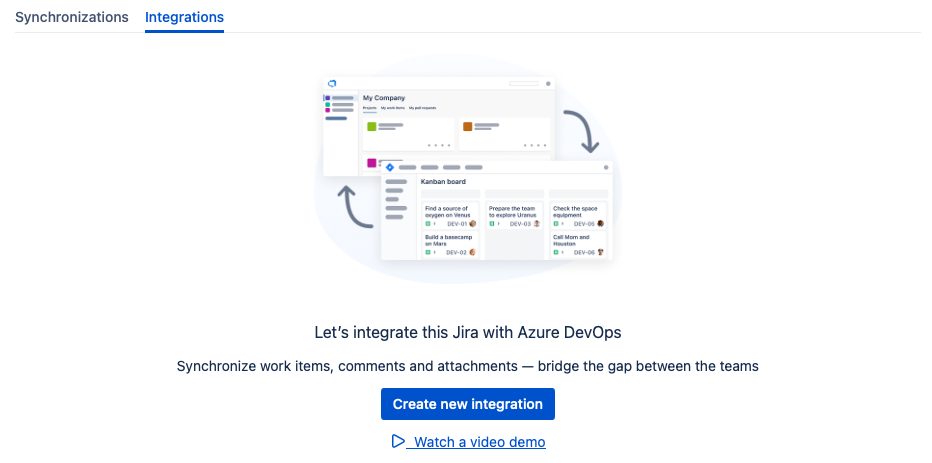
Open the Integrations tab and click Create new integration.
-
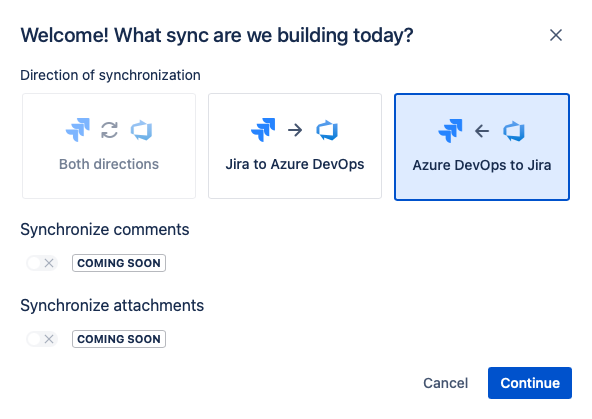
Select the direction of synchronization:
-
Jira to Azure DevOps
-
Azure DevOps to Jira

-
-
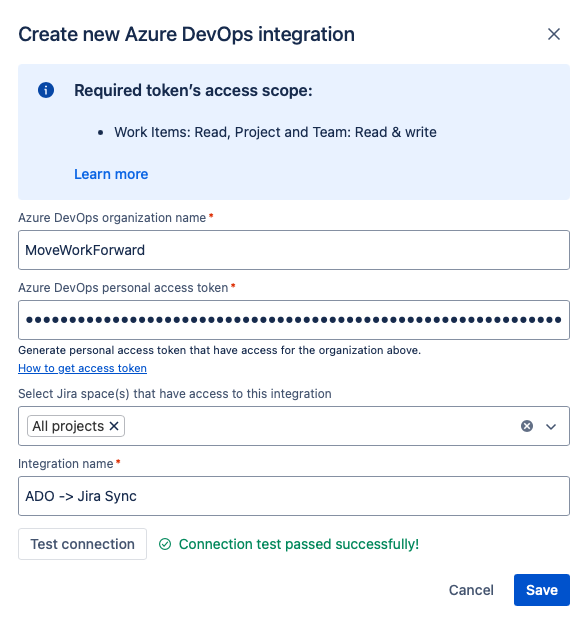
Enter the Azure DevOps organization name for the project to be synchronized.

-
Enter the Azure DevOps Personal Access Token (PAT).

Note: Required Access Scopes:
-
Jira to Azure DevOps:
-
Work Items: Read & Write
-
-
Azure DevOps to Jira:
-
Work Items: Read
-
Project and Team: Read & Write
-
-
-
Select the Jira spaces this integration can access.

-
Provide a descriptive name to easily identify the integration.

-
Click Test Connection to validate the configuration.
-
Click Save to complete the integration setup.
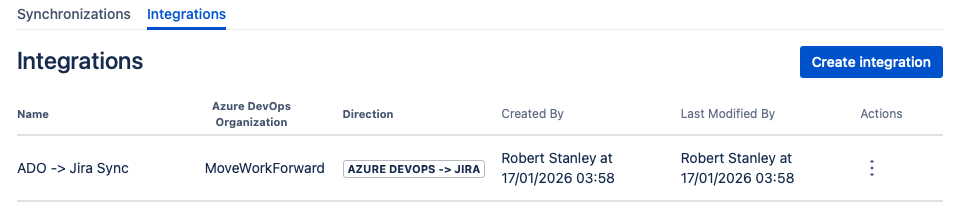
Azure DevOps to Jira Synchronization
Once an Integration is configured, a synchronization can be created.
If no relevant integration exists, you will be redirected to the integration setup screen.
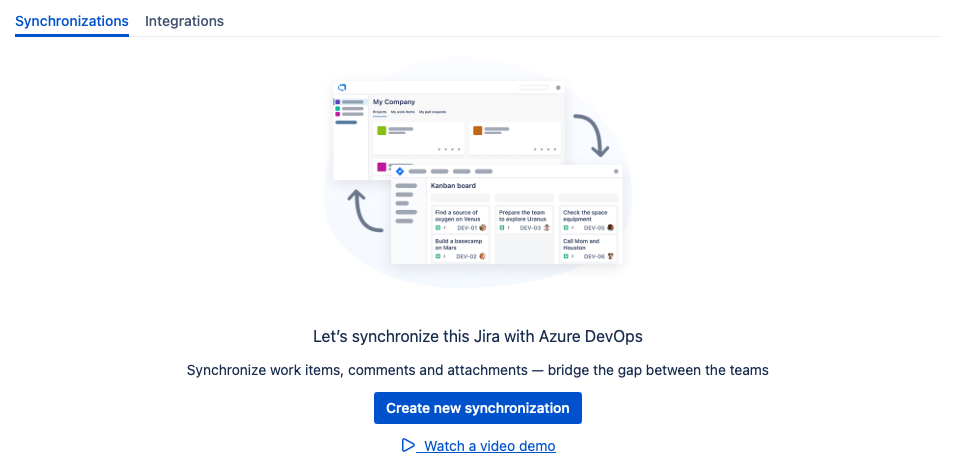
From the Synchronizations tab, select Create new synchronization.
Connect Azure DevOps
-
Select Azure DevOps to Jira, then click Continue.
-
Select an existing Azure DevOps integration or create a new one.

-
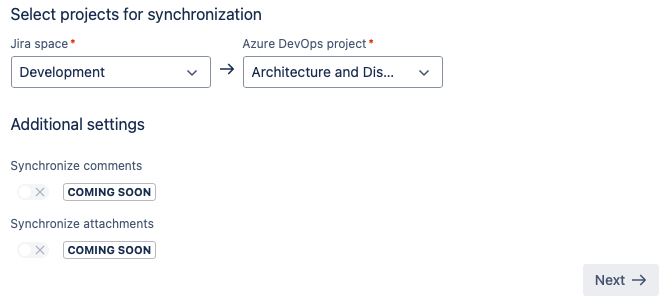
From the drop down selection, select the Jira space and Azure DevOps project to be synchronized.
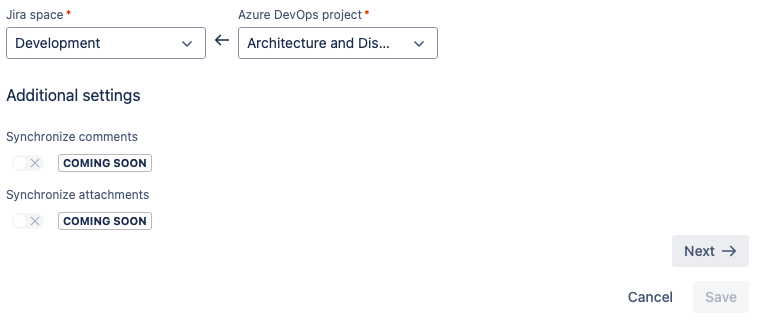
-
Click Next.
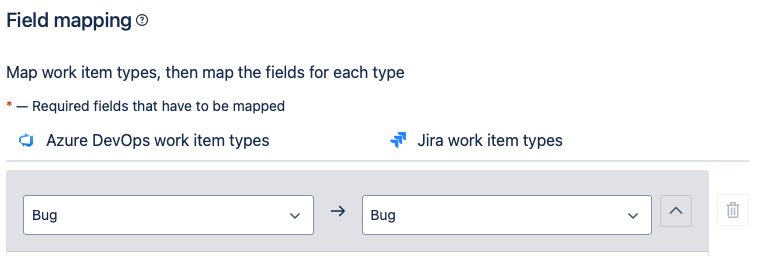
Field Mapping
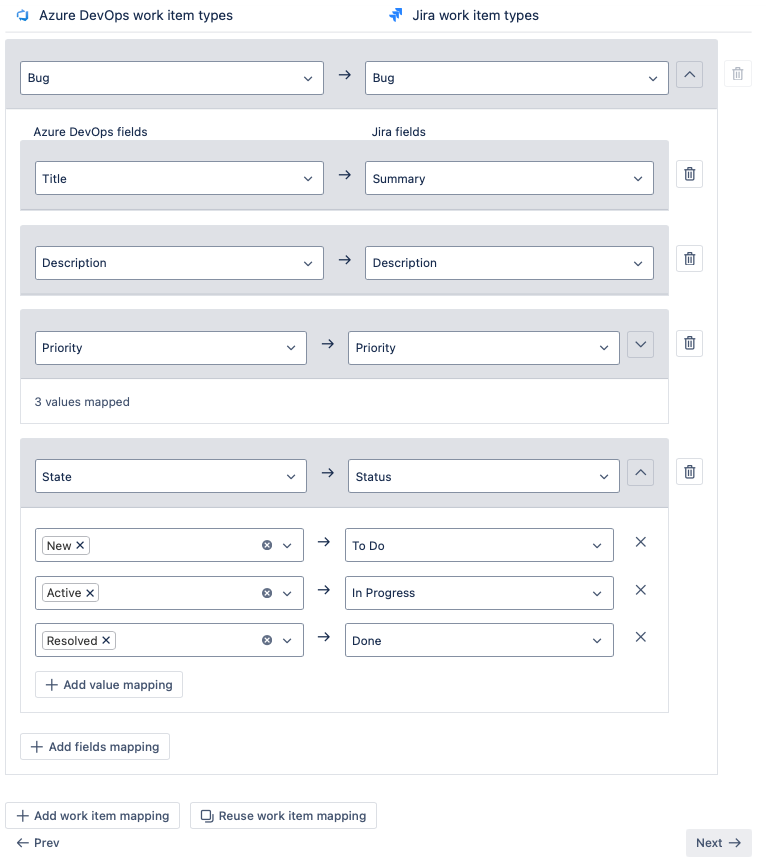
Use field mapping to align Azure DevOps work items with Jira work items.
-
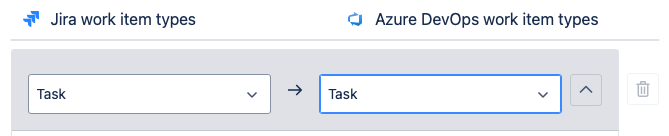
Map the Azure DevOps work item type to the corresponding Jira work item type.
-
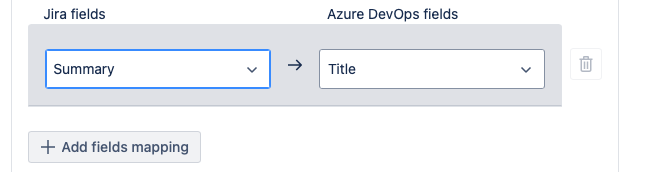
Select the Azure DevOps field to map to the Jira field. Click Add fields mapping to synchronize additional fields.
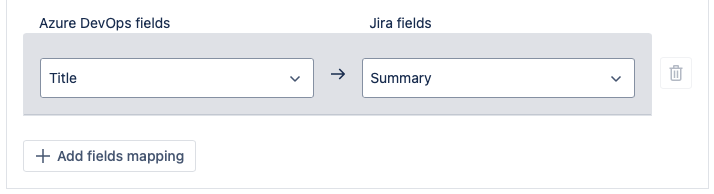
-
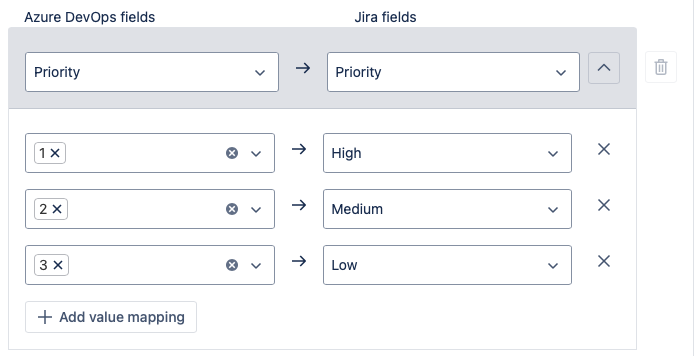
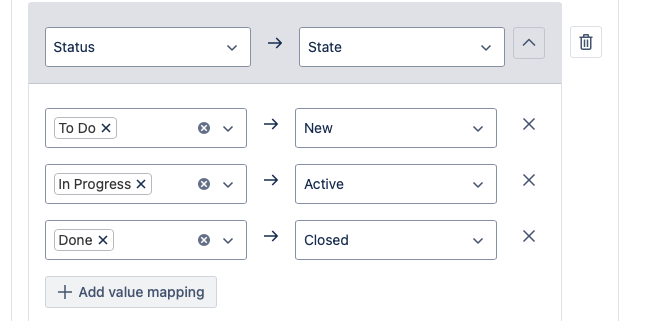
When a field has associated values, these can be mapped to the corresponding fields values in Jira. Click Add value mapping to map additional values.
-
Once all required fields are mapped, click Next.
User Mapping
User mapping is optional but helpful for assigning work items correctly.
For User Mapping to work correctly, the Personal Access Token (PAT) must include the Identity (Read & Manage) scope of access
-
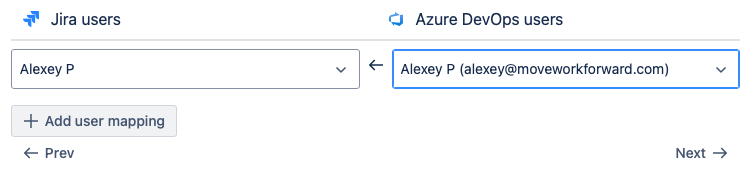
Click Add user mapping.

-
Select the Jira user and the corresponding Azure DevOps user.
-
Repeat as needed for additional users.
-
Click Next.
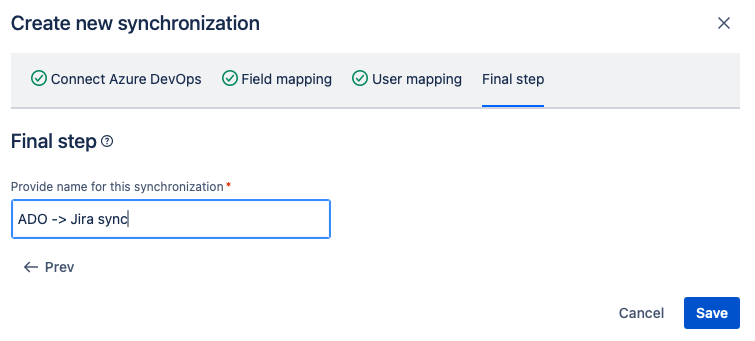
Final Step
Provide a name for the synchronization and click Save.
Work items created in Azure DevOps will now automatically create corresponding work items in the selected Jira space.
If any required Jira fields are not populated when creating a work item in Azure DevOps, the corresponding work item will not be created in Jira.
Jira to Azure DevOps Synchronization
The setup process is similar for synchronizing from Jira to Azure DevOps.
If no relevant integration exists, you will be redirected to the integration setup screen.
From the Synchronizations tab, select Create new synchronization.
Connect Azure DevOps
-
Select Jira to Azure DevOps, then click Continue

-
Select an existing Azure DevOps integration or create a new one.

-
Select the Jira space and Azure DevOps project to synchronize.
-
Click Next.
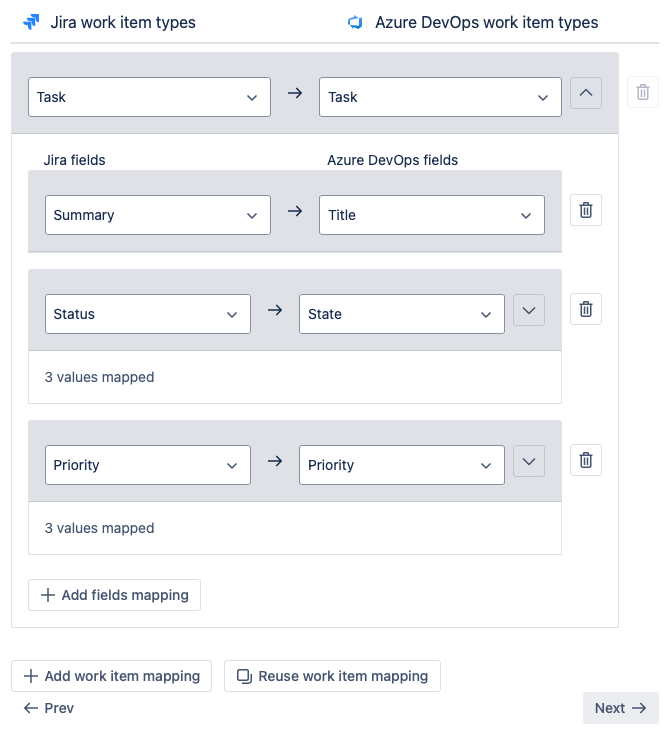
Field Mapping
-
Map the Jira work item type to the corresponding Azure DevOps work item type.
-
Select the Jira field to map to the Azure DevOps field. Click Add fields mapping to synchronize additional fields.
-
When a field has associated values, these can be mapped to the corresponding fields values in Azure DevOps. Click Add value mapping to map additional values.
-
Once all desired fields and values are mapped, click Next.
User Mapping
It’s possible to Map Azure DevOps users to Jira users. This is an optional future, however it can be useful for synchronizing between the platforms.
For User Mapping to work correctly, the Personal Access Token (PAT) must include the Identity (Read & Manage) scope of access
-
Click Add user mapping.
-
Map Jira users to their corresponding Azure DevOps users.
-
Select Add user mapping to map additional users as needed.
-
Click Next.
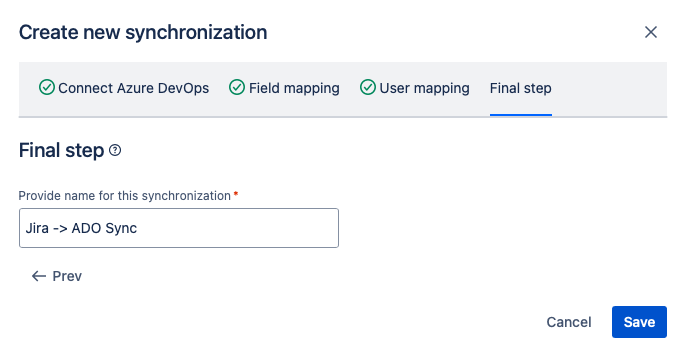
Final Step
Provide a name for the synchronization and click Save.
Work items created in Jira will now automatically create corresponding work items in the associated Azure DevOps project.
If any required Azure DevOps fields are not populated when creating a work item in Jira, the corresponding work item will not be created in Azure DevOps.
Updated: