

Platypus automatically reschedules dependent issues when a due date changes. This guide shows you how to set it up in three steps and how to review changes before they are applied. No technical knowledge required.
The big idea
Imagine two pieces of work: Design (PLAT-1) must finish before Build (PLAT-2) can begin. In Jira you record that relationship with a Blocks link, and you give each issue a due date.
Now Design slips by a few days. Normally you would have to find Build, and everything after it, and move each date by hand. With Platypus, you just change Design's due date — and Build (and anything Build blocks, and so on down the chain) is rescheduled for you, keeping the gap and duration you set.
What you'll need
-
Platypus installed in your Jira site (your Jira admin does this once).
-
Issues that have a due date (and optionally a start date).
-
A dependency link between issues — by default Platypus uses the built-in Blocks link type.
Platypus works out of the box with sensible defaults. If you want to change how it behaves, see How to configure it.
Finding Platypus
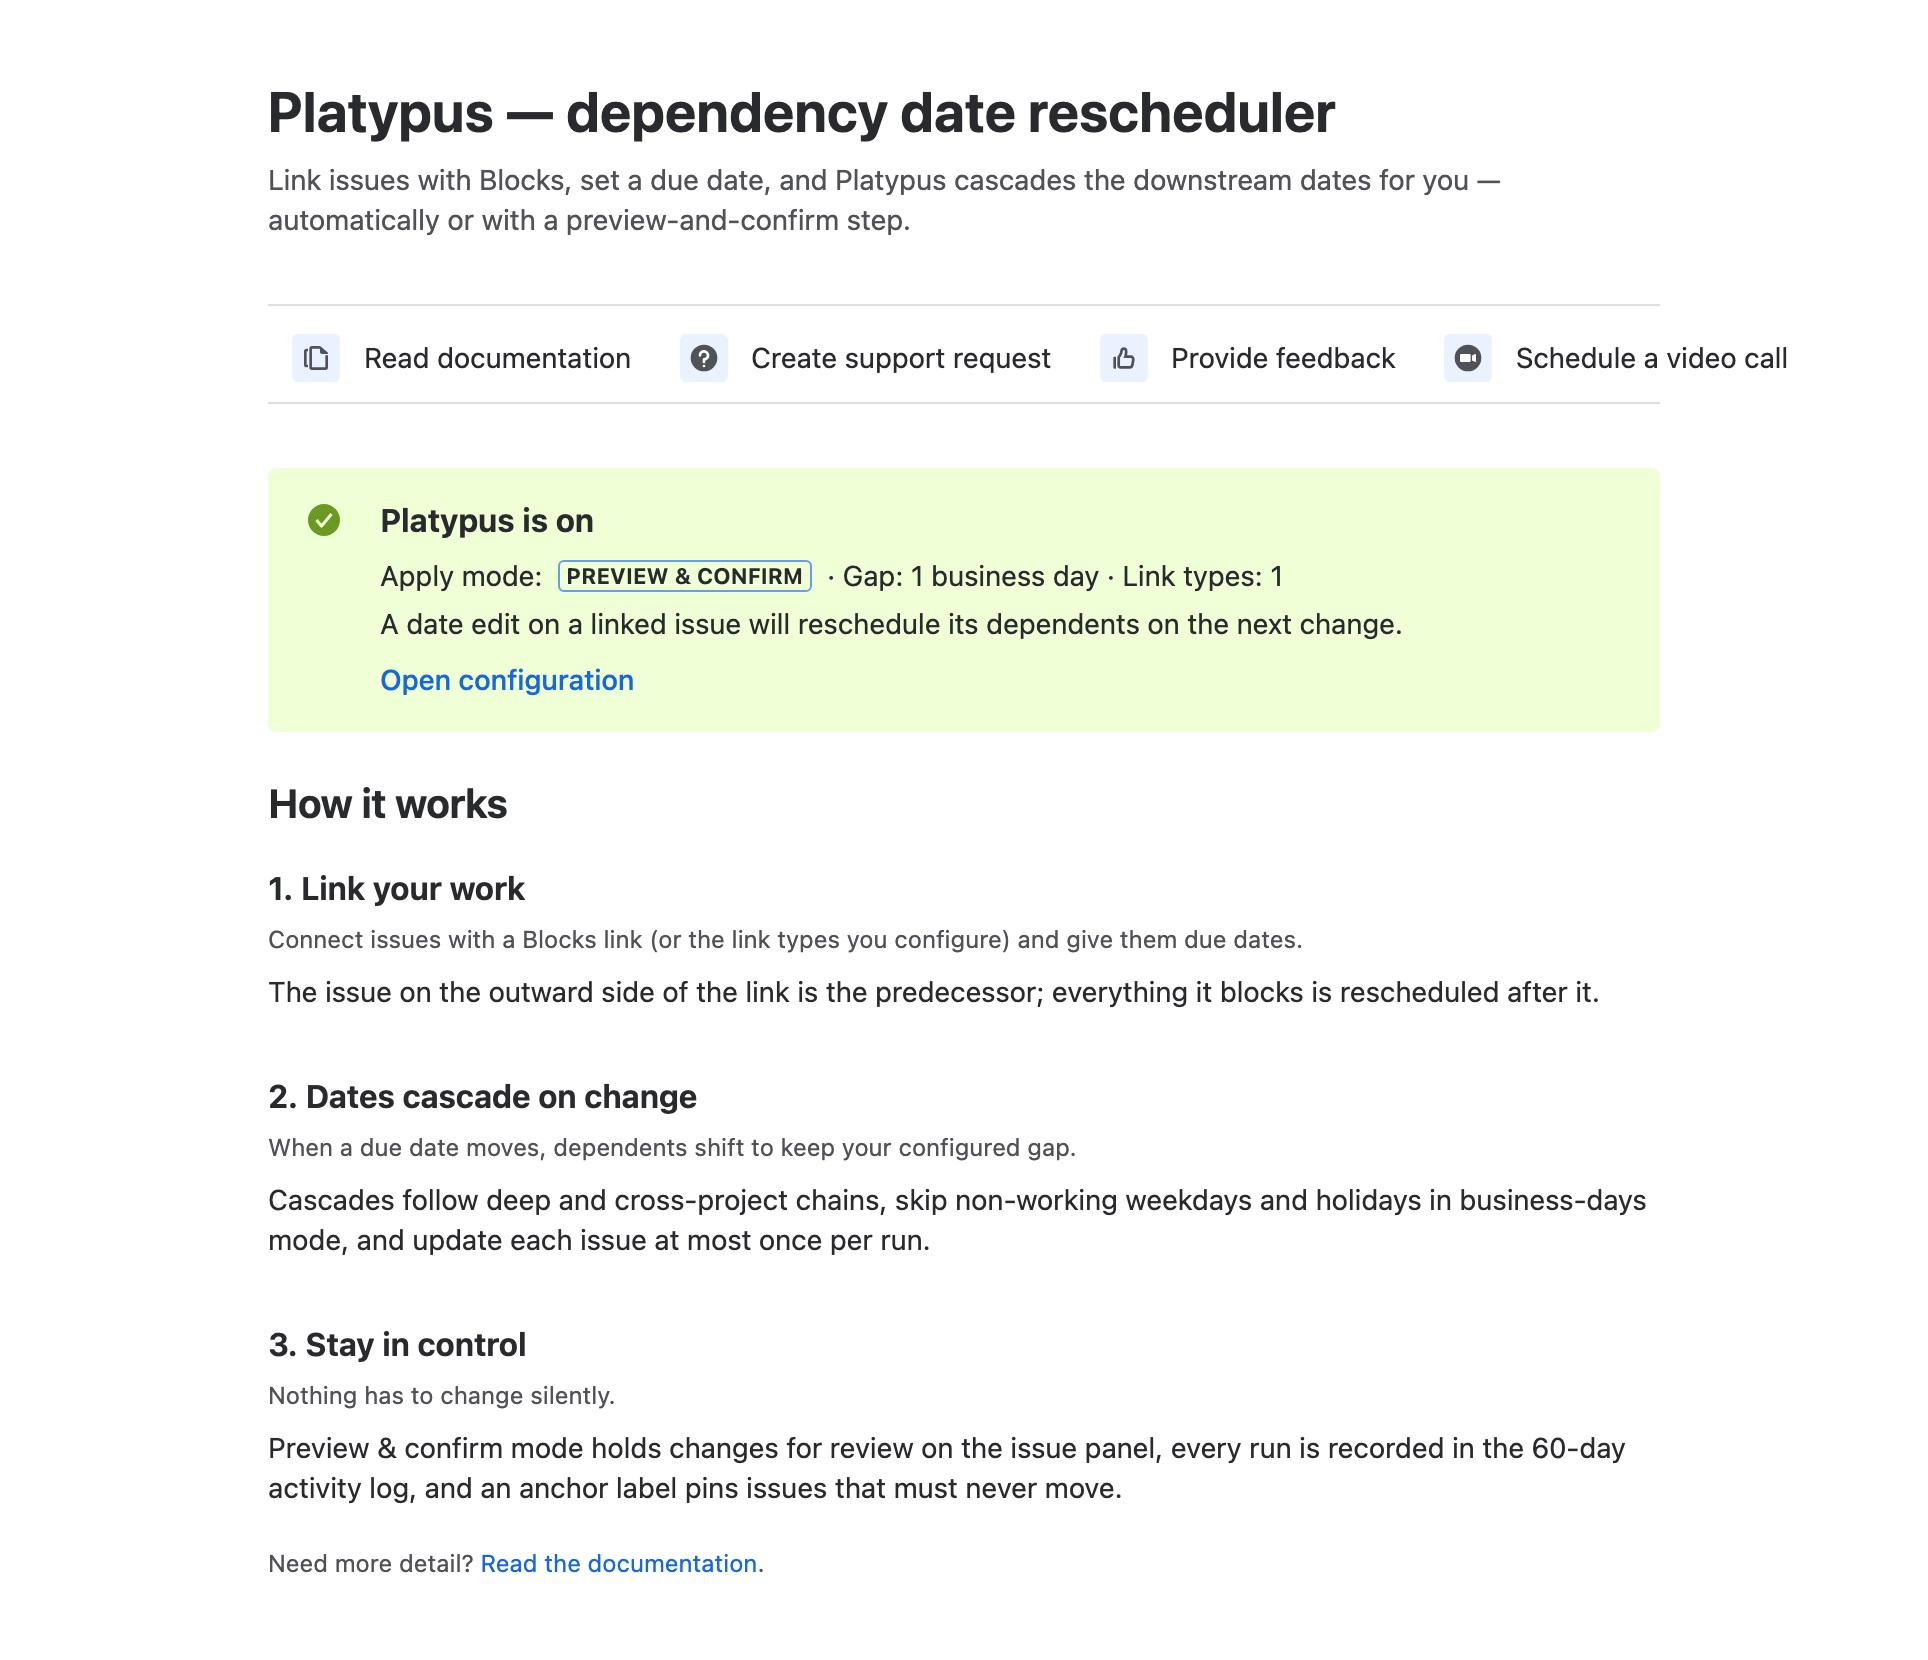
After installation, open Apps → Manage apps → Platypus, or look for Platypus in the Apps menu. The first page you see is the Get started page, which shows whether Platypus is currently on and links to its configuration.
Step 1 — Link your issues
Open the predecessor issue (the one that comes first, e.g. Design). In the issue's ••• menu or the links section, add a link of type Blocks pointing to the dependent issue (e.g. Build). The relationship reads "Design blocks Build".
Direction matters. The issue on the blocks (outward) side is the predecessor. Platypus reschedules whatever it blocks. If you link them the wrong way round, the cascade will run in the wrong direction.
Step 2 — Give the issues due dates
Make sure both issues have a Due date set. If your project also uses a Start date, Platypus will keep each issue's duration (the span from start to due) intact when it moves dates. If you only use due dates, Platypus simply shifts the due date — that is called Due-only mode.
Step 3 — Change a date and watch it cascade
Edit the predecessor's due date. Within a few seconds Platypus recalculates every dependent down the chain. What happens next depends on the apply mode your admin has chosen:
-
Automatic — the dependent dates are updated immediately, and the run is recorded in the activity log.
-
Preview & confirm — nothing is changed yet; Platypus prepares the changes and waits for someone to review and confirm them (see below).
A worked example
Design blocks Build; the gap is +1 business day. Design's due date moves from Friday to the following Tuesday:
|
Issue |
Before |
After |
Why |
|---|---|---|---|
|
Design (PLAT-1) |
Due Fri |
Due Tue |
You changed this one |
|
Build (PLAT-2) |
Starts Mon |
Starts Wed |
One business day after Design's new due date; weekend skipped; its duration is preserved |
Reviewing changes before they apply (Preview & confirm)
If your project uses Preview & confirm, Platypus never changes dates silently. Instead it flags the proposed changes so a person can approve them. There are two ways this shows up.
On the issue: a "pending review" badge
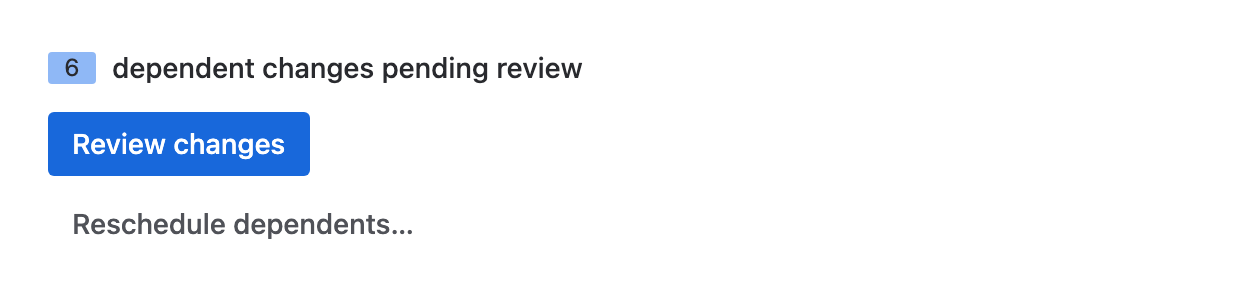
The issue you edited shows a Platypus panel telling you how many dependent changes are waiting. Click Review changes to open the preview.
The preview dialog
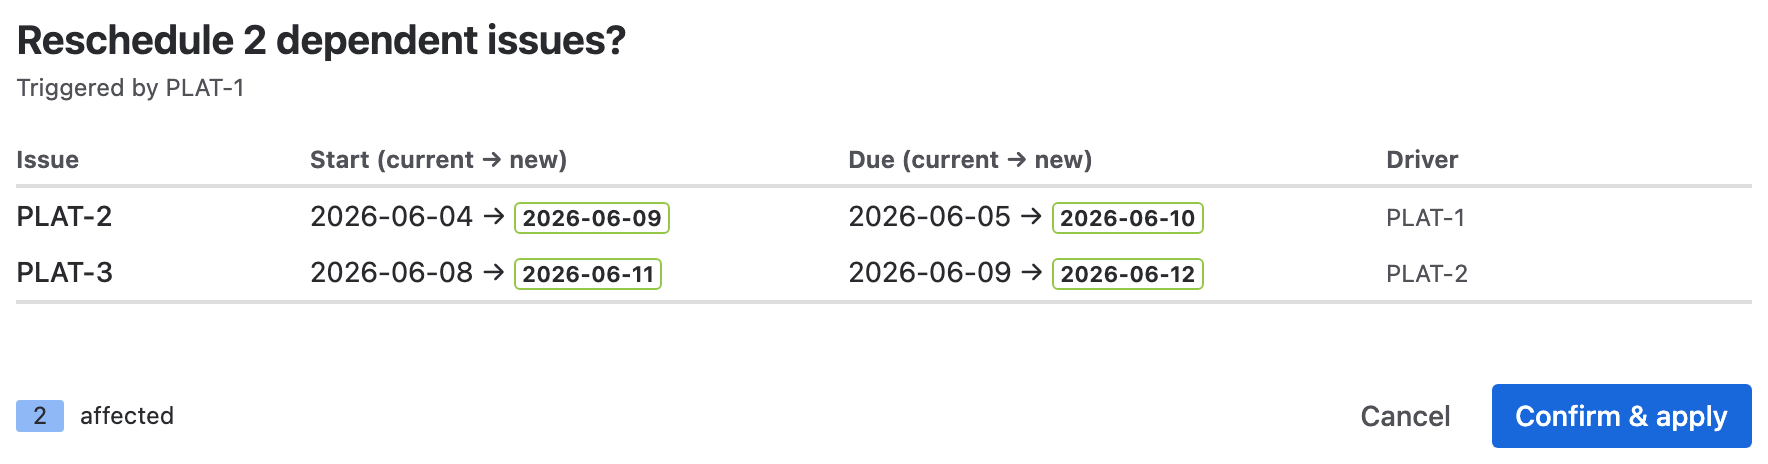
The preview lists every issue that would change, with its current date and the proposed new date side by side, and the driver (the upstream issue causing the move). Review the list, then choose Confirm & apply to make the changes, or Cancel to discard them. Hover over a highlighted date to see the exact "old → new" values.
Triggering a preview yourself
You can also start a review on demand without waiting for a date edit: open any issue's ••• menu and choose Reschedule dependents…. Platypus calculates the plan live and shows the same preview dialog. This works in any project where Platypus is enabled.
Seeing what happened
Every cascade — automatic or confirmed — is recorded for 60 days. Your admin can open the Activity tab to see each run, how many issues changed, and the before/after dates. See How to configure it for details.
Tips
-
Pin a fixed deadline. If an issue must never move (a compliance date, a launch), ask your admin to set up an anchor label and add it to that issue. Platypus will stop the cascade there.
-
Nothing happened? Check that both issues have due dates, that they are linked with a recognised link type, and that Platypus is enabled for the project.
-
Too many changes at once? Use Preview & confirm mode so you always get the final say.
Updated: