

Bitbucket Post Webhook sends data to external systems like Jenkins, Azure DevOps and other systems that should be triggered from outside.
This documentation won't be maintained anymore.
Please visit our up-to-date documentation for Post Webhooks for Bitbucket to be in the loop on the latest improvements and features.
Bitbucket Post Webhook helps you
The Bitbucket Server and Data Center app allows users to send JSON payloads to external systems like Jenkins, customer scripts, and Serverless functions. It supports triggering Azure DevOps pipelines and sending Microsoft Teams notifications.
Users can configure global, project, and repository rules and can authenticate using Basic, Bearer, or Kerberos authentication. The app also supports Mutual TLS and allows users to filter events using various criteria, including event type, committers, repository and branch masks, and from/to branches.
Users can also use the API to create rules and include query string parameters in their requests. The app has the option to skip SSL and URL validations and to skip notifications for personal projects and repositories.
More information on how to set up Jenkins.
If something is missing, please reach out.
Main functionality
Frequently Asked Questions
You can find Bitbucket Post Webhook Frequently Asked Questions here.
Configuration
Global Configuration
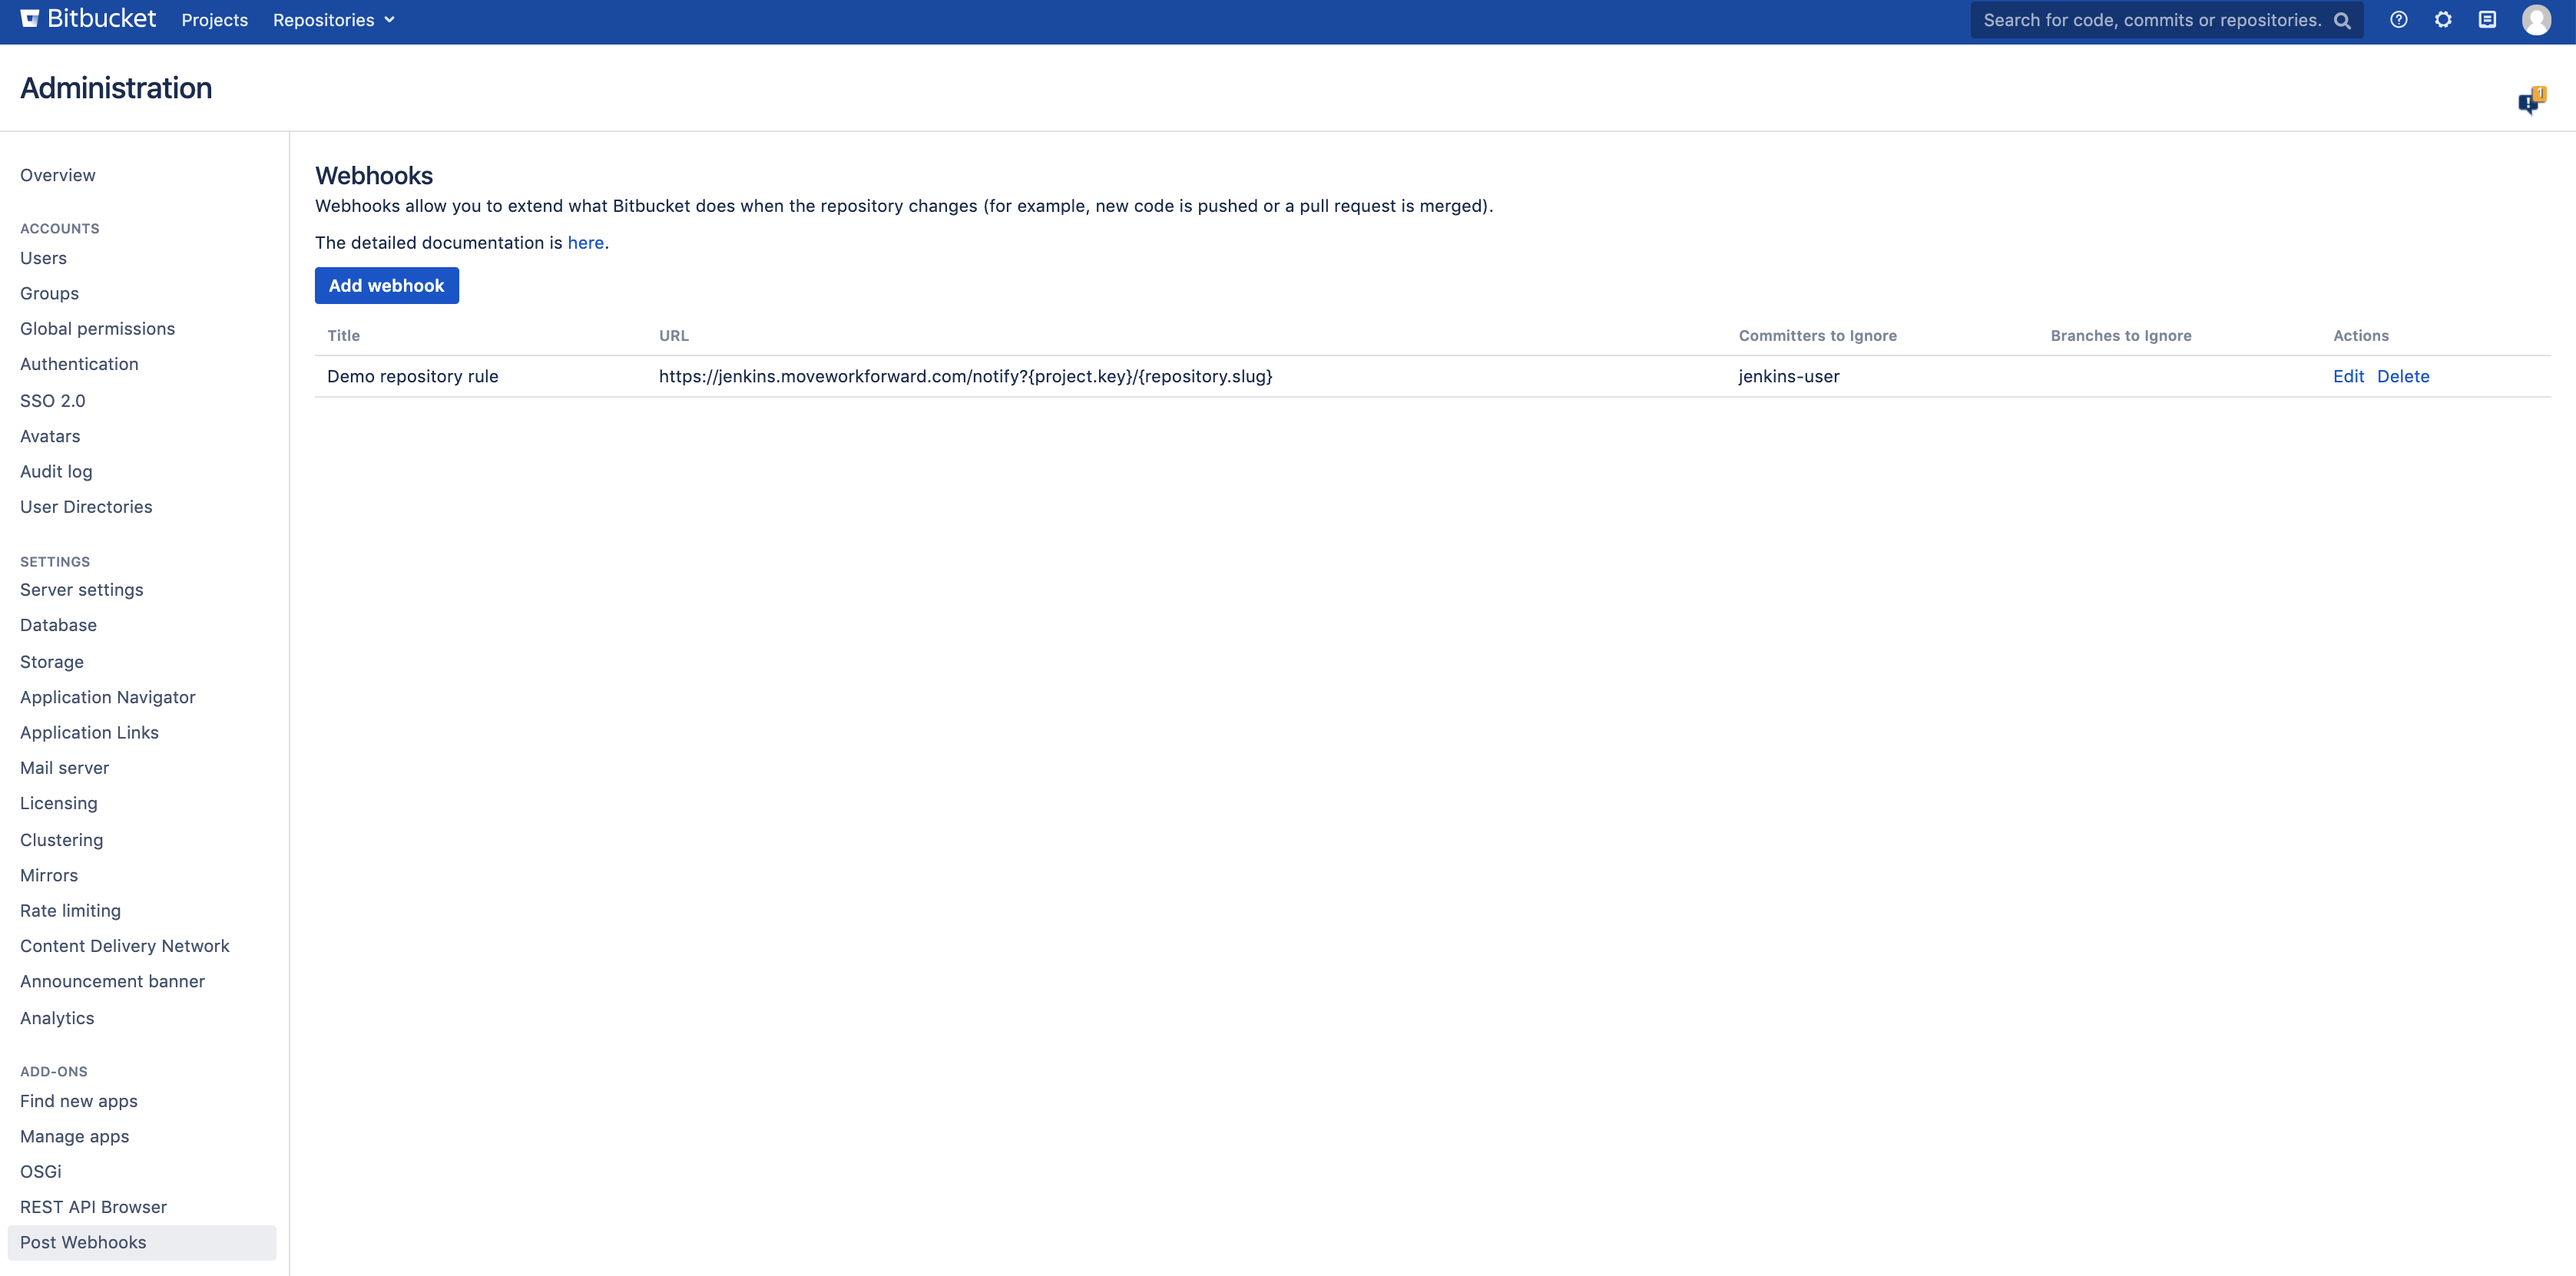
The global configuration screen for global admins at Administration → Add-ons → Post Webhooks.
You can also see all repository and project-level rules at the global level.
Do remember that you can use string substitutes for the project’s key and the repository’s slug.
Only one global configuration is allowed. You cannot have multiple global configurations. Configurations could be merged from the lowest level (repository) up to the global one.
To set up webhook posts, select the events and filters you want to notify your system. It can be the Jenkins branch source plugin or any other system.
The configuration is available at Repository → Settings → Post Webhooks.
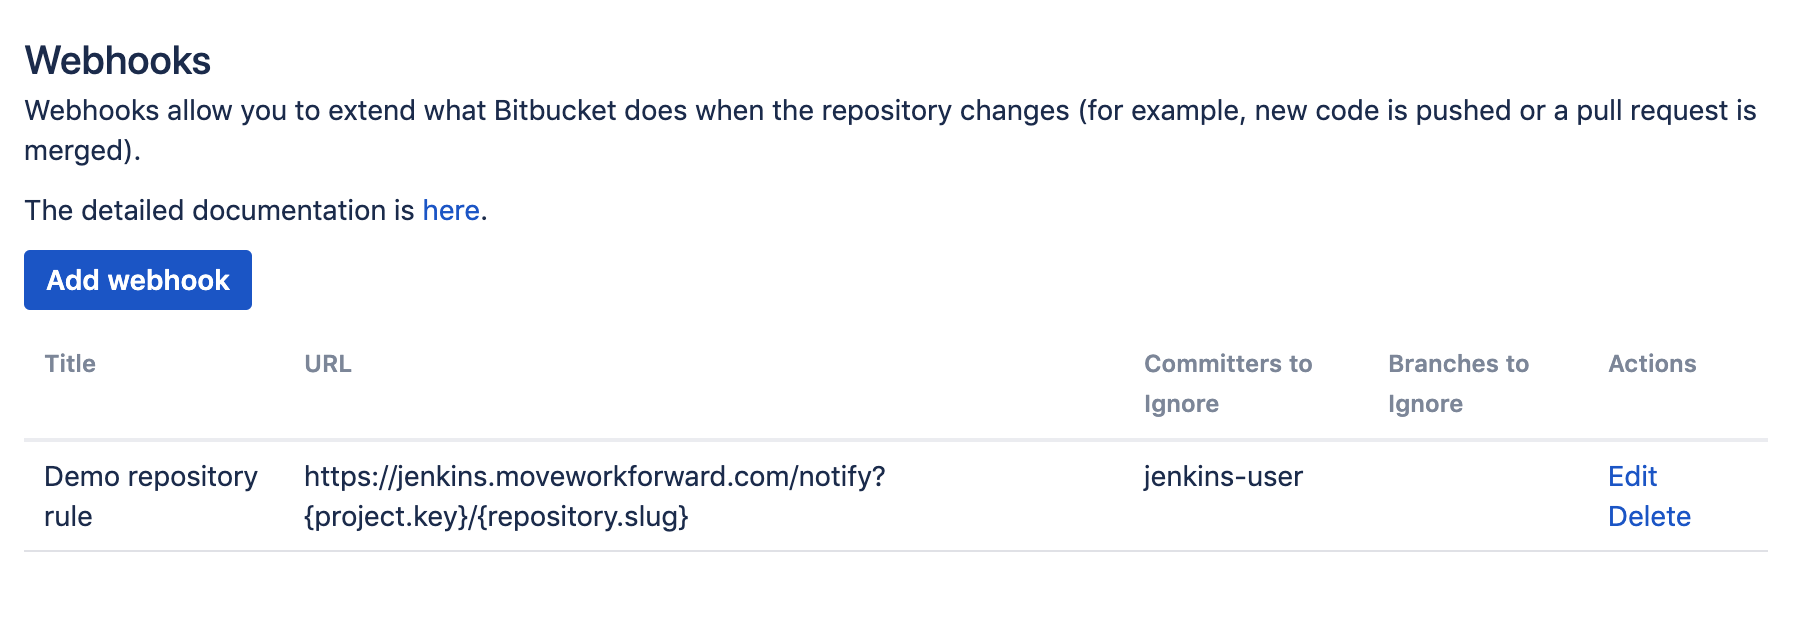
When you start with an empty list, you must add a new configuration.
You need to click “Add webhook“. Here is a picture of how it looks.

Here you need to setup:
-
The title - what is the name of the configuration (can be something random or meaningful with your repo or person name). Our advice is to name something meaningful to you and your team so that it can be understood later easier.
-
Override project and global settings. It is On by default. You can use this setting to override the project and global setup. If it is off, the project and global-level configuration will take precedence.
-
The URL - where the data should be sent to. F.e.
-
You can skip SSL verification and test connection with additional auxiliary settings.
-
{project.key}variable can be used as part of the URL to be replaced by the Bitbucket project’s key. -
{repository.slug}variable can be used as part of the URL to be replaced by the Bitbucket repository’s slug. -
You can change the HTTP method to be used. Note: getting the HTTP body is NOT sent.
-
-
Configure basic authentication and Azure DevOps Pipelines token.
-
Enable mutual TLS verification or skip the SSL certificate validation for self-signed certificates.
-
Trigger Azure DevOps pipelines.
-
Committers to ignore (full match) - the comma-separated list of Bitbucket user names that should NOT trigger an event. Important: not display names, but usernames. This is often used to ignore pushes from your continuous integration user. For instance, you could put there
jenkins-user. -
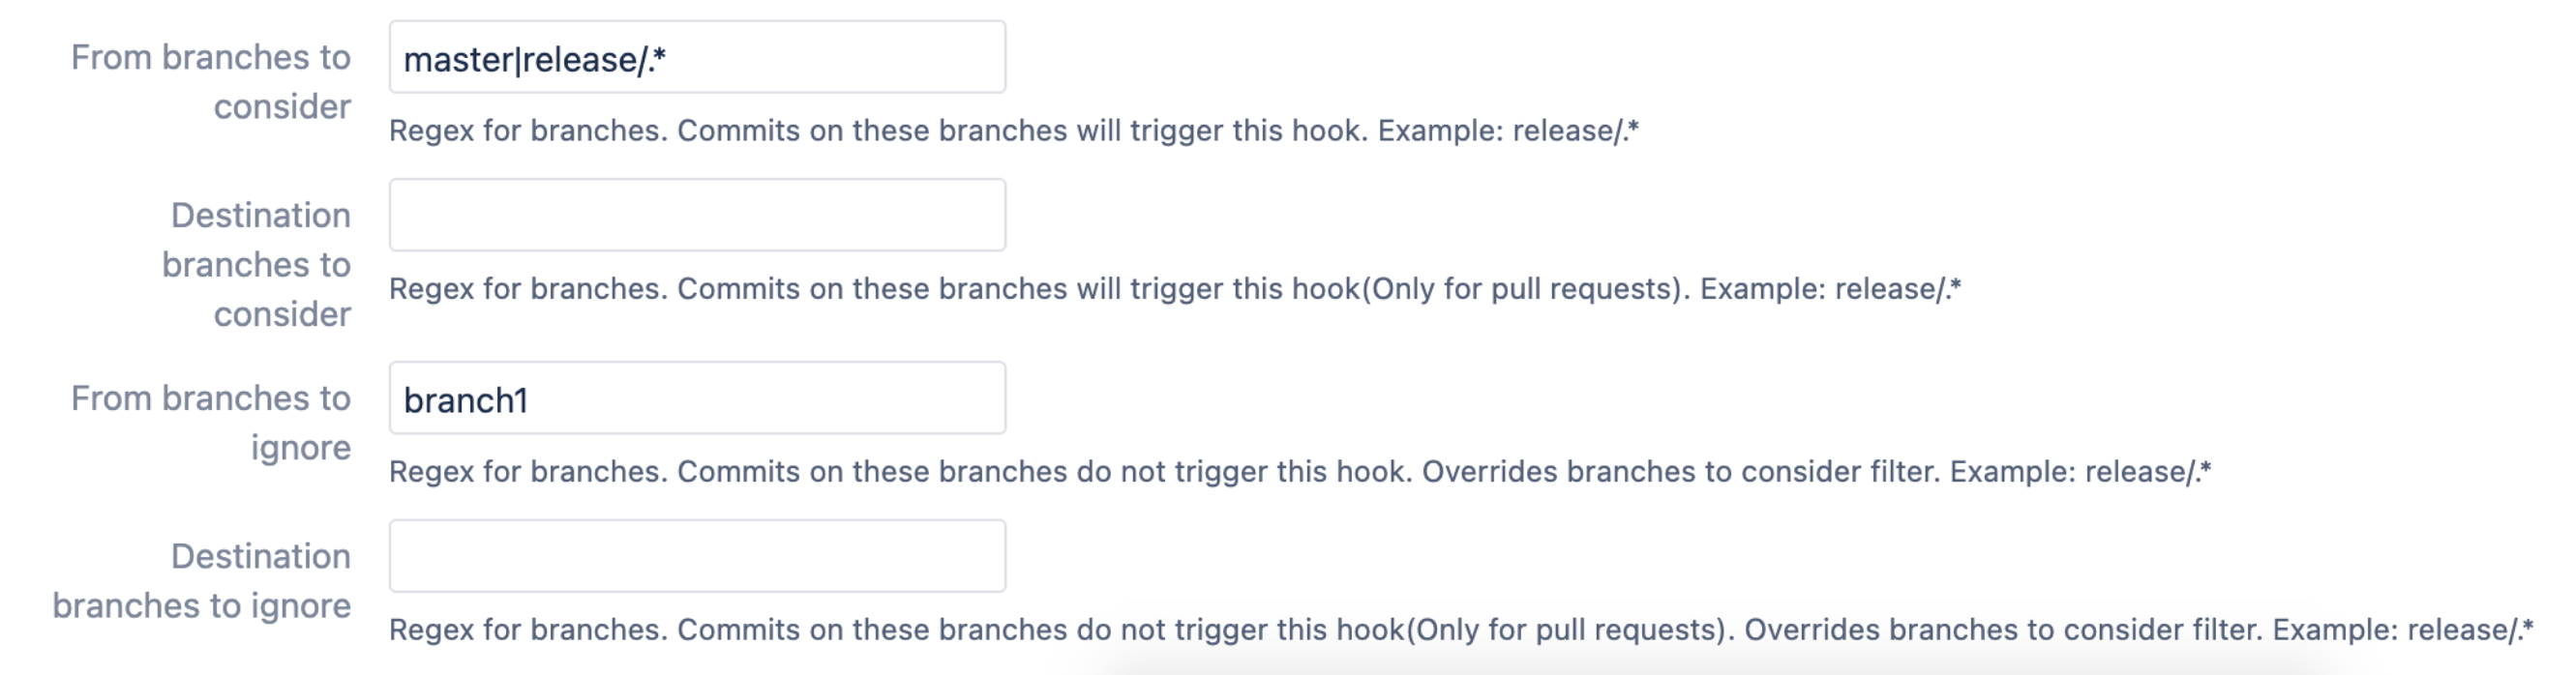
From branches to consider (regex) - the comma-separated list of Bitbucket branch regular expressions that should be considered when filtering events. For instance,
release/*,tag/*, etc. -
Destination branches to consider - the comma-separated list of Bitbucket branch regular expressions should be considered when filtering events for pull requests only. For instance,
release/*,tag/*, etc. -
From branches to ignore (regex) - the comma-separated list of Bitbucket branch regexes that should be ignored. For instance,
release/*,tag/*, etc.
-
Destination branches to ignore (regex) - the comma-separated list of Bitbucket branch regexes that should be ignored. For instance,
release/*,tag/*, etc. -
Active - should be On if this configuration is to be used.
-
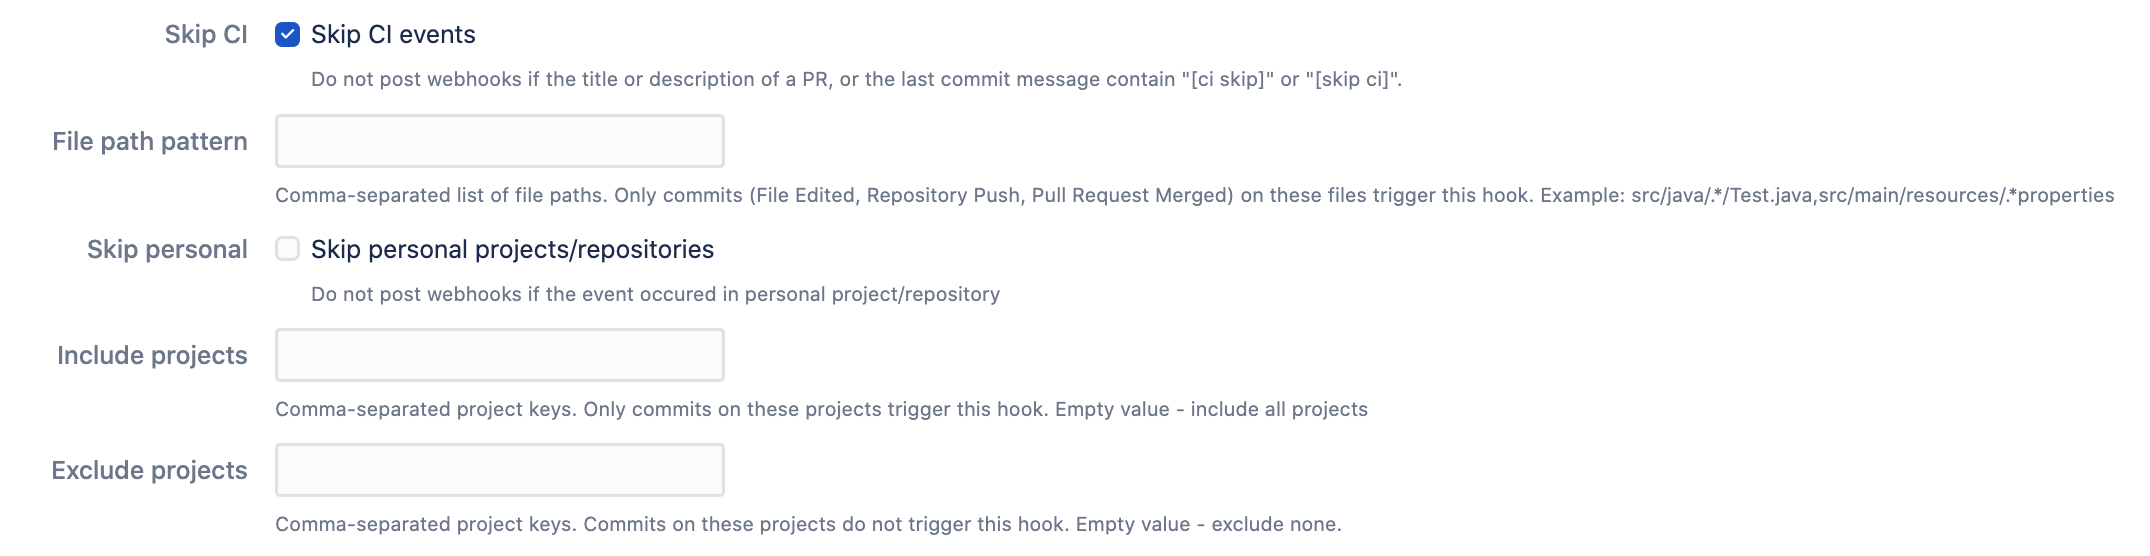
Skip CI - a setting that allows skipping notifications for the pull requests if
[ci skip]or[skip ci]is present in the pull request's title or description. The same applies to the commit-related events, and the commit message is checked. -
File path pattern - comma-separated list of file paths. Only commits on these file paths will trigger the webhook. For example,
src/java/.*/src/main/resources/.*propertieswill trigger events only for the changes in the properties files.
Only the events related to the files take this setting into consideration.
-
Skip personal - allows skipping of the events from personal projects and repositories. Skips forks.
-
Include projects - a comma-separated list of Bitbucket project keys that will trigger this event.
-
Exclude projects - a comma-separated list of Bitbucket project keys that will be IGNORED for this event. This could be used with the combination of Include projects empty (include all).
-
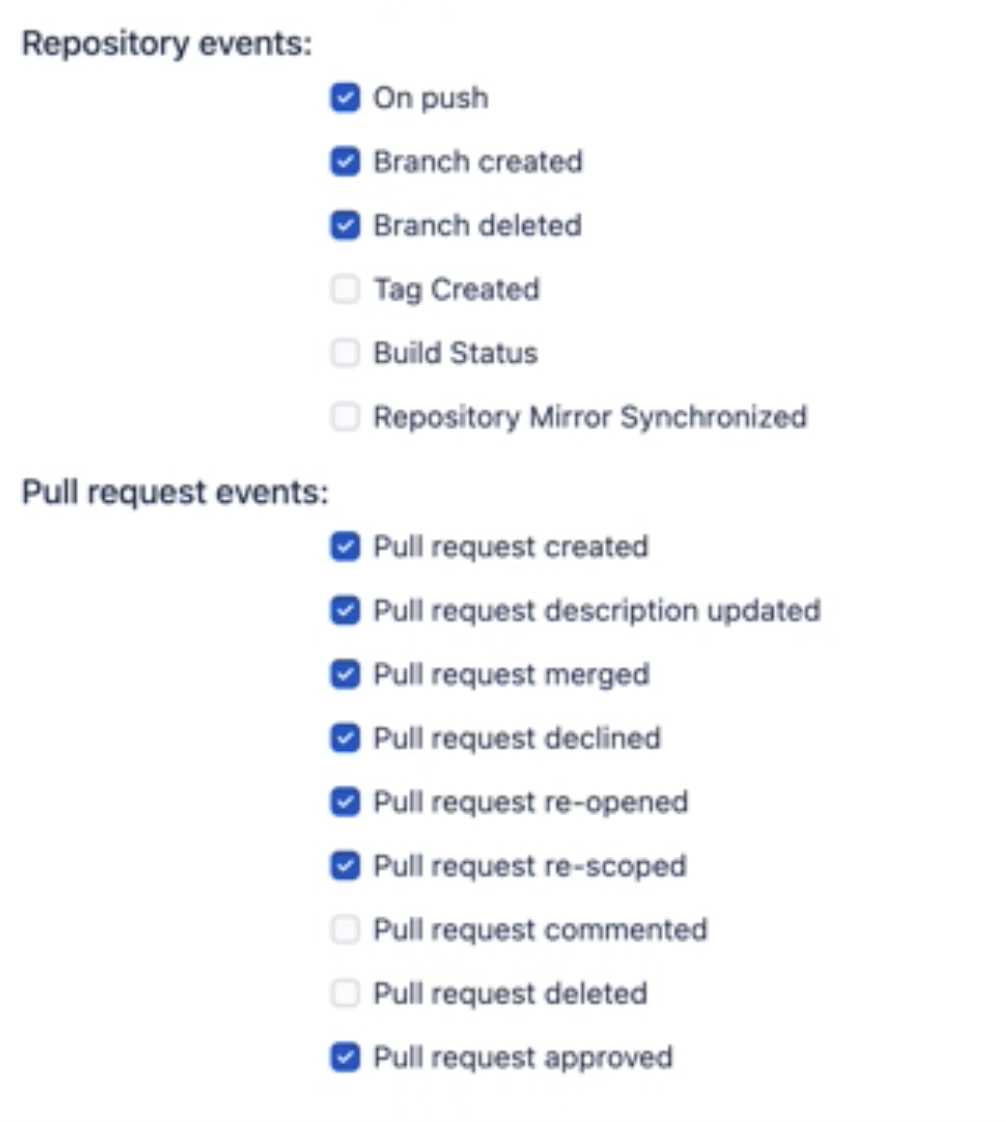
Select the list of the events that you want to notify your external system about.
Timeout: In the settings tab, you can also define the timeout for connectivity. The default value is 30 seconds.
For instance, you don’t want to notify Jenkins about the changes made by the Jenkins user not to trigger cyclomatic build dependency, so you will add the Jenkins user to the committers to ignore.
Repository configuration
Important: repository configuration by default overrides project and global configuration (this is configurable in the latest versions).
Repository-level configuration guide can be found here.
Project configuration
Important: project-level configuration by default overrides global configuration.
Project-level configuration guide can be found here.
Enable multiple rules on the repository level and other settings
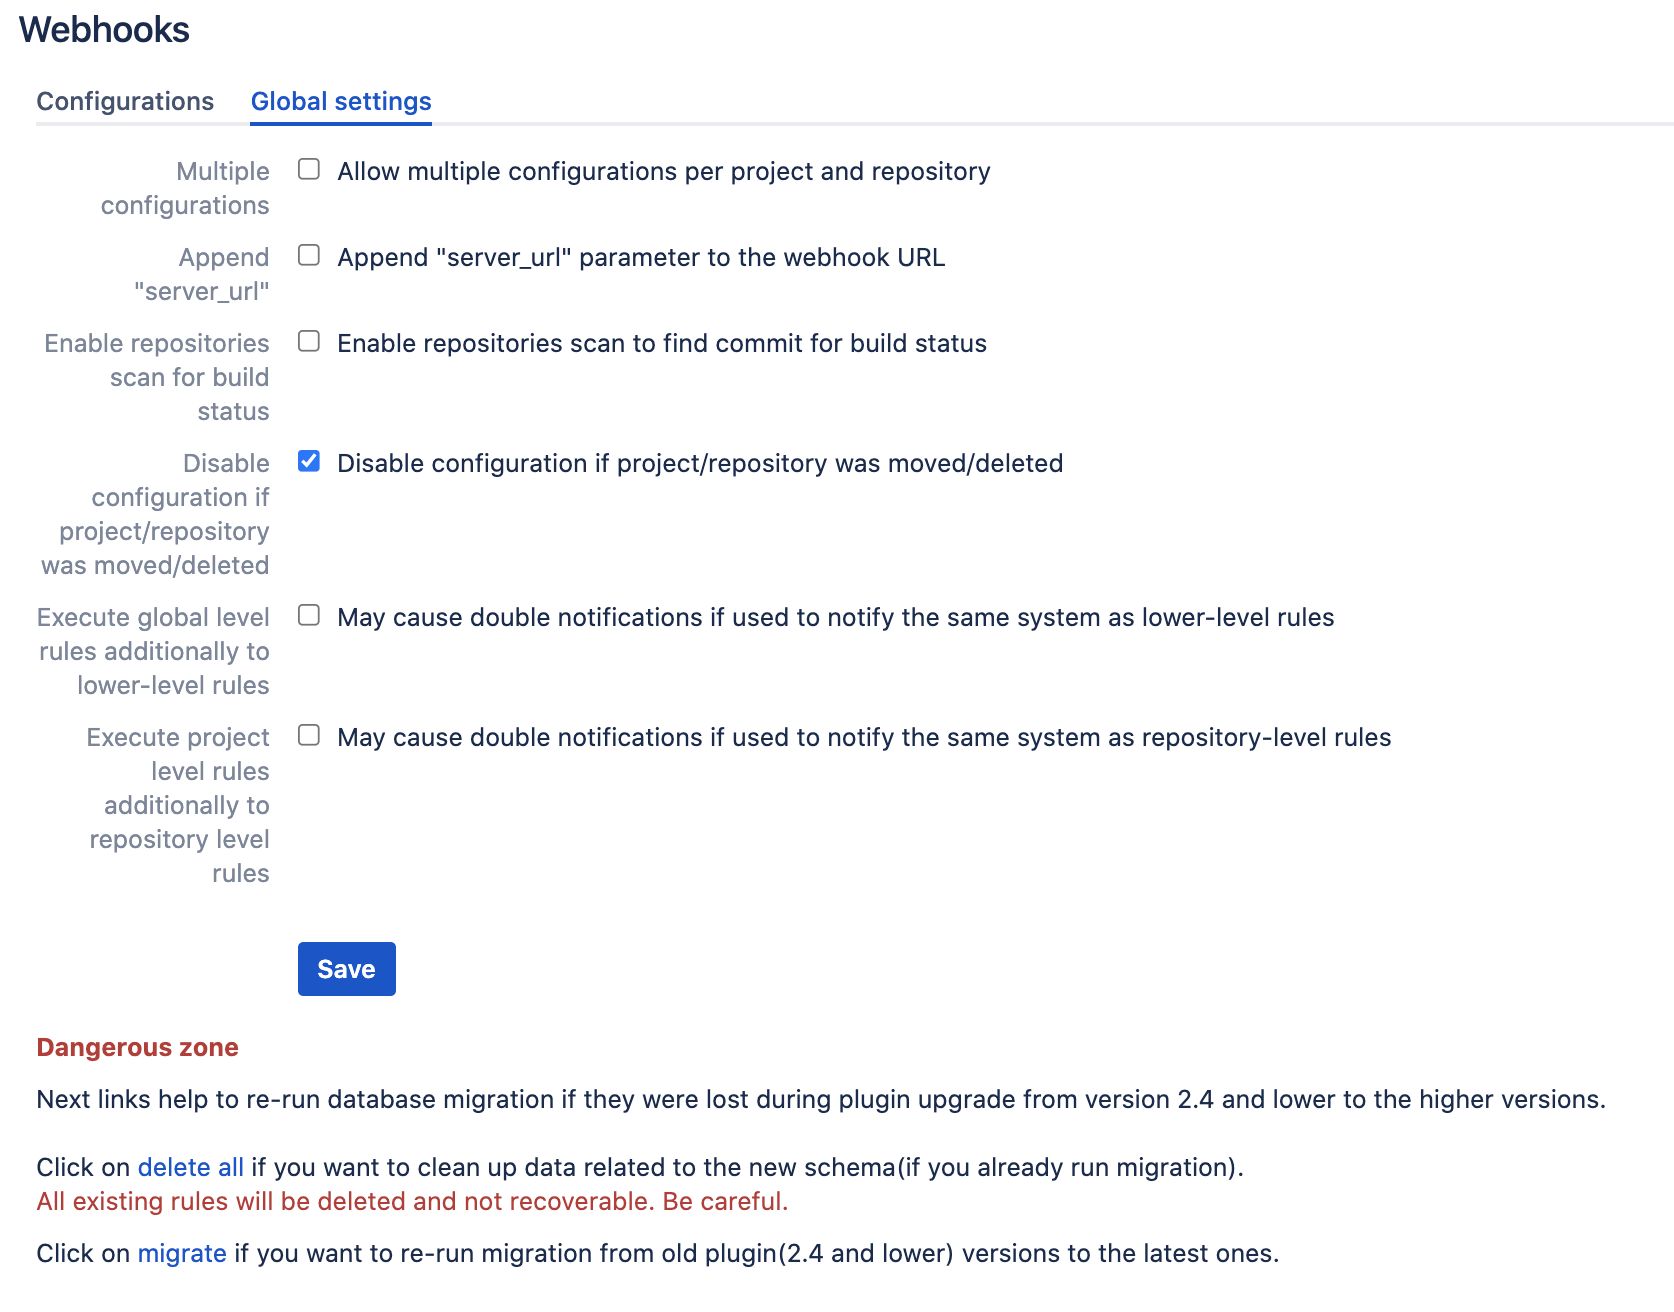
This setting is located in the Global settings → Multiple configurations checkbox.
This setting permits to have multiple configurations on the project and repository levels. Global configuration can be only one.
Below you can see all the global settings that amend the application’s behaviour.
Executing global-level rules in addition to lower-level rules setting forces the application to execute global rules independently (or on top) of lower-level rules. If this setting is not used the rules are combined into 1 rule for a particular event. As a result, if this setting is ON, it may cause double notifications if the rules on different levels are configured to override some settings and notify the same 3rd party system.
Executing project-level rules and repository-level rules forces the application to execute project-level rules independently of repository-level rules.
The above two settings are meant to be used when you want the App to work independently on each level. Repo or project admins do their configurations. Alternatively, by default, the rules are merged for each repository.
Allow editing configurations for Project/Repository writers
System administrators can allow repository writers to use REST APIs to manage configurations using the following setting Modification permit for writers.

Allow editing configurations for Project/Repository readers
System administrators can allow repository writers to use REST APIs to manage configurations using the following setting Modification permit for readers.

Query string parameters support
The following query string parameters are supported:
-
repository.slug- the repository slug -
project.key- the project key -
branch.name- the branch name -
pullrequest.frombranch- the from branch name of the pull request (relative git path) - f.e. refs/heads/bug/someBug -
pullrequest.frombranch.name- the from-branch name - f.e.someBug. -
pullrequest.tobranch- the to-branch name of the pull request (relative git path) - f.e. refs/heads/master -
pullrequest.tobranch.name- the to-branch name - f.e.master. -
pullrequest.url- the pull request url
Build status event handling
Bitbucket build status API provides the only commitId and Bitbucket Post Webhooks needs to find rules to process an event. Because the App cannot get repository information, it uses two approaches to find the repository by commit id:
-
Default (since 3.12.23): we cache the commit id and repository id to find the repository id by commit id in O(1) time.
-
Repository search (default before 3.12.23): The app scans all repositories and projects, globally where rules exist with Build status notification enabled. This approach is not very performant when a huge repository because it results in a repository scan. This approach is disabled by default since version 3.12.23. You can enable it in the global setting (“Enable repositories scan to find commit for build status“ checkbox).
Trigger Azure DevOps Pipelines Cloud and Server (On-Premises)
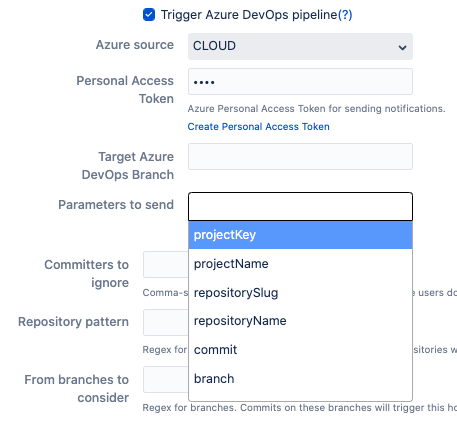
Since December 2022, Microsoft does not allow Azure DevOps pipelines receive unknown pipeline parameters, so you need to update to 4.12.08+ version to specify the parameters your pipeline is ready to receive.
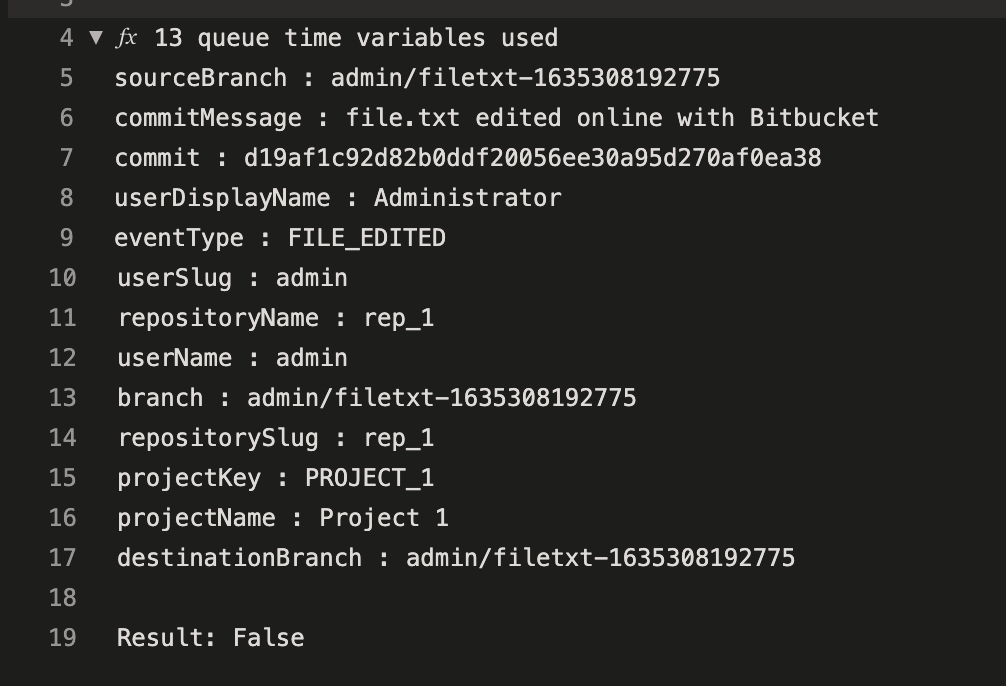
You need to make sure that the parameters of the pipeline are settable at the queue time.
You can use Bitbucket Post Webhook App to trigger Azure DevOps Pipelines.
You need to generate an API token that allows the execution of the required action. https://docs.microsoft.com/en-us/azure/devops/organizations/accounts/use-personal-access-tokens-to-authenticate?view=azure-devops&tabs=preview-page#create-a-pat
It should allow triggering the build pipelines, nothing more. No code access is required. Only Read and Execute pipelines.
Please set the URL in the provided field.
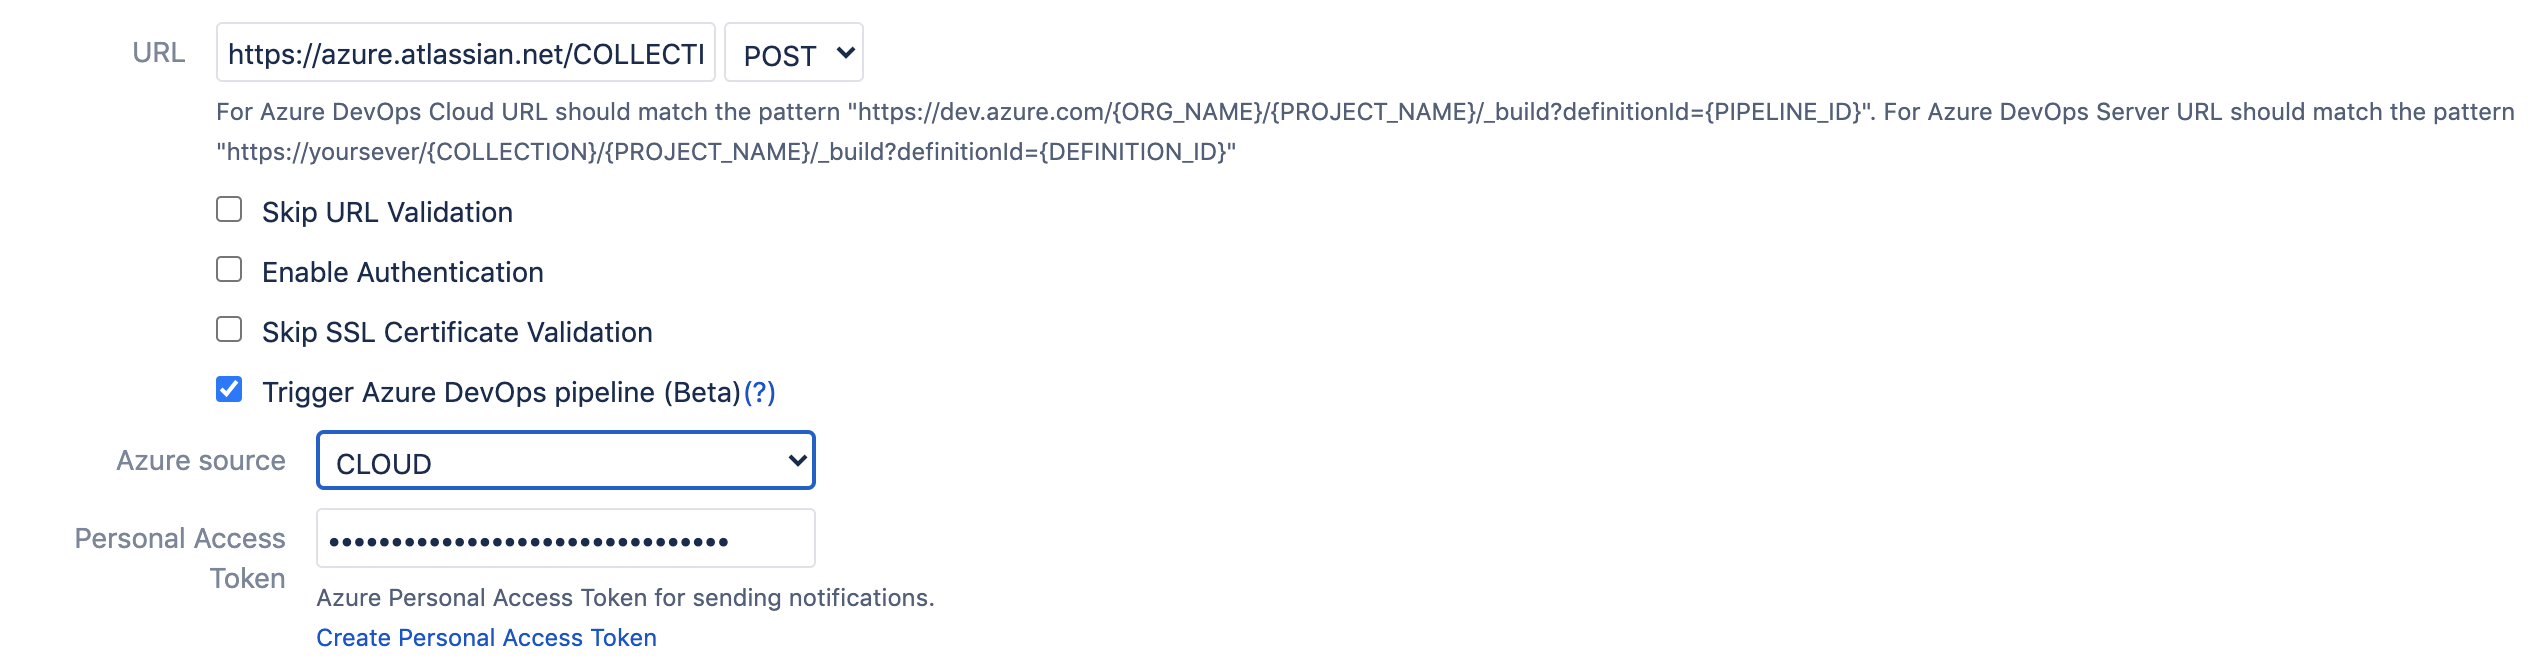
And specify the URL to the pipeline in the following format:
The build triggers the source branch. For instance, if you create a branch feature/DEV-123-azure-DevOps-confluence-fix the branch ref will be passed to the pipelines that should check out/clone the right branch.
Cloud: The url should match the following pattern https://dev.azure.com/{ORG_NAME}/{PROJECT_NAME}/_build?definitionId={PIPELINE_ID}
Server: The url should match the following pattern https://yoursever/{COLLECTION}/{PROJECT_NAME}/_build?definitionId={DEFINITION_ID}
Azure DevOps Pipelines parameters
Additional details are here.
The following parameters are passed from Bitbucket to Azure DevOps Pipelines:
-
projectKey
-
projectName
-
branch (the branch name)
-
repositorySlug (the repository URL-friendly name)
-
repositoryName
-
commit (optional commit hash)
-
commitMessage (optional commit message)
-
sourceBranch
-
destinationBranch
-
userDisplayName
-
userSlug
-
eventType
-
pullRequestId
-
pullRequestTitle
-
pullRequestDescription
-
pullRequestState
Dealing with removed/moved repositories
From version 3.12, App updates or deactivates configurations when a repository or a project is renamed or moved. Which highlights the rules which may need a fix.
Not valid configurations are marked in yellow and shown only at the global level so that the global admin can amend or delete them.
In the older versions, you may see RepositoryMovedException. Follow the document below to delete/change older issues. However, the best approach is to update to the latest version and fix the highlighted rule in the Global configuration.
Bitbucket RepositoryMovedException
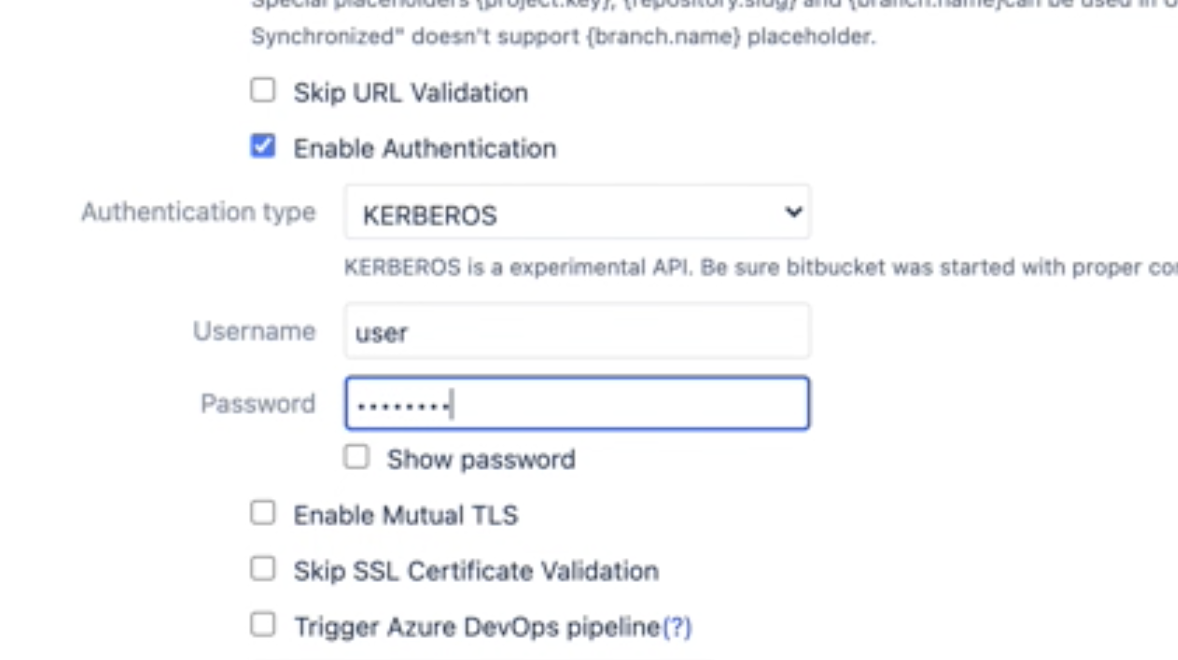
Kerberos support
KERBEROS is a experimental API. Be sure Bitbucket was started with proper configuration e.g.: JAVA_OPTS="-Djavax.net.ssl.trustStore=/etc/pki/java/cacerts -Djava.security.krb5.conf=/etc/krb5.conf -Djavax.security.auth.useSubjectCredsOnly=false"
Afterwards, you can specify a username and password in the authentication section of the configuration screen.
Microsoft Teams support
We recommend to use Advanced Microsoft Teams Bitbucket Connector for better configurability, noise reduction and user experience.
Incoming webhook generation
Generate an incoming webhook URL for the channel you want to receive notifications.
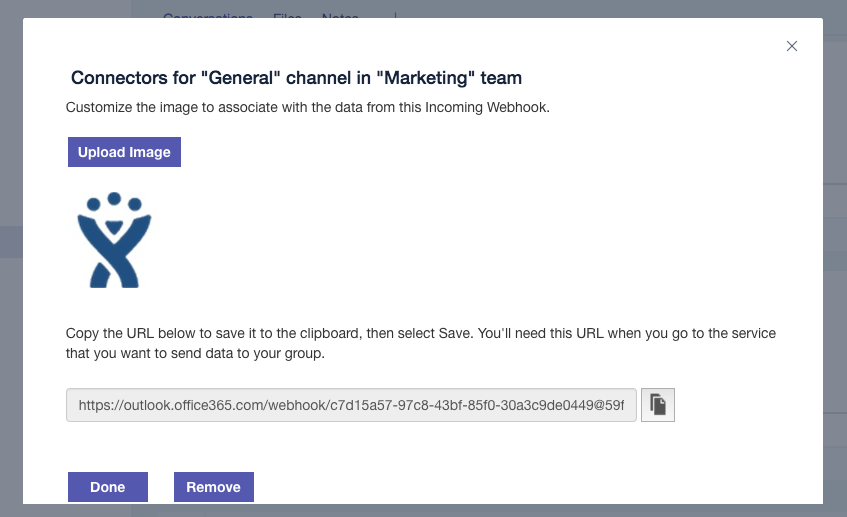
Go to the Microsoft Teams channel configuration and add a connector.
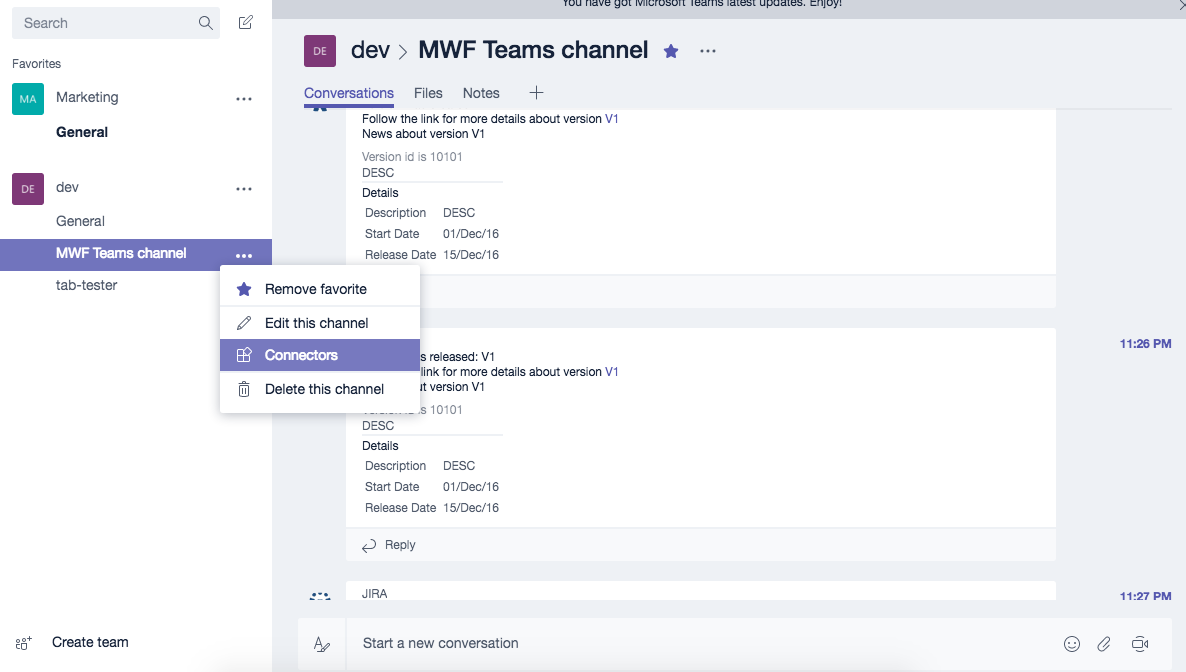
Find an Incoming Webhook and add one. Put the name as Bitbucket and set the Bitbucket logo.
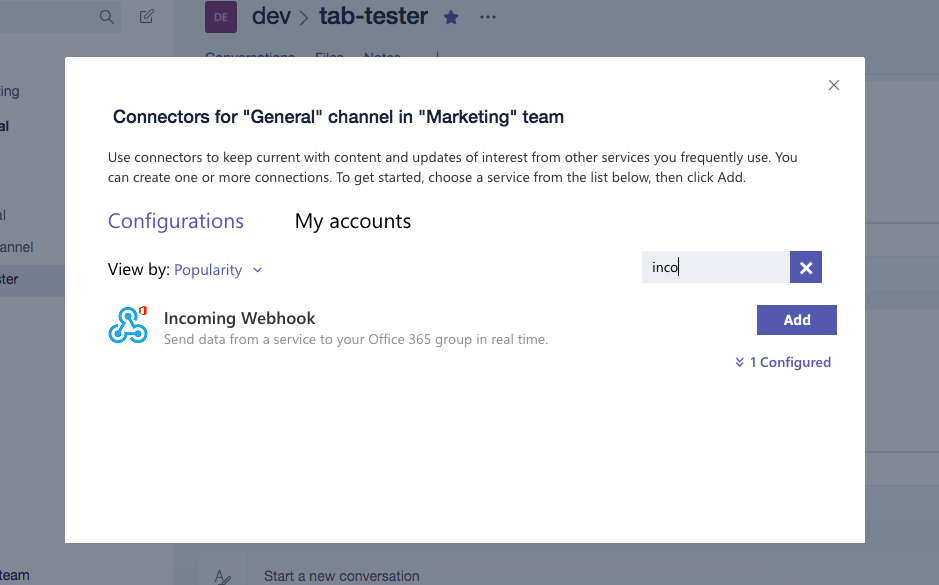
Set the name and the icon of the Connector.

Copy the webhook URL that will be used later on during the configuration process.
Setup
On any level (repository, project or global), you can paste a newly generated URL. No checkboxes are necessary. The App supports the old and new formats of Incoming Webhook URLs.
Rerun data migration
There is a danger zone in the global settings, where you can delete all existing configurations and rerun migration from older (free versions). We do recommend backup the data first (just in case).
API
Please navigate to the API documentation - Atlassian Bitbucket Post Webhook API.
Outgoing API contracts are here - https://help.moveworkforward.com/BPW/post-webhooks-for-bitbucket-outgoing-api
Providing feedback
Please contact us via the Service Desk.
Debugging
You need to enable debug mode for Bitbucket and supply us with the support zip or Bitbucket log file.
Updated: