How to integrate Bitbucket Server with Jenkins Pipelines?
This integration enables the triggering of the Jenkins pipeline automatically whenever some changes are pushed to the Bitbucket Server repository, allowing you to build, test, and deploy seamlessly.
This guide is for Post Webhooks for the Bitbucket Atlassian Marketplace application.
Plugins for Jenkins Server
Firstly, you need to install the necessary plugins on your Jenkins Server:
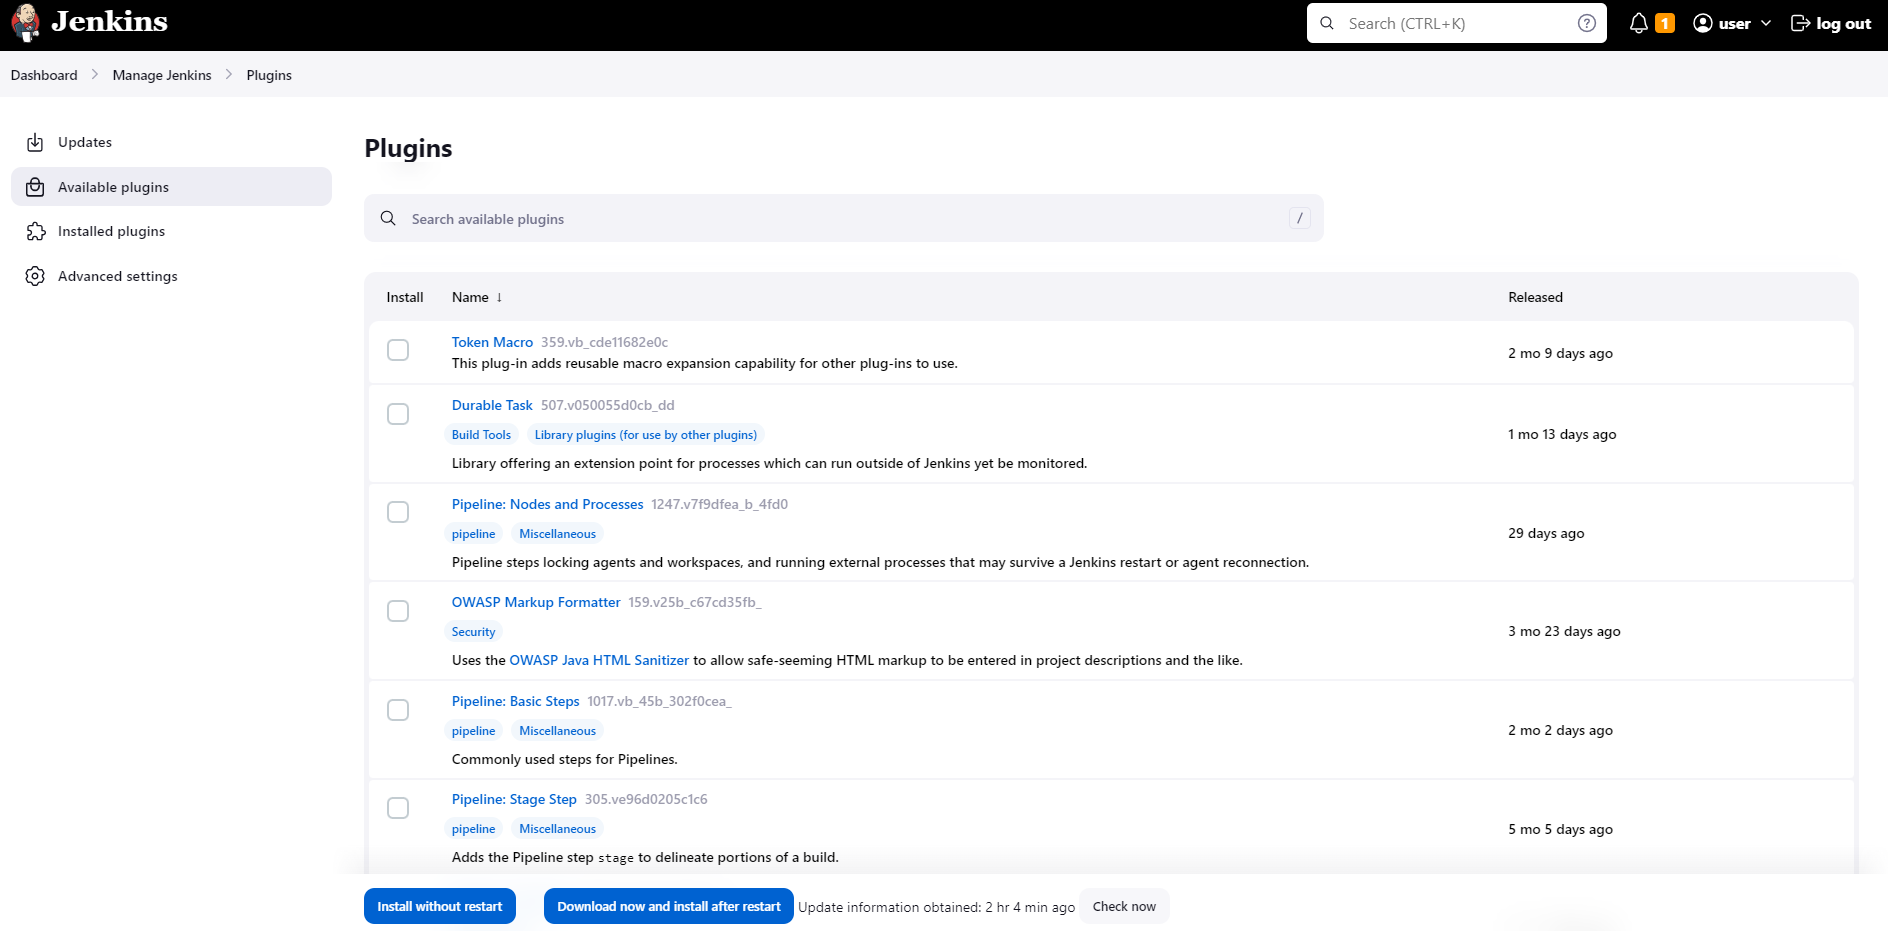
Git Parameter Plug-In (adds Git parameters to the Jenkins pipelines, you can use it to specify the branch to check in or any other things used in the Jenkins pipeline).
Build Authorization Token Root Plugin (allows using the build token for external builds).
Follow this short instruction on installing new plugins in Jenkins:
Log in to Jenkins and on the dashboard click on Manage Jenkins in the left sidebar.
Click on Plugins to open the Plugin Manager.
Move to the Available section. Here you can search for necessary plugins using the search bar or browse through the available plugins.
After the plugin installation is complete, Jenkins may prompt you to restart the server for the changes to take effect.
Create a Jenkins Pipeline Job
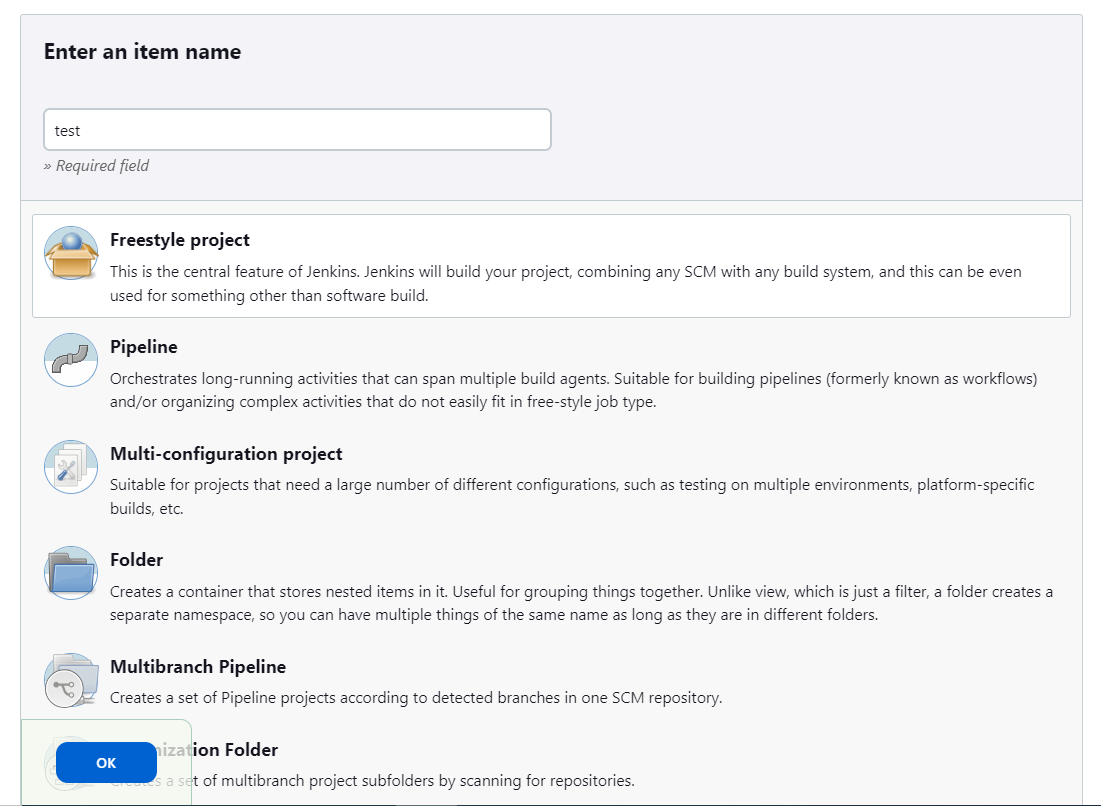
On the Jenkins dashboard, click on New Item in the left sidebar to create a new job.
Give a name to the Job that you are creating.
Select the Freestyle Project (or any other pipeline type) and click on OK.
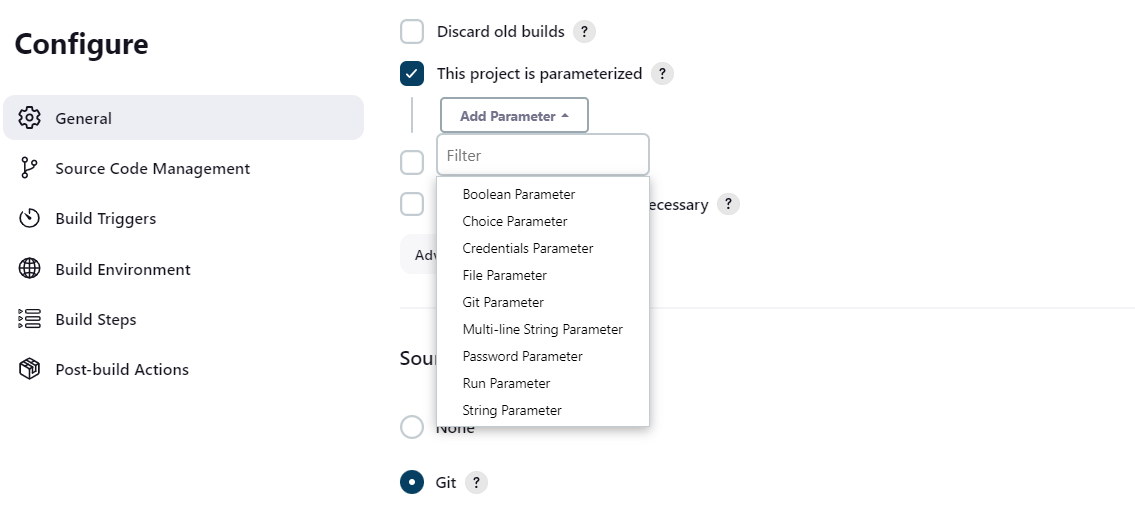
Add the branch as a Git parameter:
Chose the option This project is parameterized. Click on Add Parameter and select Git Parameter in the drop-down.
Specify the
Name,Parameter typeandDefault valueof the Git parameter (as it is shown in the screenshot below).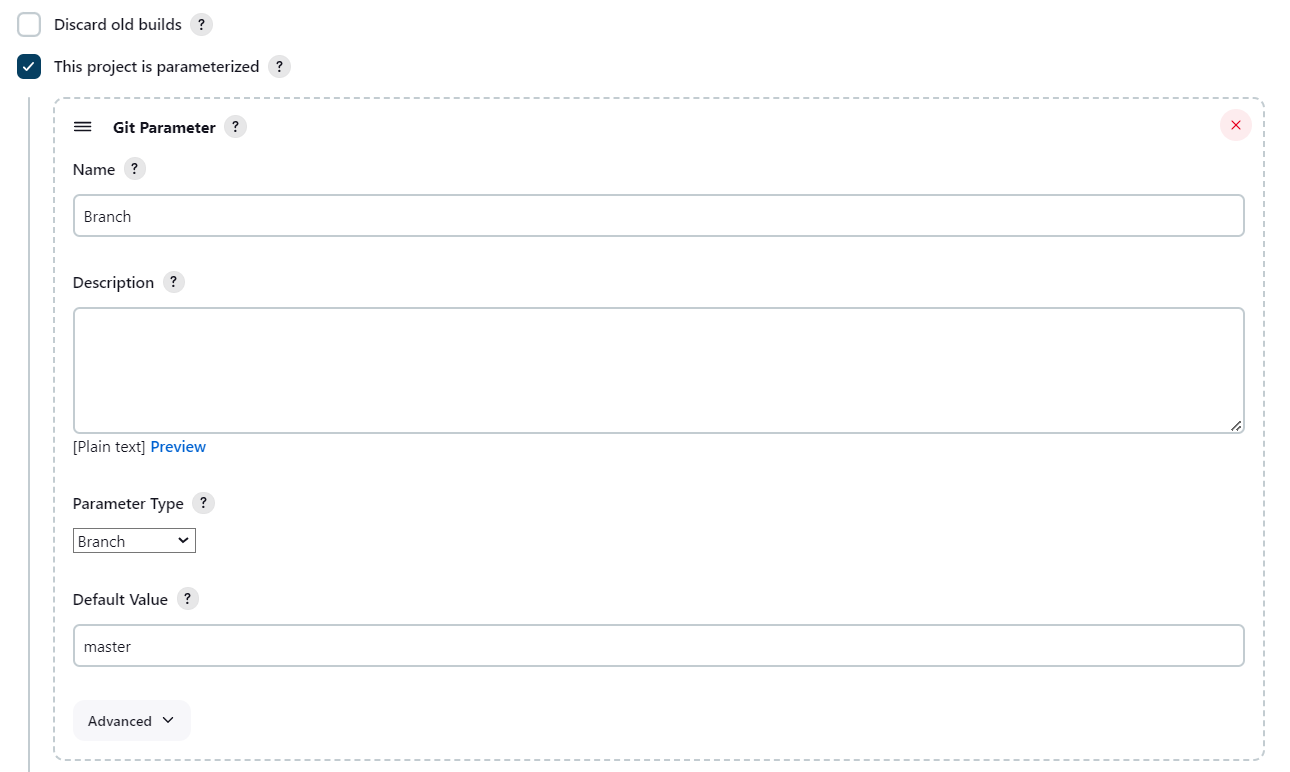
Move to Source Code Management to provide access to the Bitbucket repository:
Select Git option.
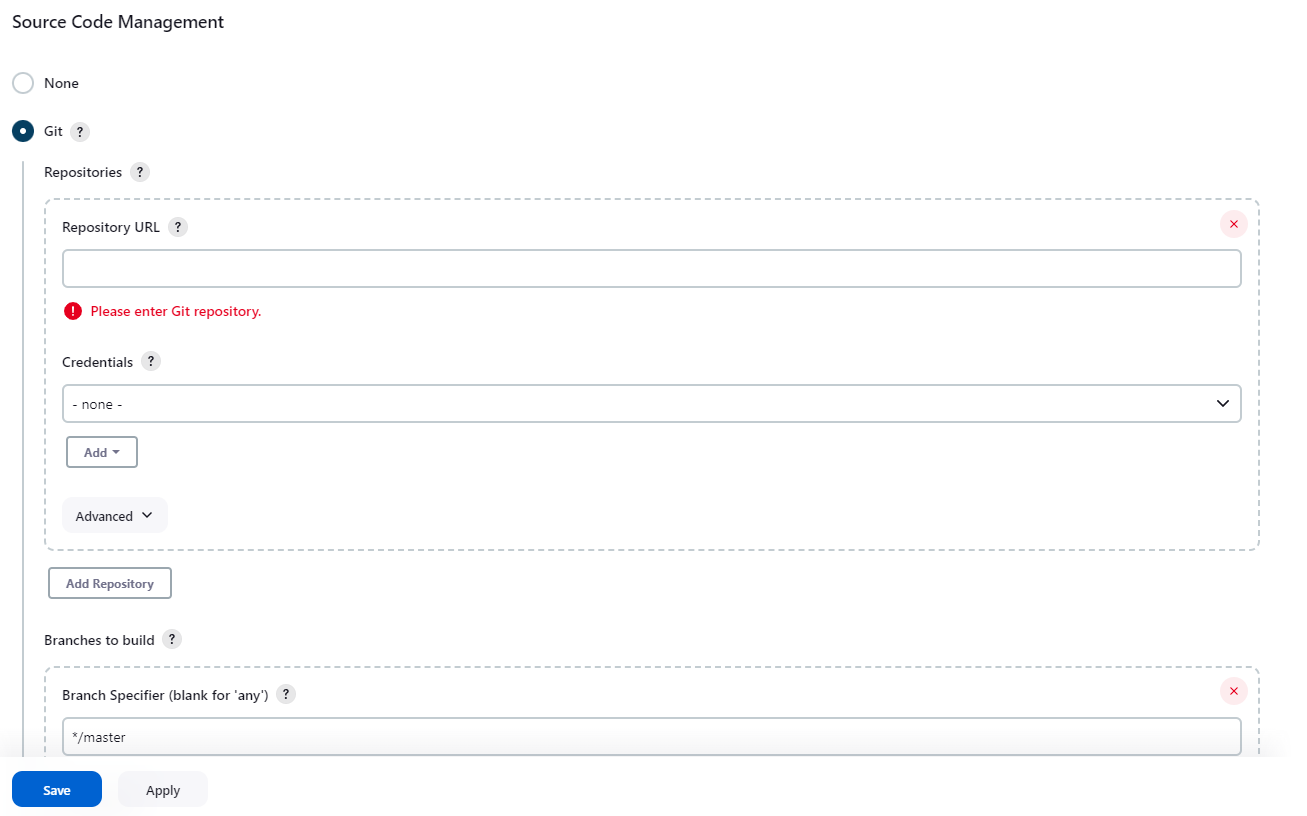
Enter the
Repository URLandCredentialsof your Bitbucket account. We recommend usingURLfrom the Clone section on the Bitbucket side.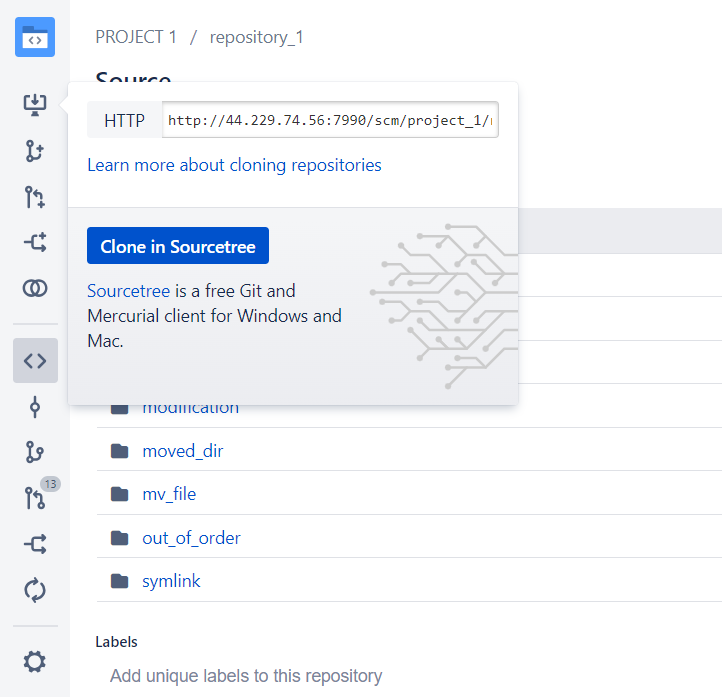
On the Build Triggers section select the option Trigger builds remotely (e.g., from scripts) and create an
Authentication Token.
Click on Save button to save the Pipeline Job Configuration.
Now you are ready for the Bitbucket сonfiguration.
Configuration
Navigate to the repository-level configurations of Post Webhooks for Bitbucket app and create a new webhook:
Move to the Bitbucket repository you wish to set up Post Webhooks for Bitbucket app.
Navigate to the Repository settings by clicking on the “gear” button on the left sidebar.
On the Workflow section find our application Post Webhooks.
From the Configurations tab, click

Create a new configuration and specify all the necessary parameters. Use Test Connection button to verify the connectivity between Bitbucket and Jenkins.
To complete webhook creation click on Save button.
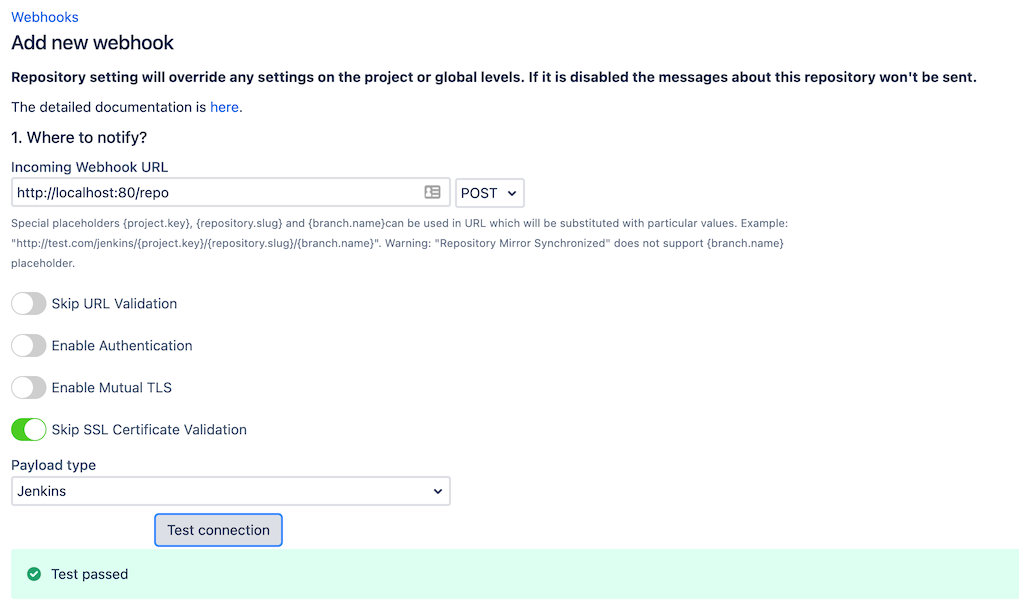
Below you can find a short definition of the parameters you have to specify.
Parameter | Definition |
|---|---|
| a link to the Jenkins Pipeline Job by pattern:
For example, |
| this parameter instructs the app to skip the validation of SSL certificates, allowing the connection to be established even if the certificate cannot be verified. |
| allows you to specify the types of events that should trigger the pipeline. |
| allows you to specify the types of events that should trigger the pipeline. |
| the name of the configuration Our advice is to name something meaningful to you and your team so that it can be understood later easier |
| should be enabled if this configuration is going to be used. |
The rest parameters are optional to provide flexibility and customization options to tailor the webhook integration according to your specific needs.
Demo Video
https://www.youtube.com/watch?v=JUYwmQYB3QERepository Level Configurations
How to set up Azure DevOps Pipeline triggering from Bitbucket Server?
How to enable notifications from Bitbucket in Microsoft Teams?
How to choose an authentication type?
Updated:
