

Instead of switching between different tools or command-line interfaces, you can initiate the feature branch creation process within Jira, saving time and effort.
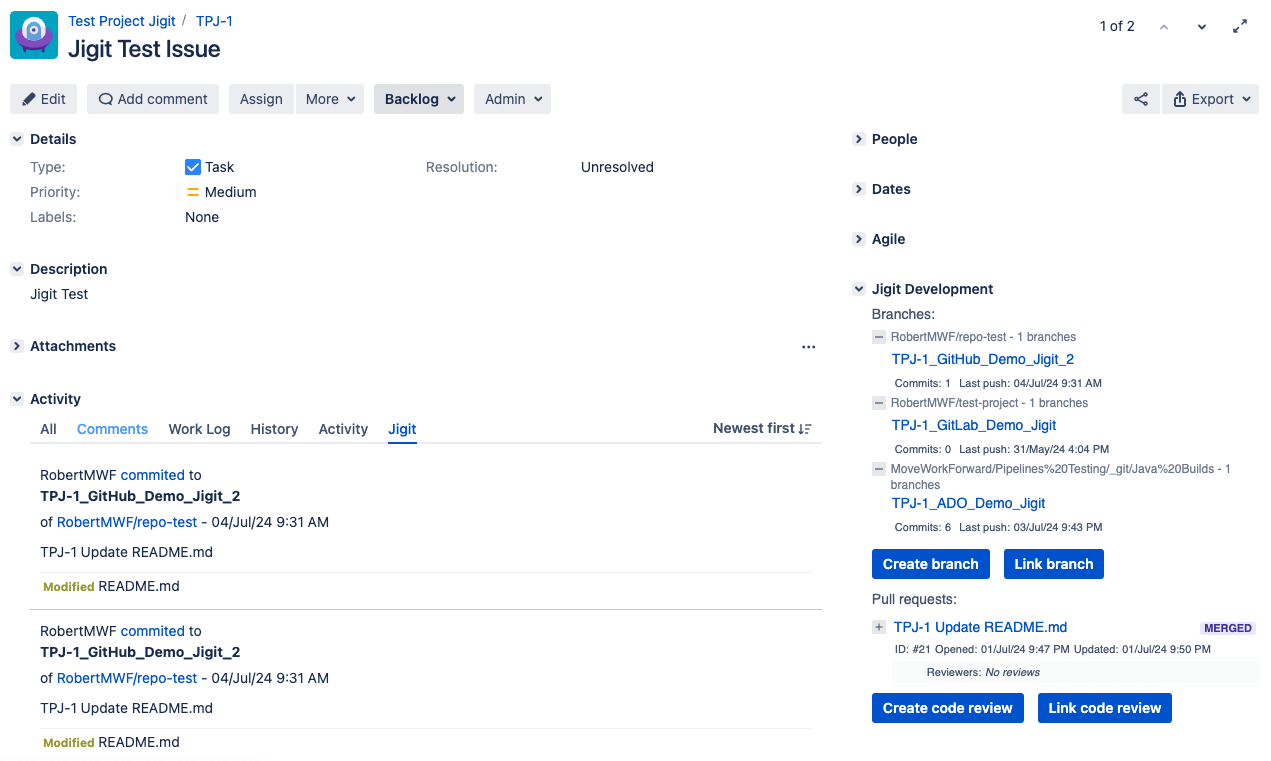
To сreate or link branches to a Jira issue, and сreate or link code reviews using Jigit Development Panel your Jira administrator needs to enable parameter Display repositories in the development panel during Jigit Plugin Configuration. To enable this, please contact your Jira administrator.
To create a feature branch using the Jigit Development Panel, you have follow the steps:
-
Go to the Jira issue that corresponds to the branch you want to create.
-
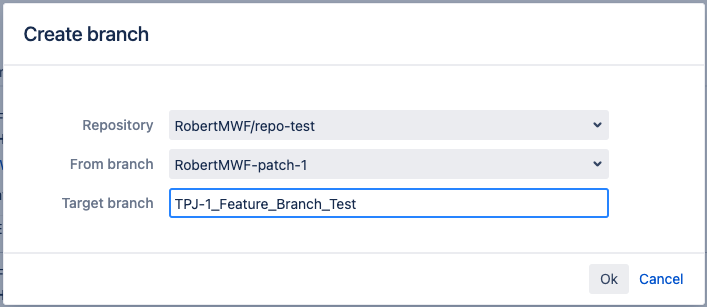
On the Jigit Development Panel click on the Create branch button, which will open a dialogue window.
-
In the dialogue, select the desired branch from which you want to create a new branch and the branch name (should include the issue key to be displayed on the Jira issue view screen).
-
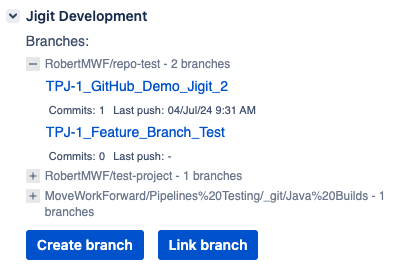
Confirm the selection and the branch will be created and visible on Jigit Development Panel.
How to link Git entities to Jira issues?
How to create a pull or merge in Jira using the Jigit app?
How to link the branch to the Jira issue?
Updated: