
How to create Azure DevOps branch from Jira?
Our Azure DevOps and Jira integration provide the ability to create a branch in Azure DevOps from Jira issue view. Developers can initiate the branching process without switching between different tools, reducing context-switching and saving time.
To make this feature work, the personal access token used for integration needs write access to the Code. Learn more here.
Create Azure DevOps branch
To create a new Azure DevOps branch follow the steps:
Open the Jira Issue.
Go to the development panel. It is located on the right-hand side of the Jira issue's details page.
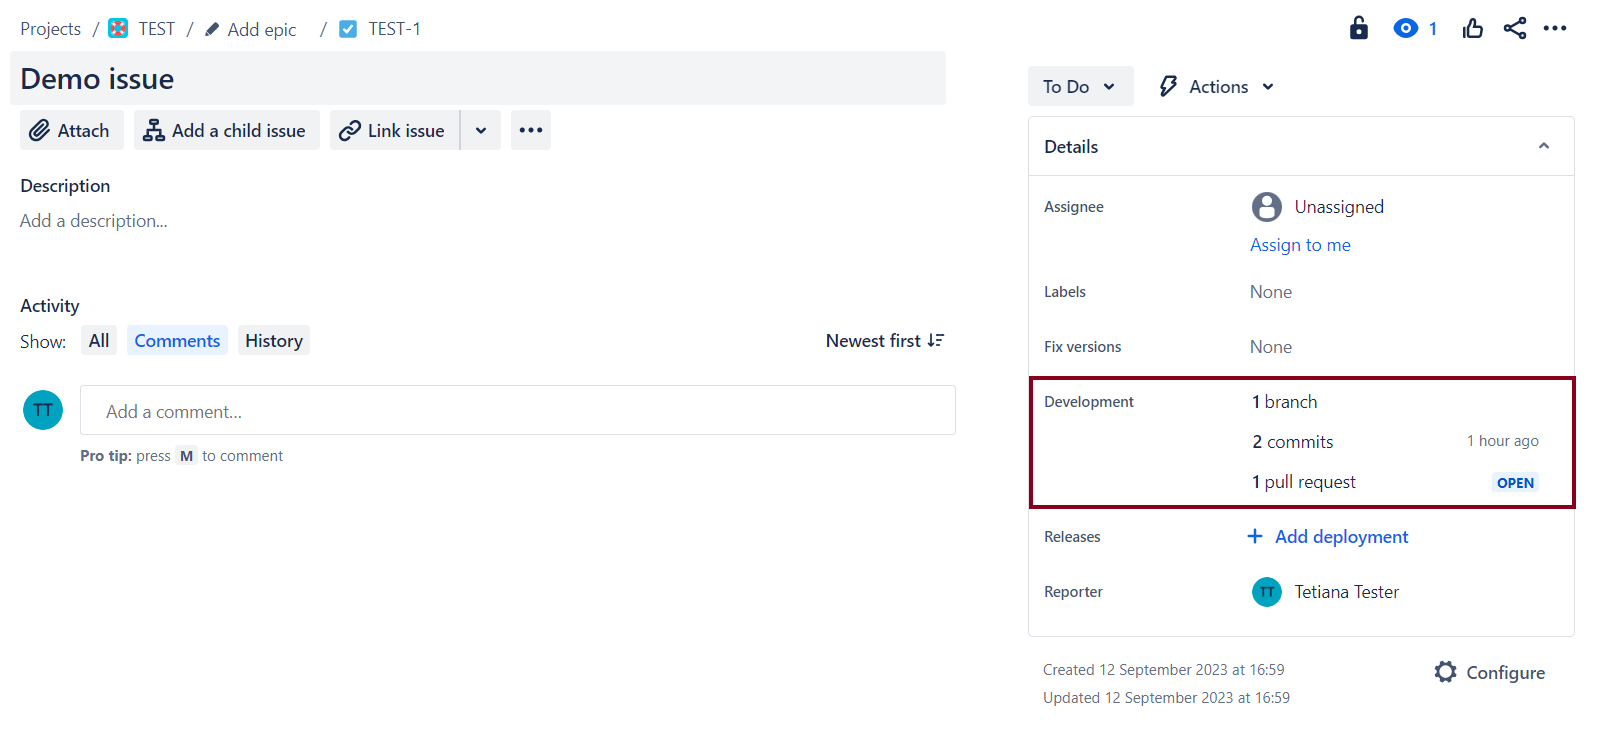
Hover over the number of branches and click on “+". Then click on Create branch in Azure DevOps.

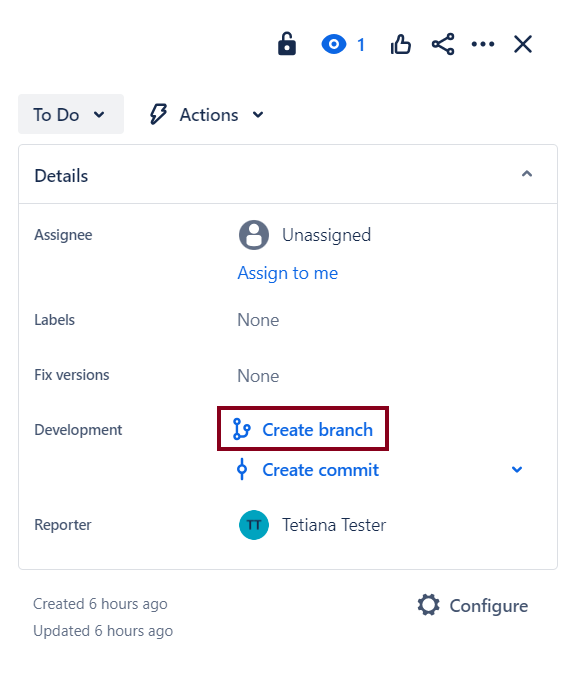
If there are no activities connected to this issue simply click on Create branch button.
Select Azure DevOps project, repository and parent branch.
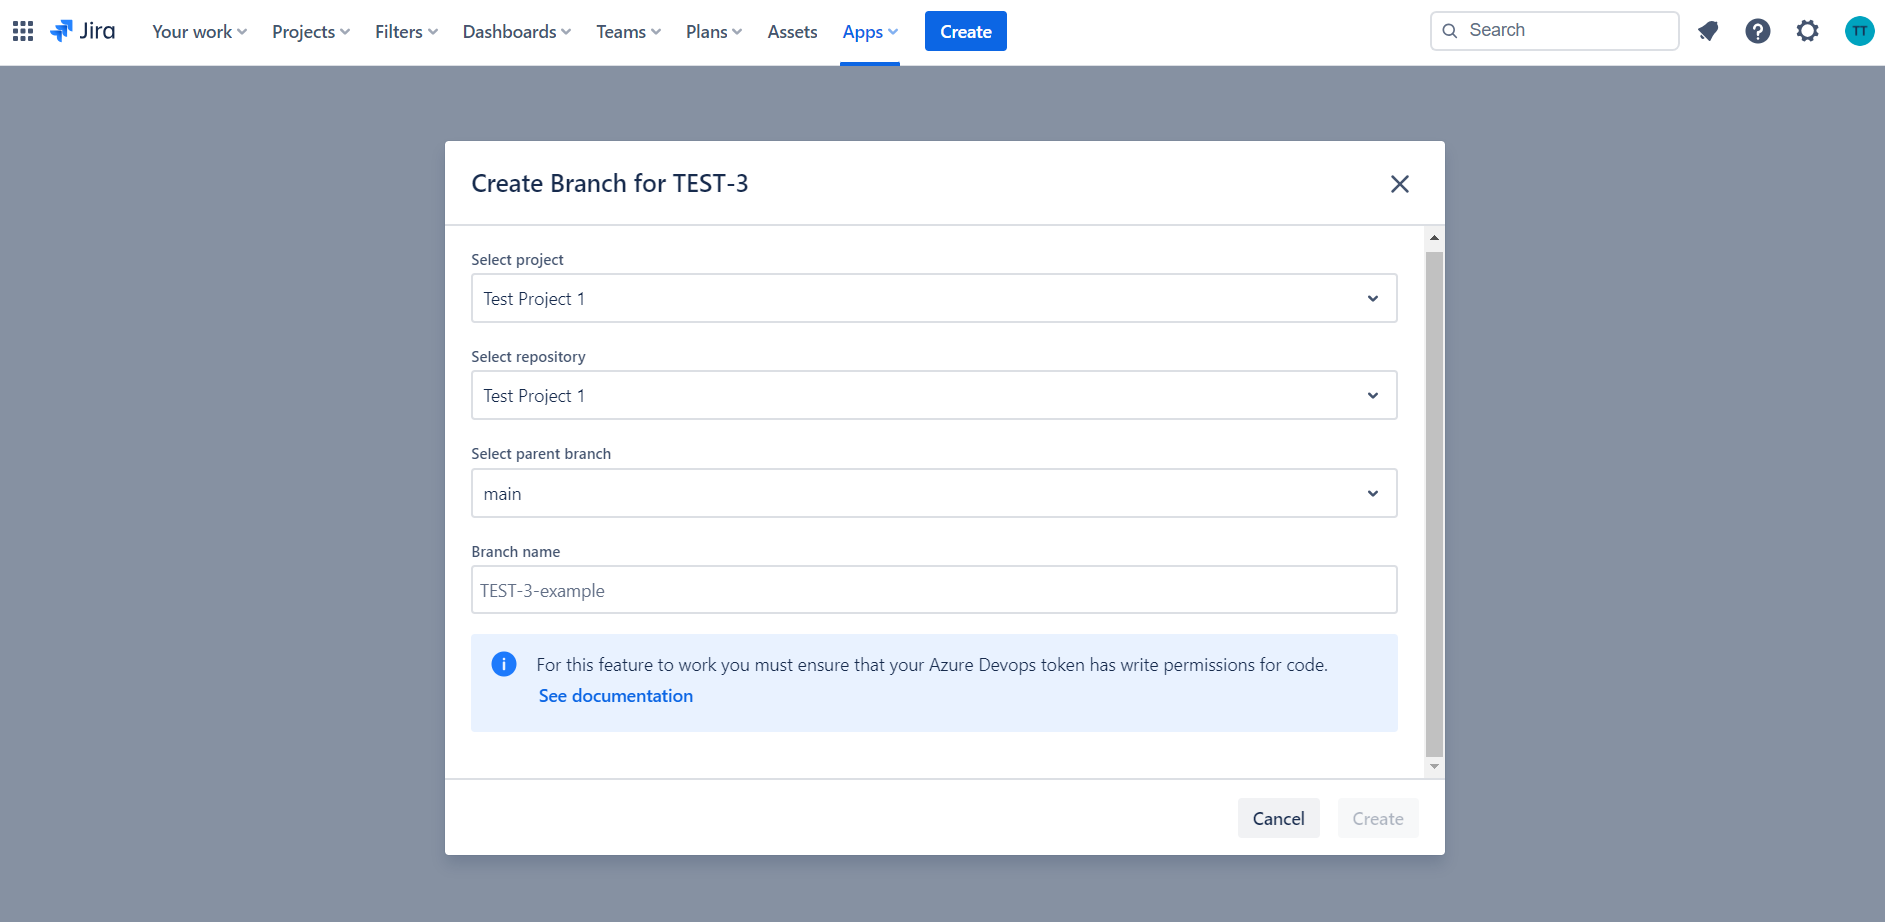
Name your branch. We suggest including issue key to display this branch on the development panel.
Click on Create to confirm the creation of the Azure DevOps branch.
Check the Azure DevOps repository to verify that the new branch has been created.
Extend personal access token permissions
This functionality requires additional permissions for the personal access token: write access to the Code.
If the token has the wrong access scope you may see this error message:
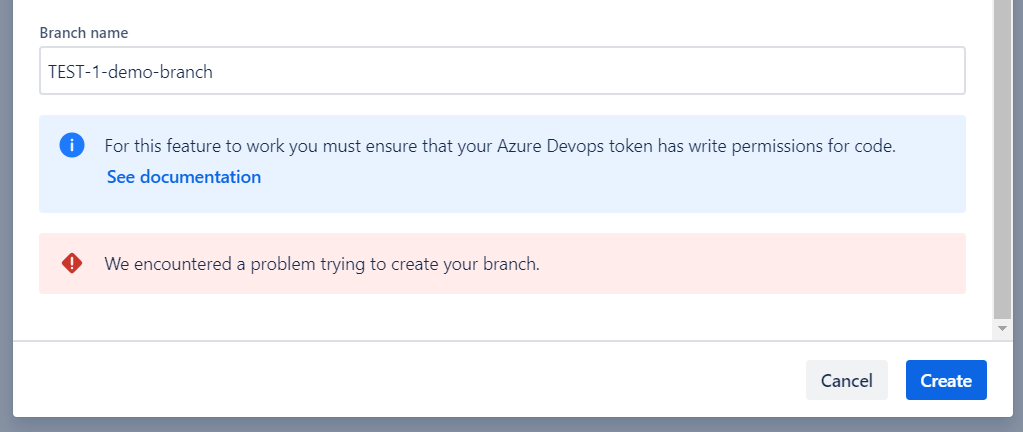
Please ask your Jira administrator to check the scope of the token used for connecting Azure DevOps and Jira instances. More details are here.
Updated: