Get started for Jira end-user
Get started guide for the end user of Azure DevOps for Jira integration.
This is the guide for Azure DevOps for Jira application that bring development information from Microsoft Azure DevOps to Atlassian Jira Cloud.
If you are looking for Jira Data Center and Azure DevOps integration, check out Jigit.
If your administrator has connected your Jira Software to Azure DevOps, you’ll see development information alongside your issues in Jira. You can monitor relevant branches, commits, pull requests, builds and deployments straight from the Jira issue development and releases panels.
Before you begin
Your Jira administrator must connect Jira Software and Azure DevOps on Global configuration page. Learn more here.
You must have the View development tools permission to be able to see the development panel.
How to link development information to the Jira issue?
You must reference Jira issue keys in commits, branches, and pull requests to display development activity in Jira. After you can just hover over branches, commits, pull requests, and builds to see more details.
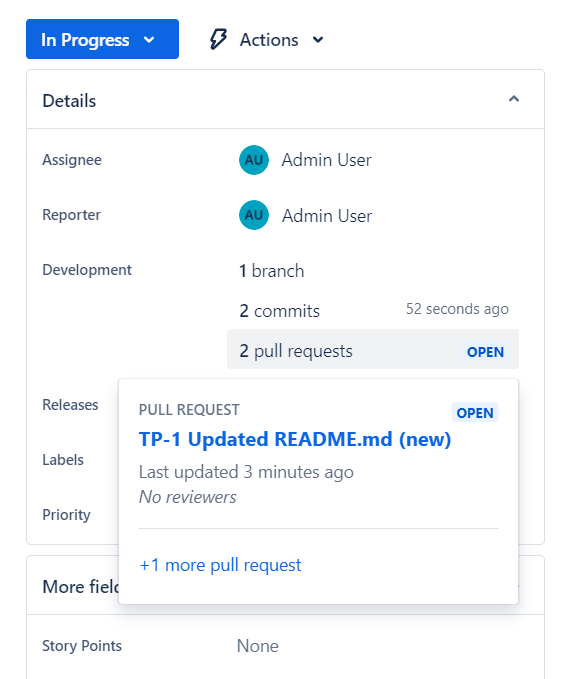
Once development information has been linked to an issue, it can’t be removed.
Branches
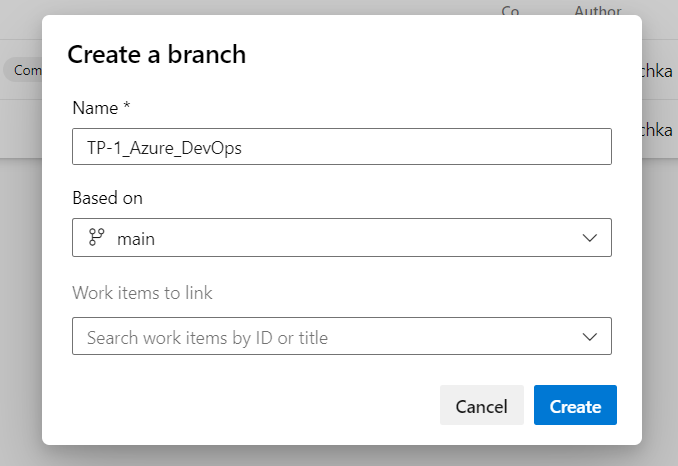
Create a new branch in your repo, using the issue key in the branch name. For example, TP-1-<branch-name>, feature/TP-1-azure-devops-jira. Our integration also supports Git Flow branch names.
Commits
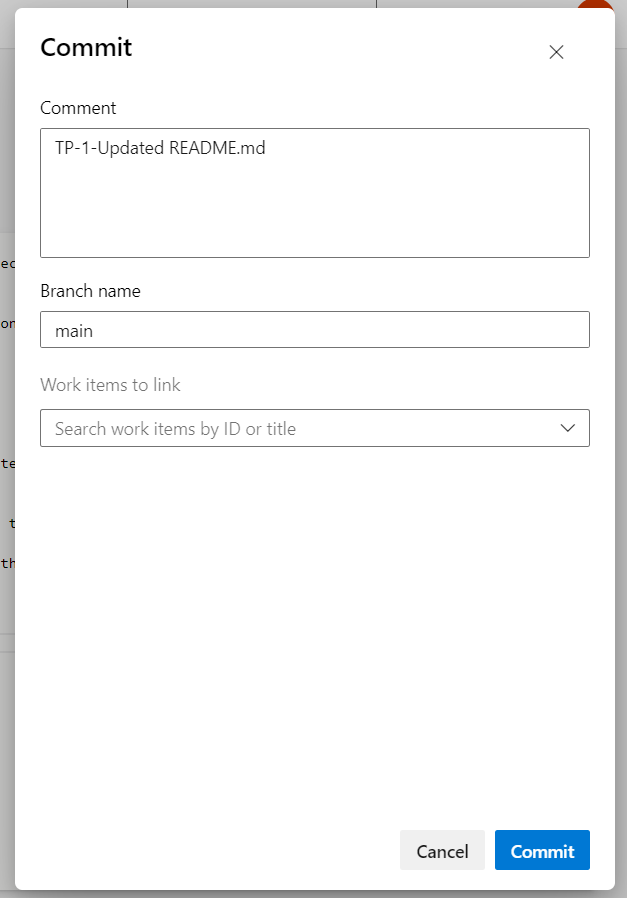
When committing changes to your branch, use the issue key in your commit message to link those commits to the development panel in your Jira issue. For example, TP-1 <summary of commit> or The change TP-1.
Also, you can use special commands, called Smart Commits, in your commit messages to take actions on Jira issues from Azure DevOps:
comment on issues;
record time tracking information against issues;
transition issues to any status defined in the Jira Software project's workflow.
Pull requests
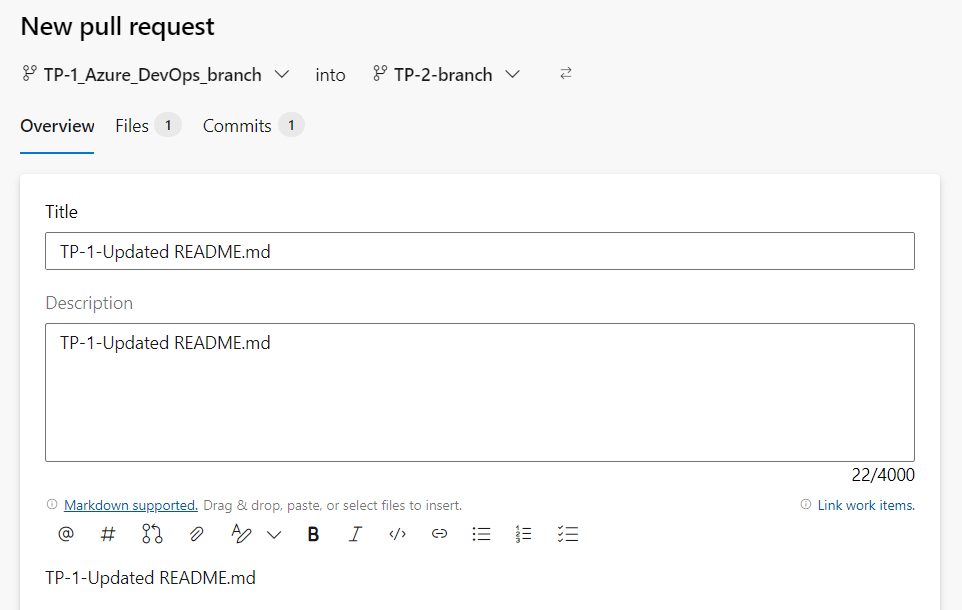
When you create a pull request, use the issue key in the pull request title or description.
Builds
For Azure DevOps, a build is automatically linked to an issue if one of the build's commits includes the issue key in its commit message. The issue key must be included in the commit to activate this feature.
Useful how to guide related to YAML pipelines - How to integrate Azure DevOps YAML pipelines deployments with Jira.
Deployments
A deployment to an environment, such as production or testing, is linked if a commit or a pull request associated with the deployment contains the issue key.
You need to make a commit in Azure DevOps including the Jira issue key in the commit message. In case you are using pull requests, the issue key can be included in the pull request title as well. This ensures the commit, branch and pull requests are linked with the issue and shown in the development panel.
You need to push something to the connected Azure DevOps repository to recognize and sync with Jira. Sometimes, it may take a few minutes for a complete sync to happen.
Not seeing anything? Make sure you’ve formatted the Jira issue key correctly, using capital letters. For example, “TP-1”, not “tp-1”.
If you are using YAML pipelines for deployments, please review How to integrate Azure DevOps YAML pipelines deployments with Jira.
How to read the information in the Jira development panel?
By consistently referencing Jira issues in your development work, you create a transparent and traceable connection between your code changes and the requirements, bugs, or tasks tracked in Jira.
The Development and Releases panels in Jira are valuable features for tracking and managing development-related information in the context of Jira issues. It is located on the right-hand side of the Jira issue's details page.
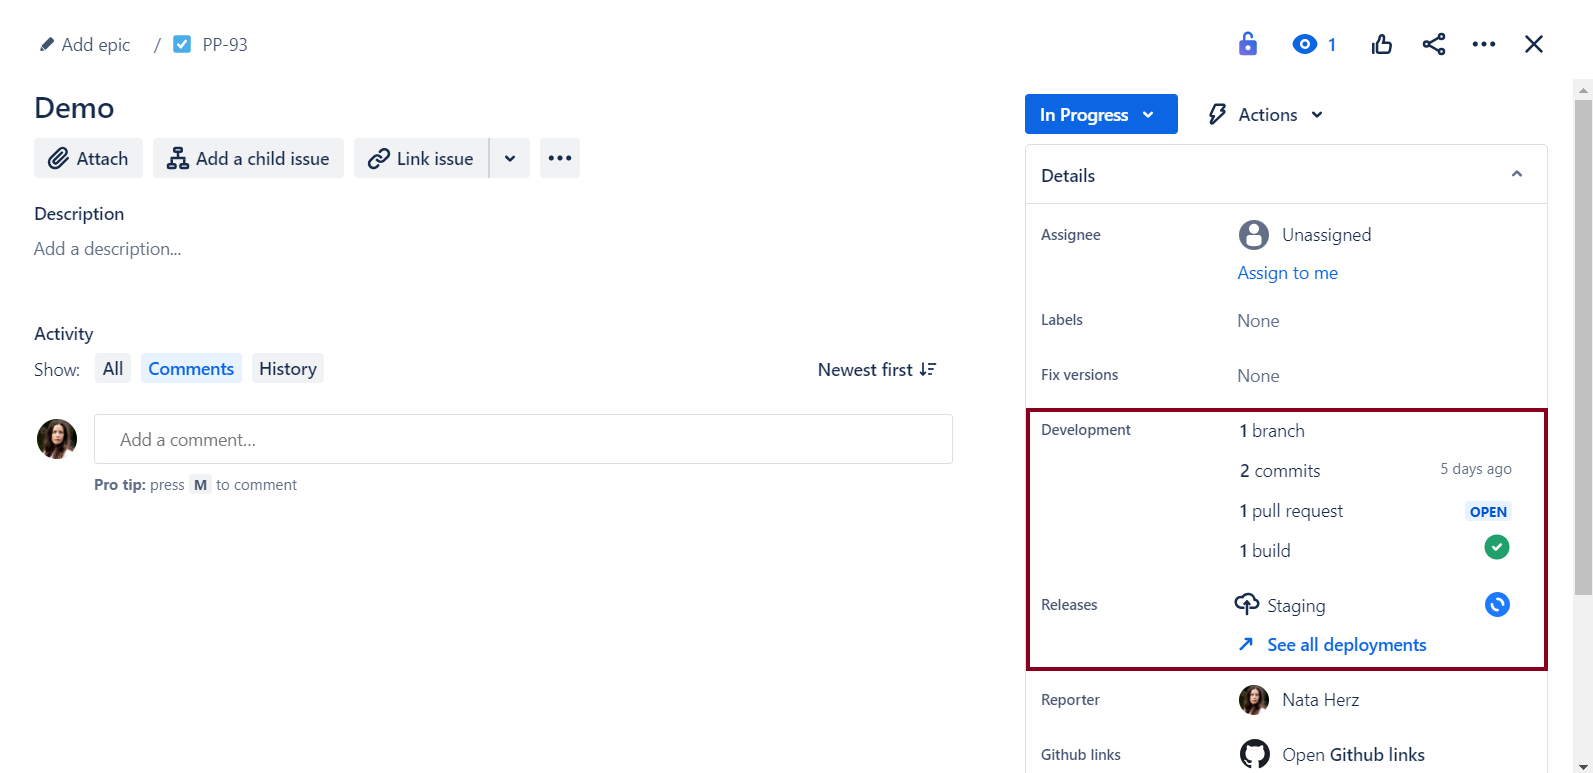
Development panel: Hover over branches, commits, pull requests, and builds to see more details.
Releases panel: Hover over deployments to see more details.
Let's take a closer look at each type of development information:
Branches
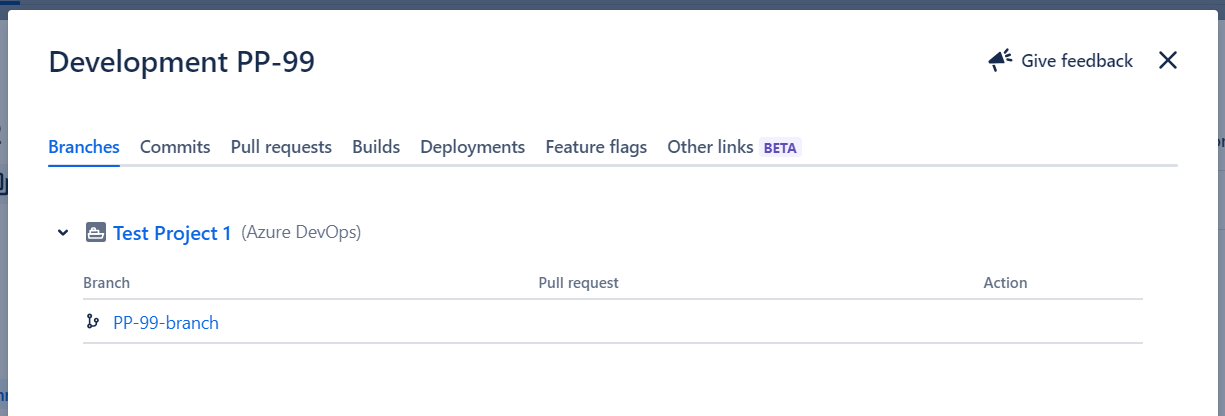
In the development panel, you can see the number of branches related to the current Jira issue.
Click on the branches section to get more detailed information.

Commits
Next to the number of commits, you can find the date when the last commit has been added.
Click on the commits section to get more detailed information.

On the Development modal window, you will be redirected to the Commits tab contains the following columns: Author, Commit (commit hush), Message (commit title), Date (the time of commit creation), Files (link to the Azure DevOps file).

Pull requests
Next to the number of pull requests you can find the status name:
OPEN if there is at least one open pull request.
MERGED if there are no open pull requests, and at least one pull request has been merged.
DECLINED if there are no open or merged pull requests, and at least one pull request has been declined.
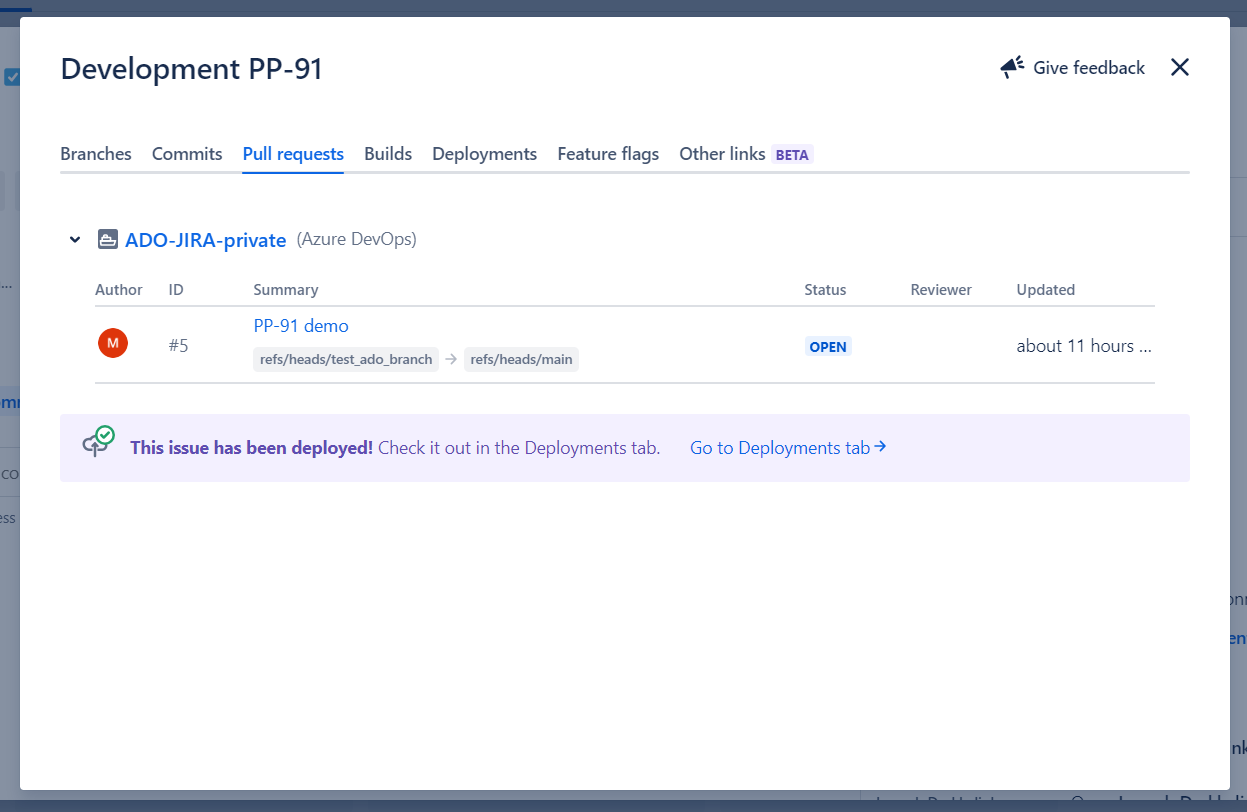
Click on the pull request(s) section to get more detailed information.

On the Development modal window, you will be redirected to the Pull Requests tab contains the following columns: Author, ID, Summary (includes related branches), Status, Reviewer (if present), and Updated (the time of last update).
Builds
Next to the number of build(s) you can see the status, which is:

if all the different builds (for example, unit tests, functional tests, deploy to staging) have passed.

if at least one run failed for any build by any linked build server.
Click on the builds section to get more details about this development activity.

On the Development modal window, you will be redirected to the Builds tab contains the following columns: Pipeline (pipeline responsible for building and deploying the code changes), Latest build, Test results, Last updated (time of the most recent update).

Deployments
Deployments are rendered in the Releases panel. Here you can see the status of the last deployment:
Cancelled;
Failed;
Successful;
Pending.
Click on the deployments section to get more details about this development activity.
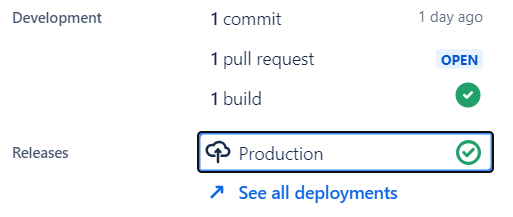
On the Development modal window, you will be redirected to the Deployments tab contains the following columns: Pipeline, Environment name, Deployment, Status, Last updated (time of the most recent update).

Also, you can navigate to all deployments by clicking on the button See all deployments in this project.
Demo
https://www.youtube.com/watch?v=AcnuyFaxg0s
Frequently asked security questions
Frequently asked security questions
Updated:
