

This guide explains how to create a branch in Azure DevOps directly from a Jira issue, without leaving Jira, using Azure DevOps for Jira.
This guide covers Azure DevOps Cloud. To create a branch in Azure DevOps Server (On-Premises), see Creating Azure DevOps (On-Premises) Branches from Jira instead.
Before you begin
Make sure you have:
-
Access to view the Jira work item you want to branch from.
-
The Create branch permission on the Azure DevOps repository you'll be branching in. This is an Azure DevOps permission, not a Jira one, so it's controlled by your Azure DevOps access level and repository permissions rather than anything in Jira.
-
If you plan to connect with a Personal Access Token rather than signing in, a PAT with Code (Write)scope.
Creating a branch this way uses your own Azure DevOps identity. Nobody else's access is affected, and no separate admin setup is needed beyond your admin having connected the relevant Azure DevOps project to Jira.
Step 1. Open Create branch on a Jira work item
-
Open the Jira work item you want to branch from.
-
Expand the Azure DevOps section on the work item.
-
Select Create branch.
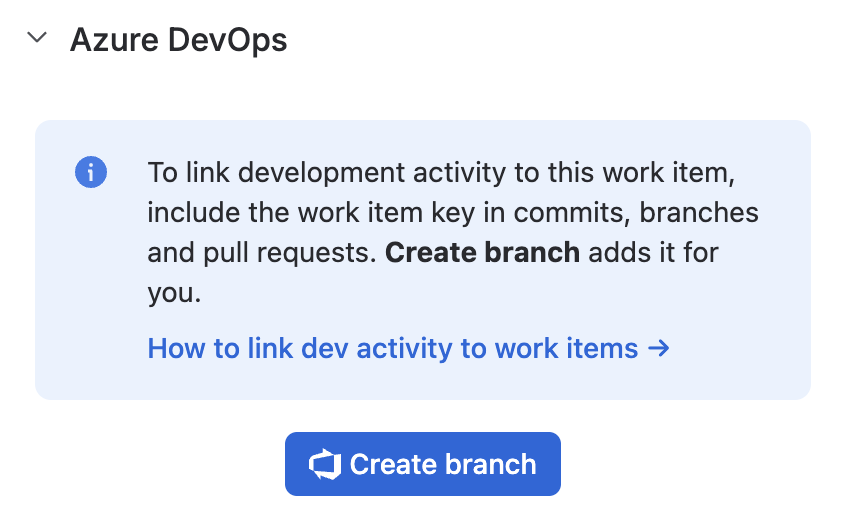
The info banner explains why the branch name matters: Create branch automatically includes the work item's key in the branch name, which is what links the branch, and anything committed to it, back to this work item.
If your admin hasn't connected the relevant Azure DevOps project to Jira yet, you'll see a message about it here instead of the Create branch button. Only a Jira admin can complete that step.
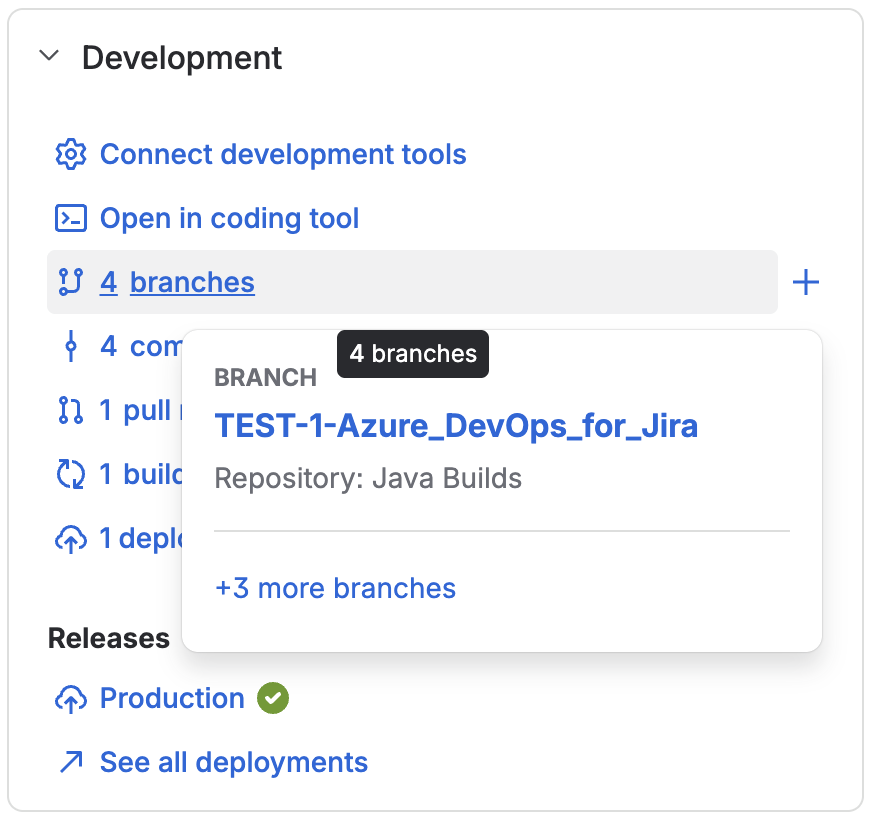
You might also notice a small + icon next to "branches" in the work item's standard Development panel, with a "Create new branch" tooltip. This is a generic Jira feature unrelated to branch creation in Azure DevOps for Jira.
Step 2. Connect your Azure DevOps account
The first time you create a branch, you'll be asked to connect your Azure DevOps account. You only need to do this once. There are two ways to do it - pick whichever applies to you.
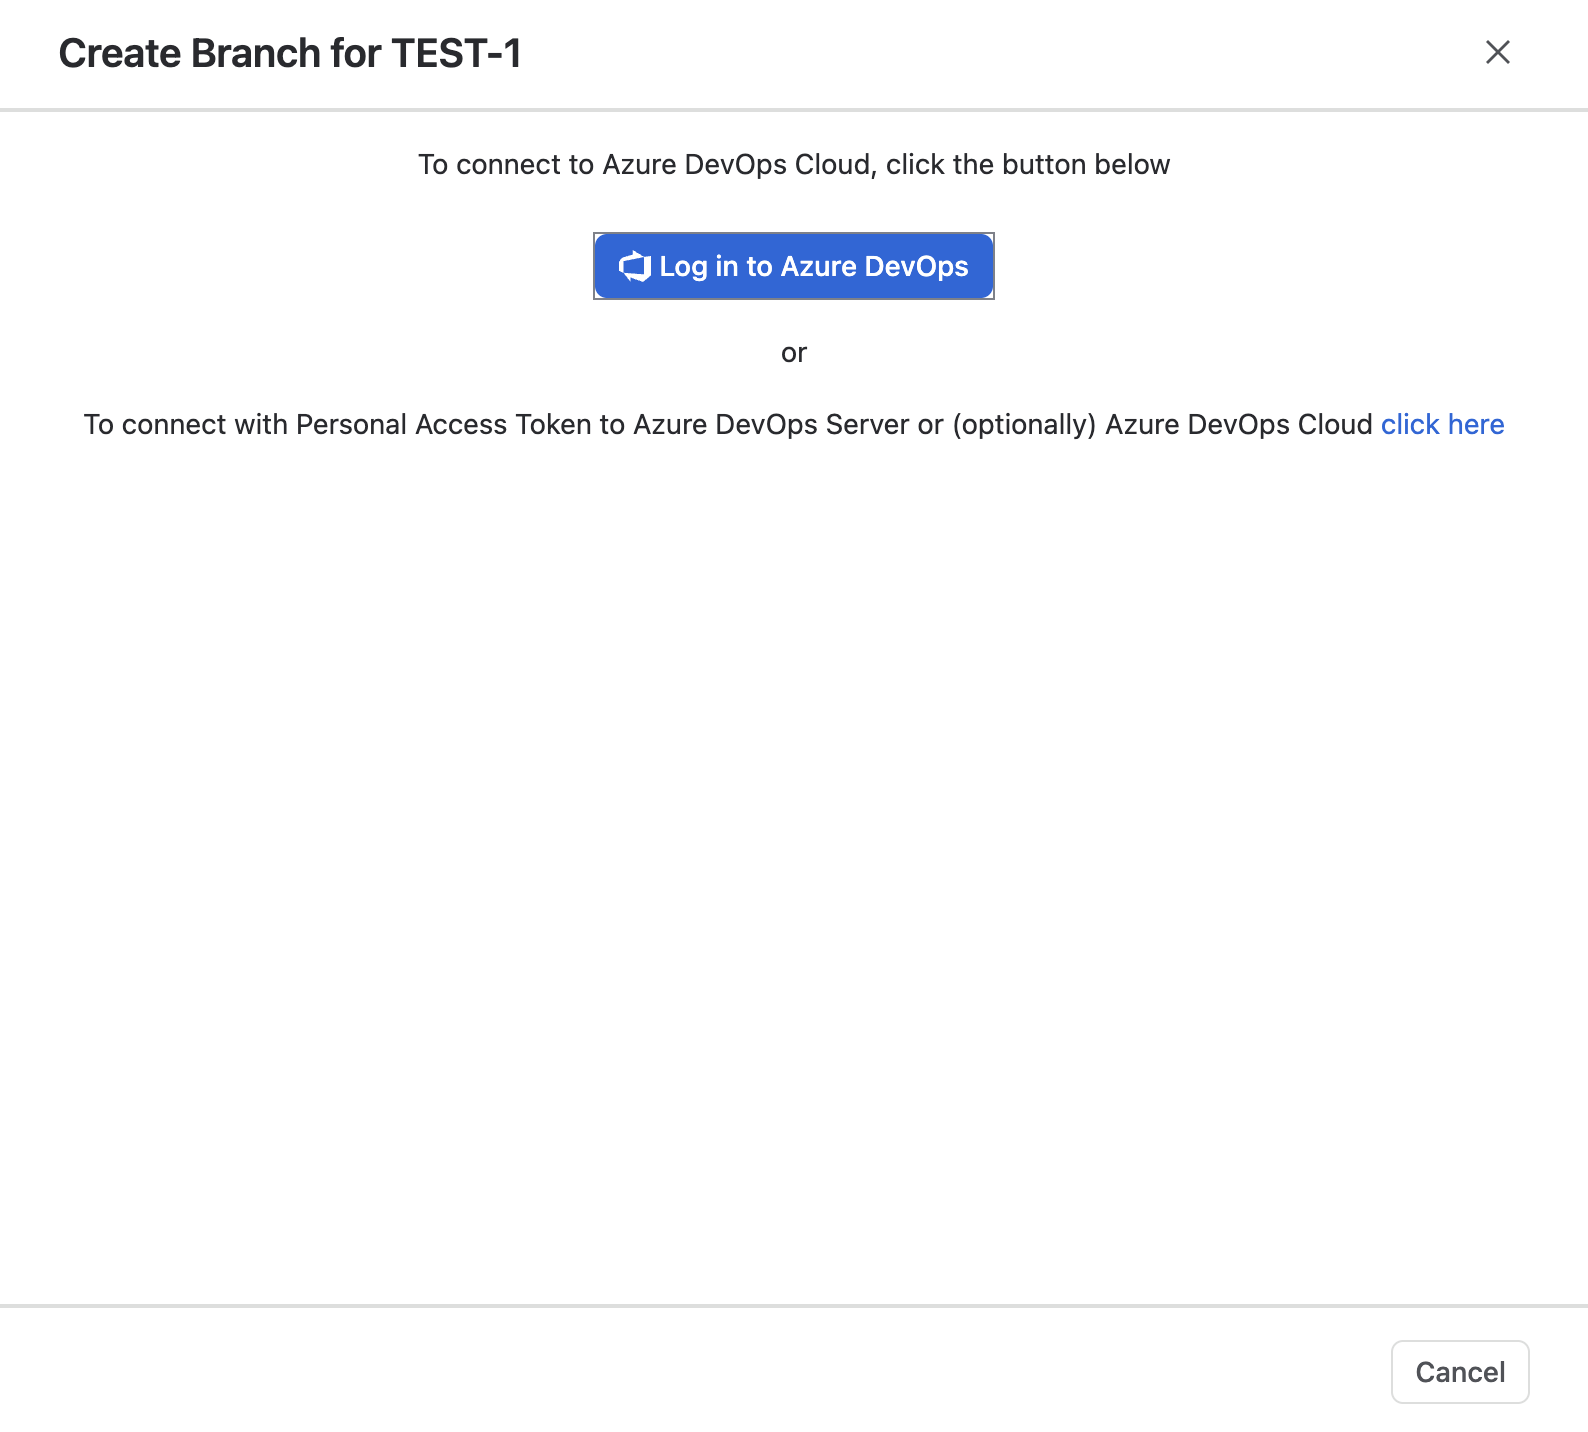
Sign in with Azure DevOps Cloud
Select Log in to Azure DevOps.
This opens Atlassian's own permission screen next, telling you Azure DevOps needs additional access to your account. Select Configure access to continue.

This leads to Atlassian's consent screen, confirming which account you're connecting and which external site you'll be redirected to. Check the domain shown matches Microsoft's login, then select Continue.
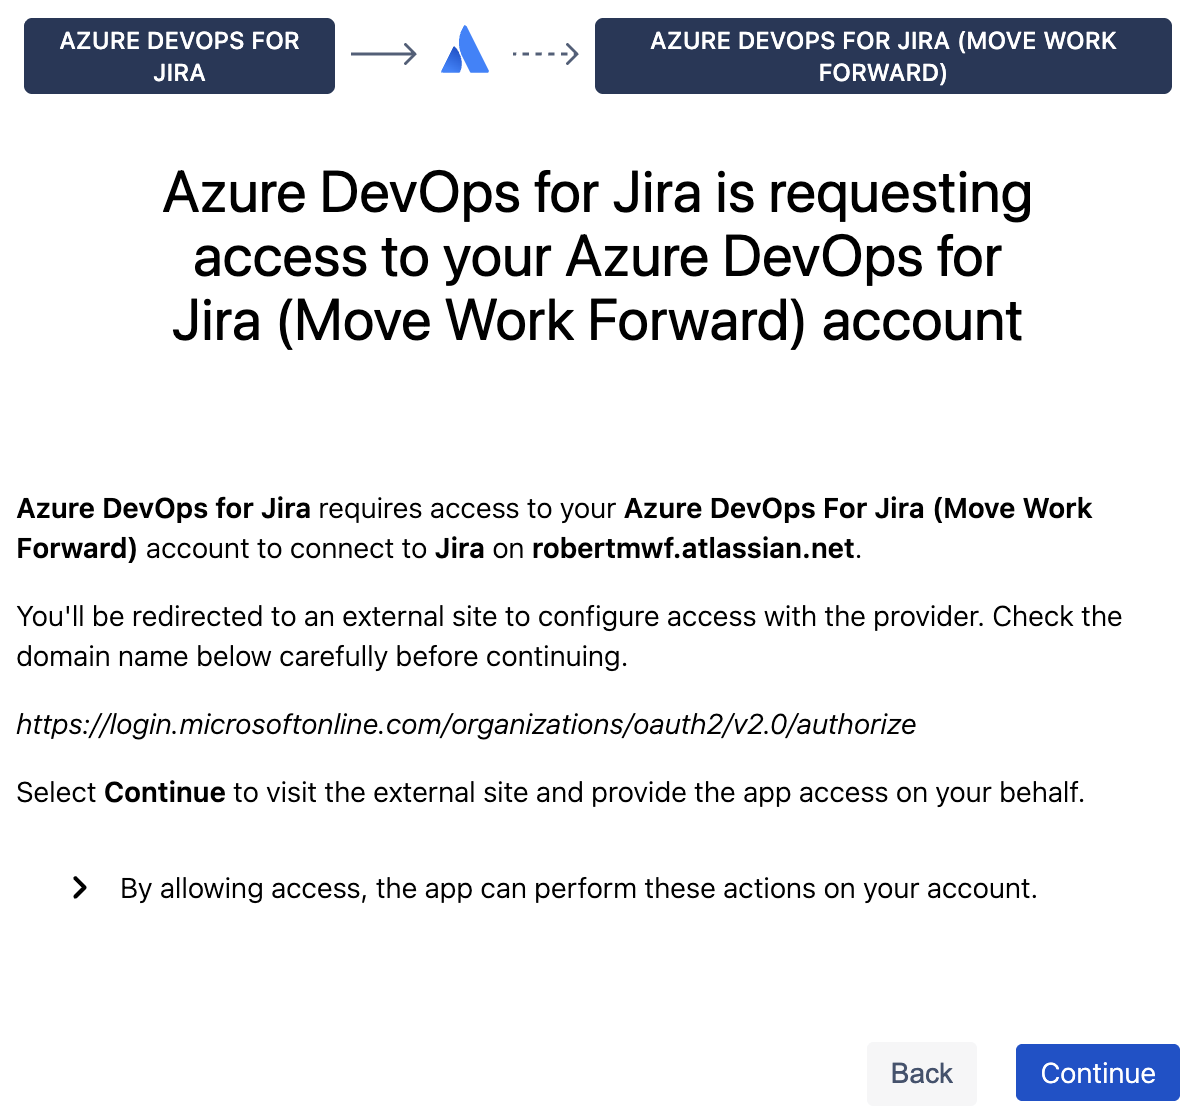
Once you select Continue, the connection is complete and you're ready to create a branch.
Use a Personal Access Token instead
If you'd rather not sign in, select click here next to "To connect with Personal Access Token to Azure DevOps Server or (optionally) Azure DevOps Cloud."

Turn on Is Cloud PAT?, then enter your PAT and your Azure DevOps organisation name. The token needs Code (Write) access.
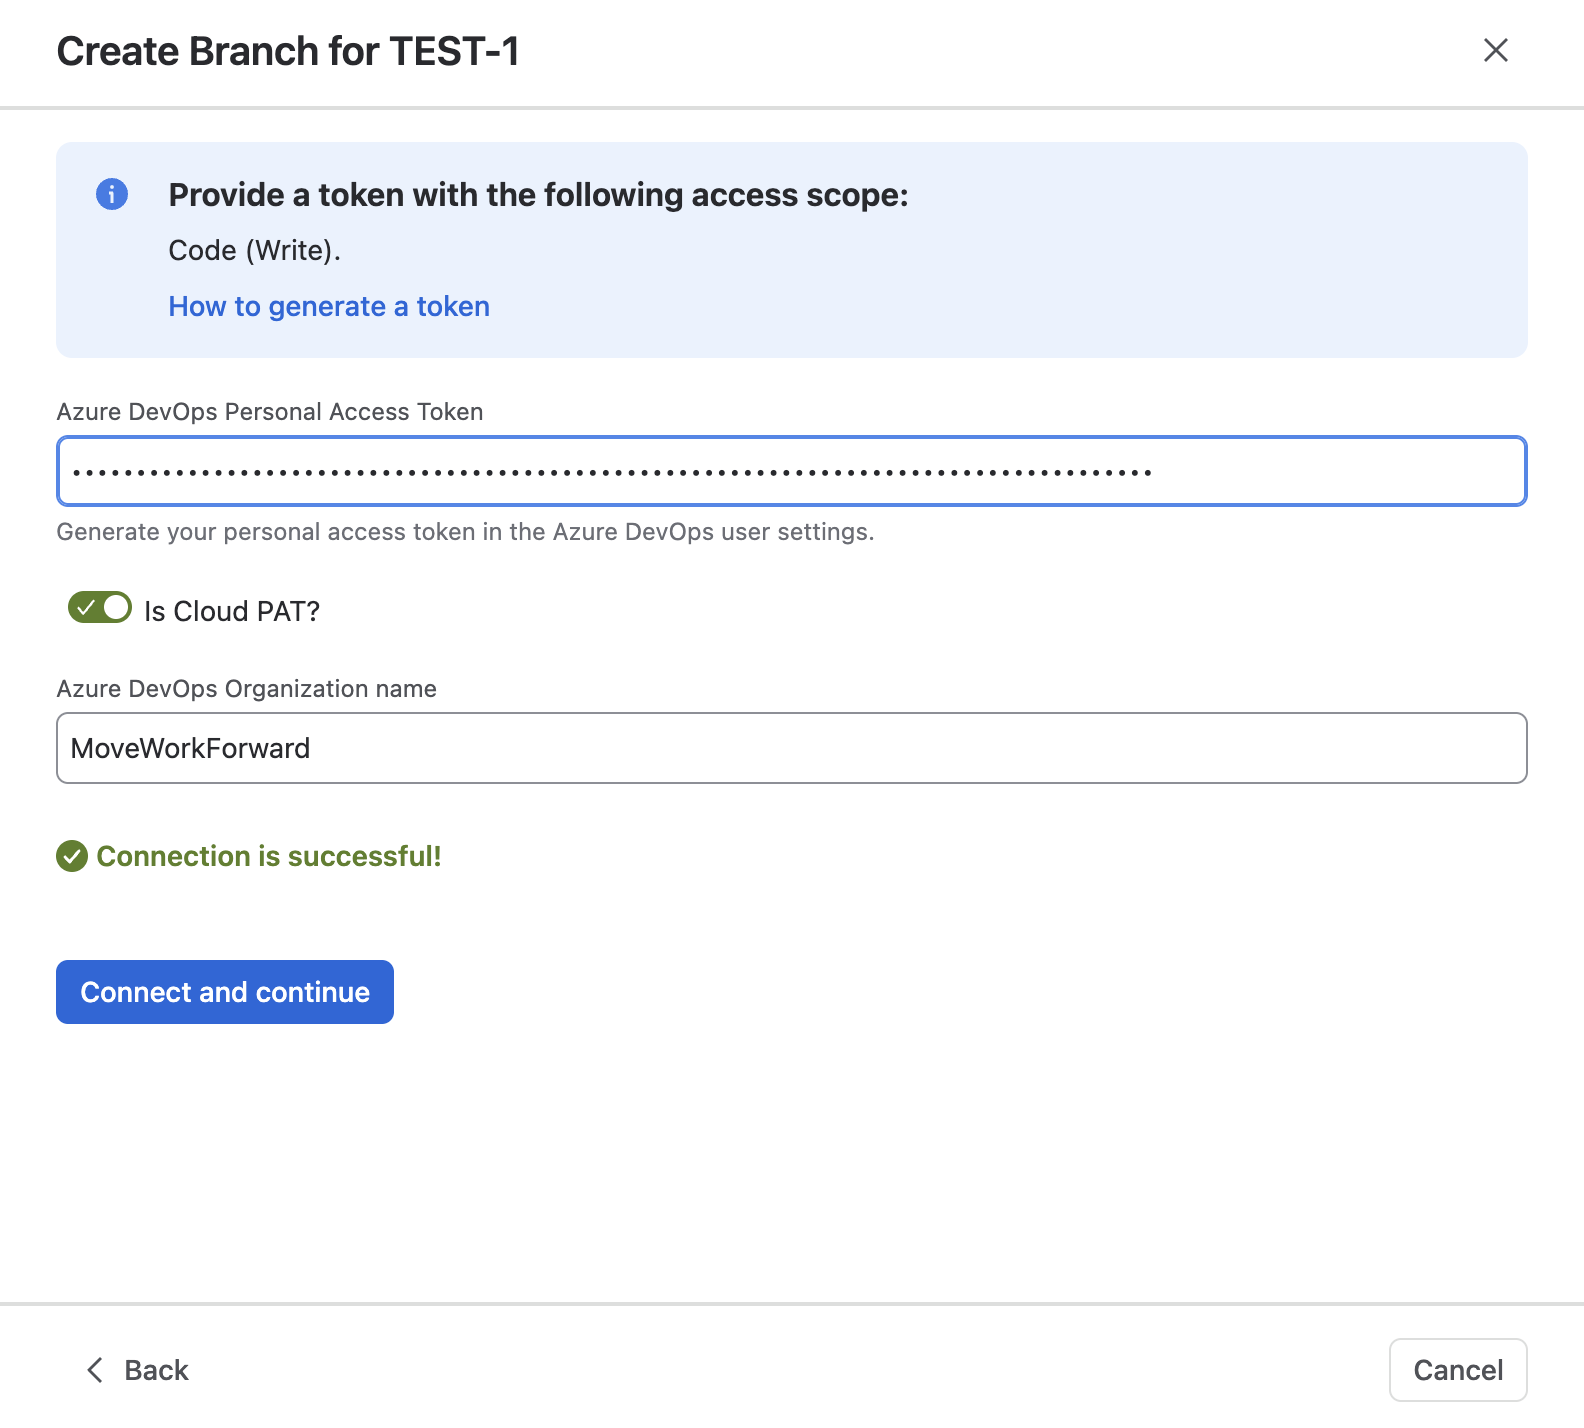
Once it validates, a green Connection is successful! message confirms you're good to go before Connect and continue becomes selectable.
Step 3. Fill in the branch details and create
This all happens on one screen, titled Create Branch for [work item key]:
-
Select the Organization.
-
Select the Project.
-
Select the repository.
-
Select the parent branch to create from.
-
Check the Branch name field. It's filled in automatically from the work item's key and summary, with spaces in the summary replaced by hyphens - for example, a work item
TEST-1titled "Test 1" pre-fills asTEST-1-test-1. Edit it if you'd prefer something different. -
Select Create.
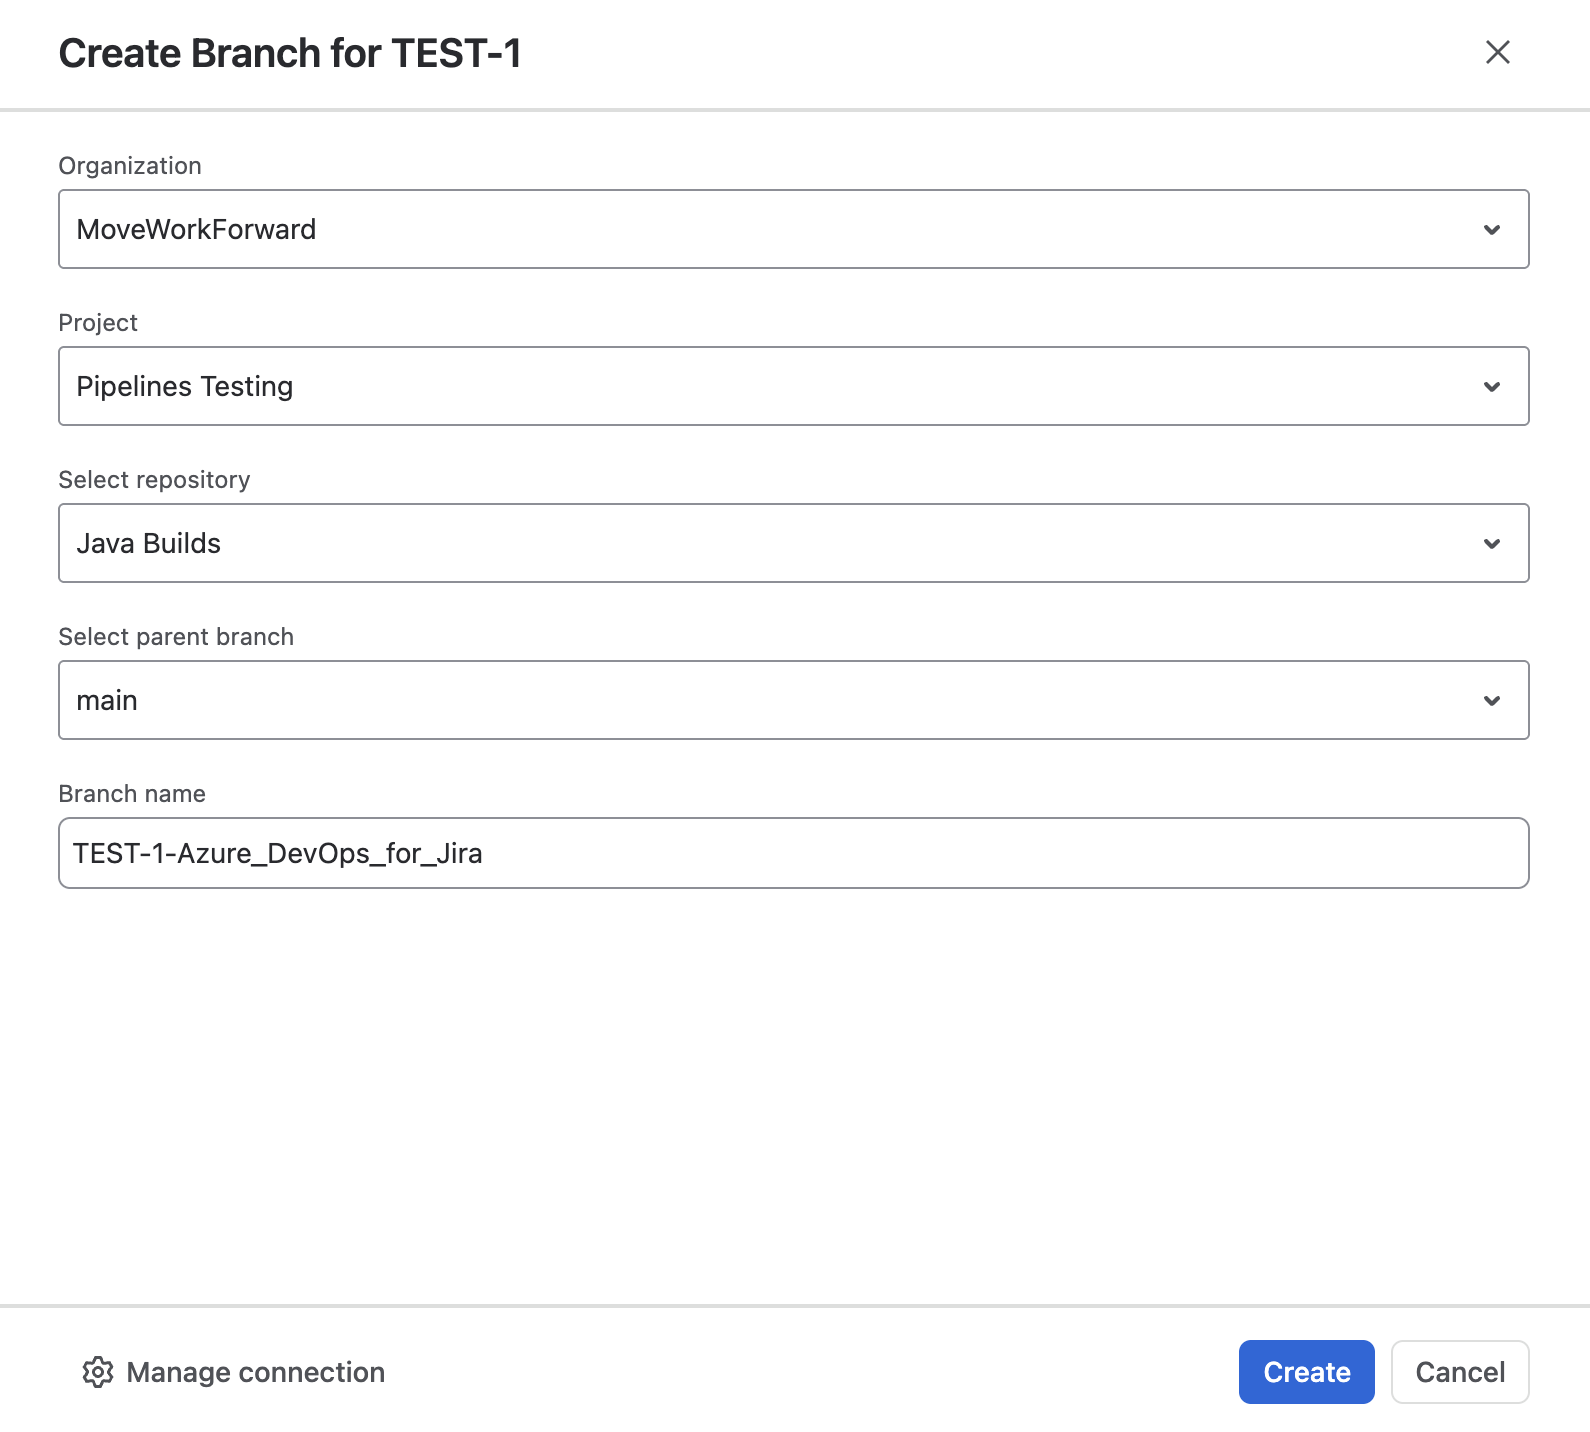
If the project you pick isn't connected to Jira yet, you'll see a prompt about it here instead of being able to continue. Ask a Jira admin to connect it first.
Once created, you'll see a confirmation with a link to view the new branch directly in Azure DevOps.

The new branch also appears right away in the work item's standard Development panel, alongside its commits, pull requests, builds, and deployments.
Managing your connection
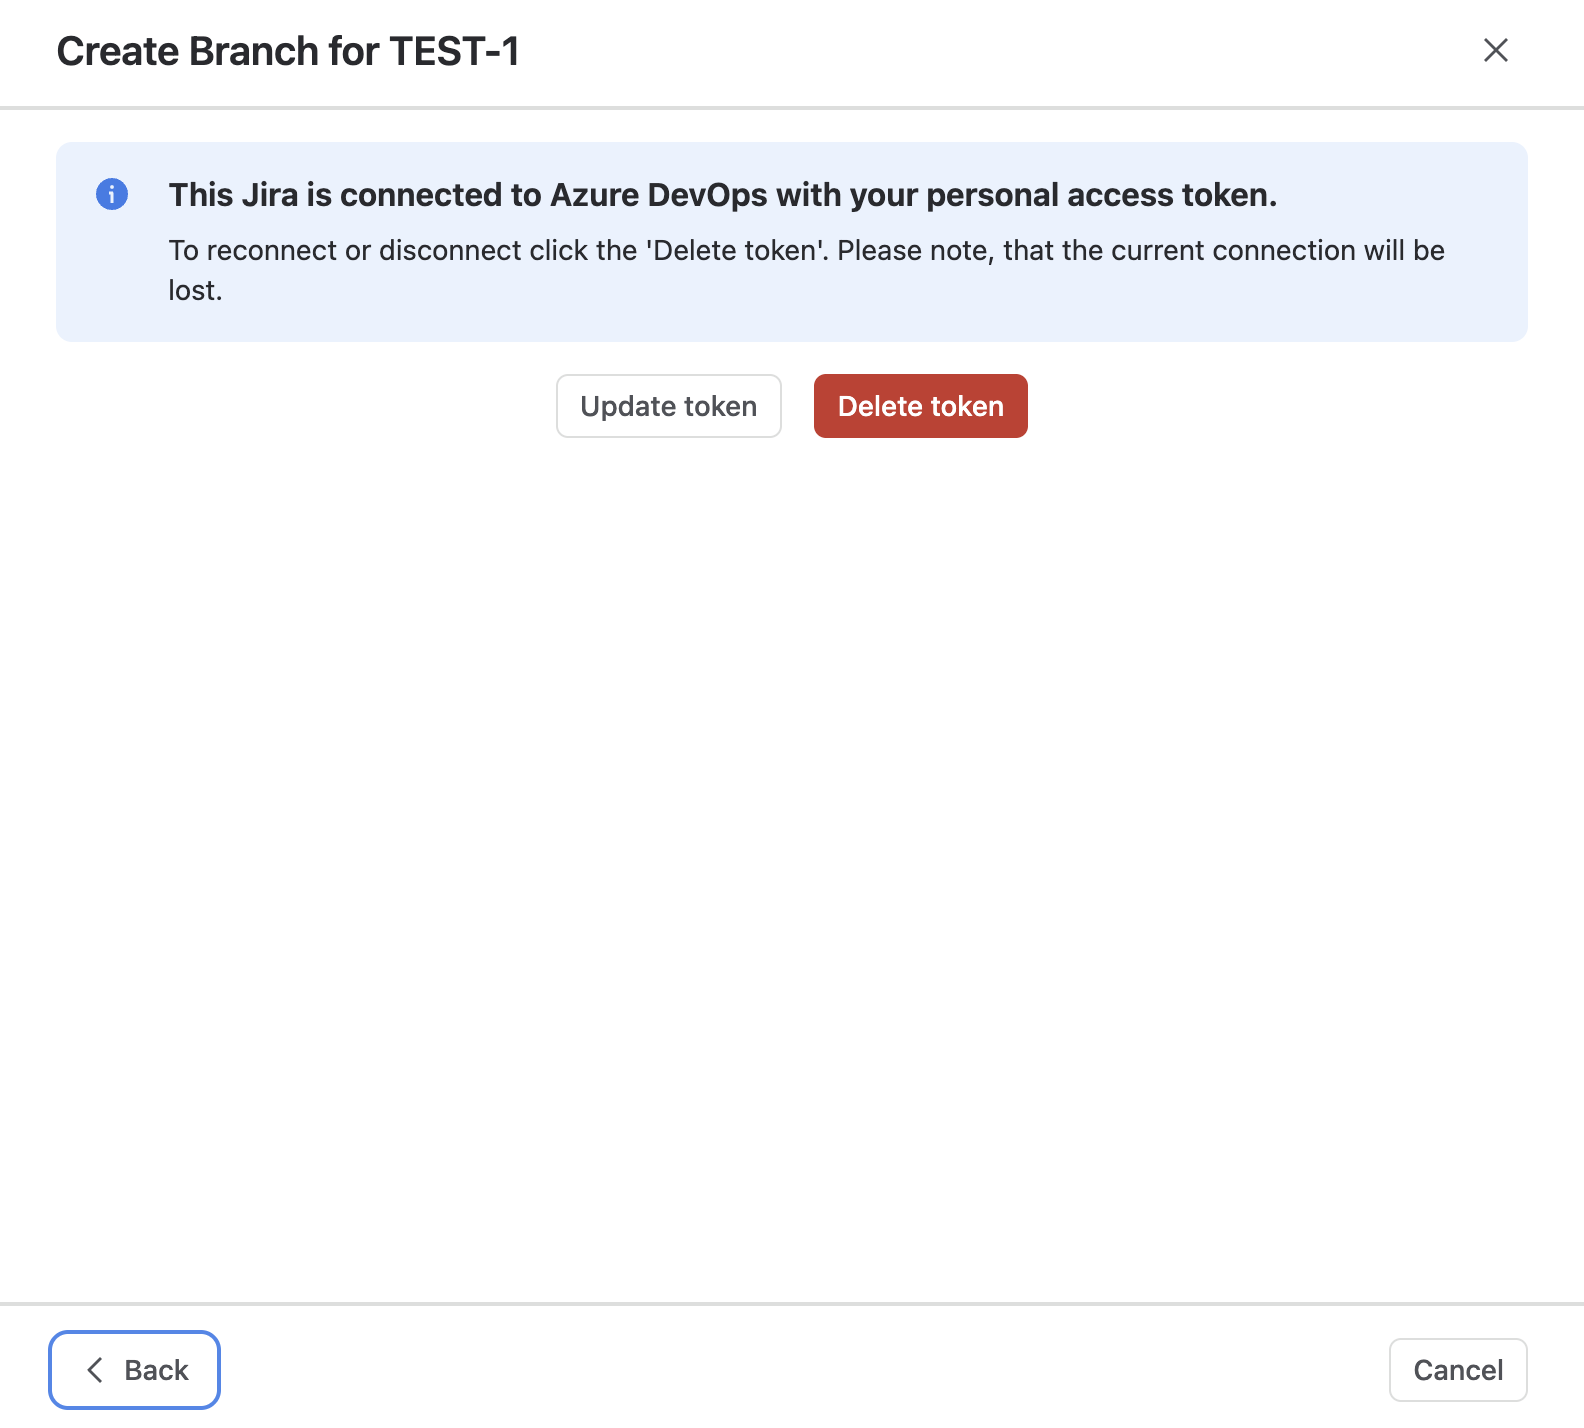
Select Manage connection at the bottom of the Create Branch screen to update or remove how you're connected.
-
If you connected by signing in, this screen can't revoke that access on its own, since it was granted through your Atlassian account rather than stored by this app directly. It tells you so directly, and gives you a button straight to the right place: Open Atlassian connected apps.
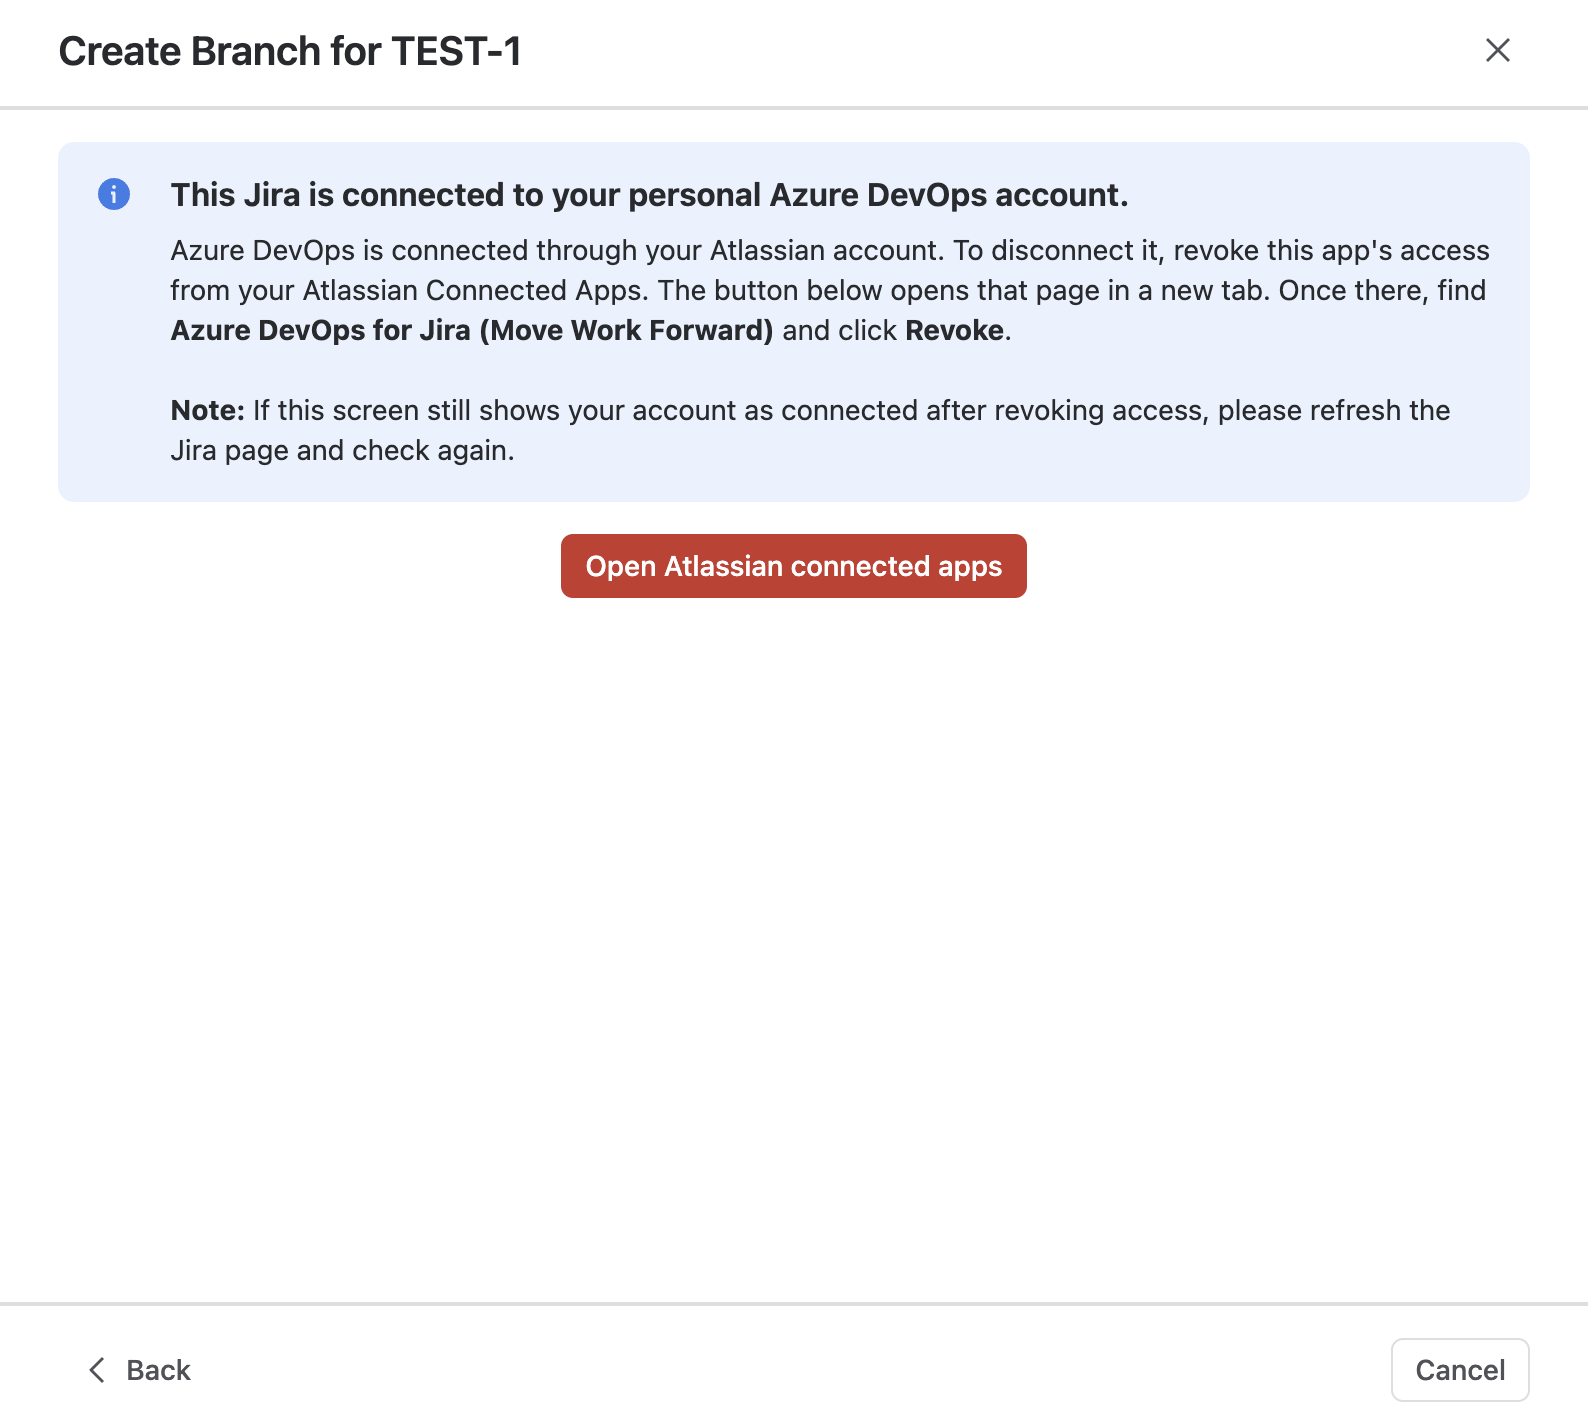
Search for Azure DevOps for Jira (Move Work Forward) and select Revoke.

If the screen still shows you as connected right after revoking, refresh the Jira page and check again.
-
If you connected with a Personal Access Token, you can update it here, or delete it to disconnect. Deleting it loses the current connection.
If you see "No access to Azure DevOps"
If your connection breaks - for example, if you (or someone else) revoke access from the Atlassian connected apps page above - the Create Branch screen shows this instead of letting you continue. The organisation, project, and branch fields stay visible but greyed out with loading errors, and Create is disabled.
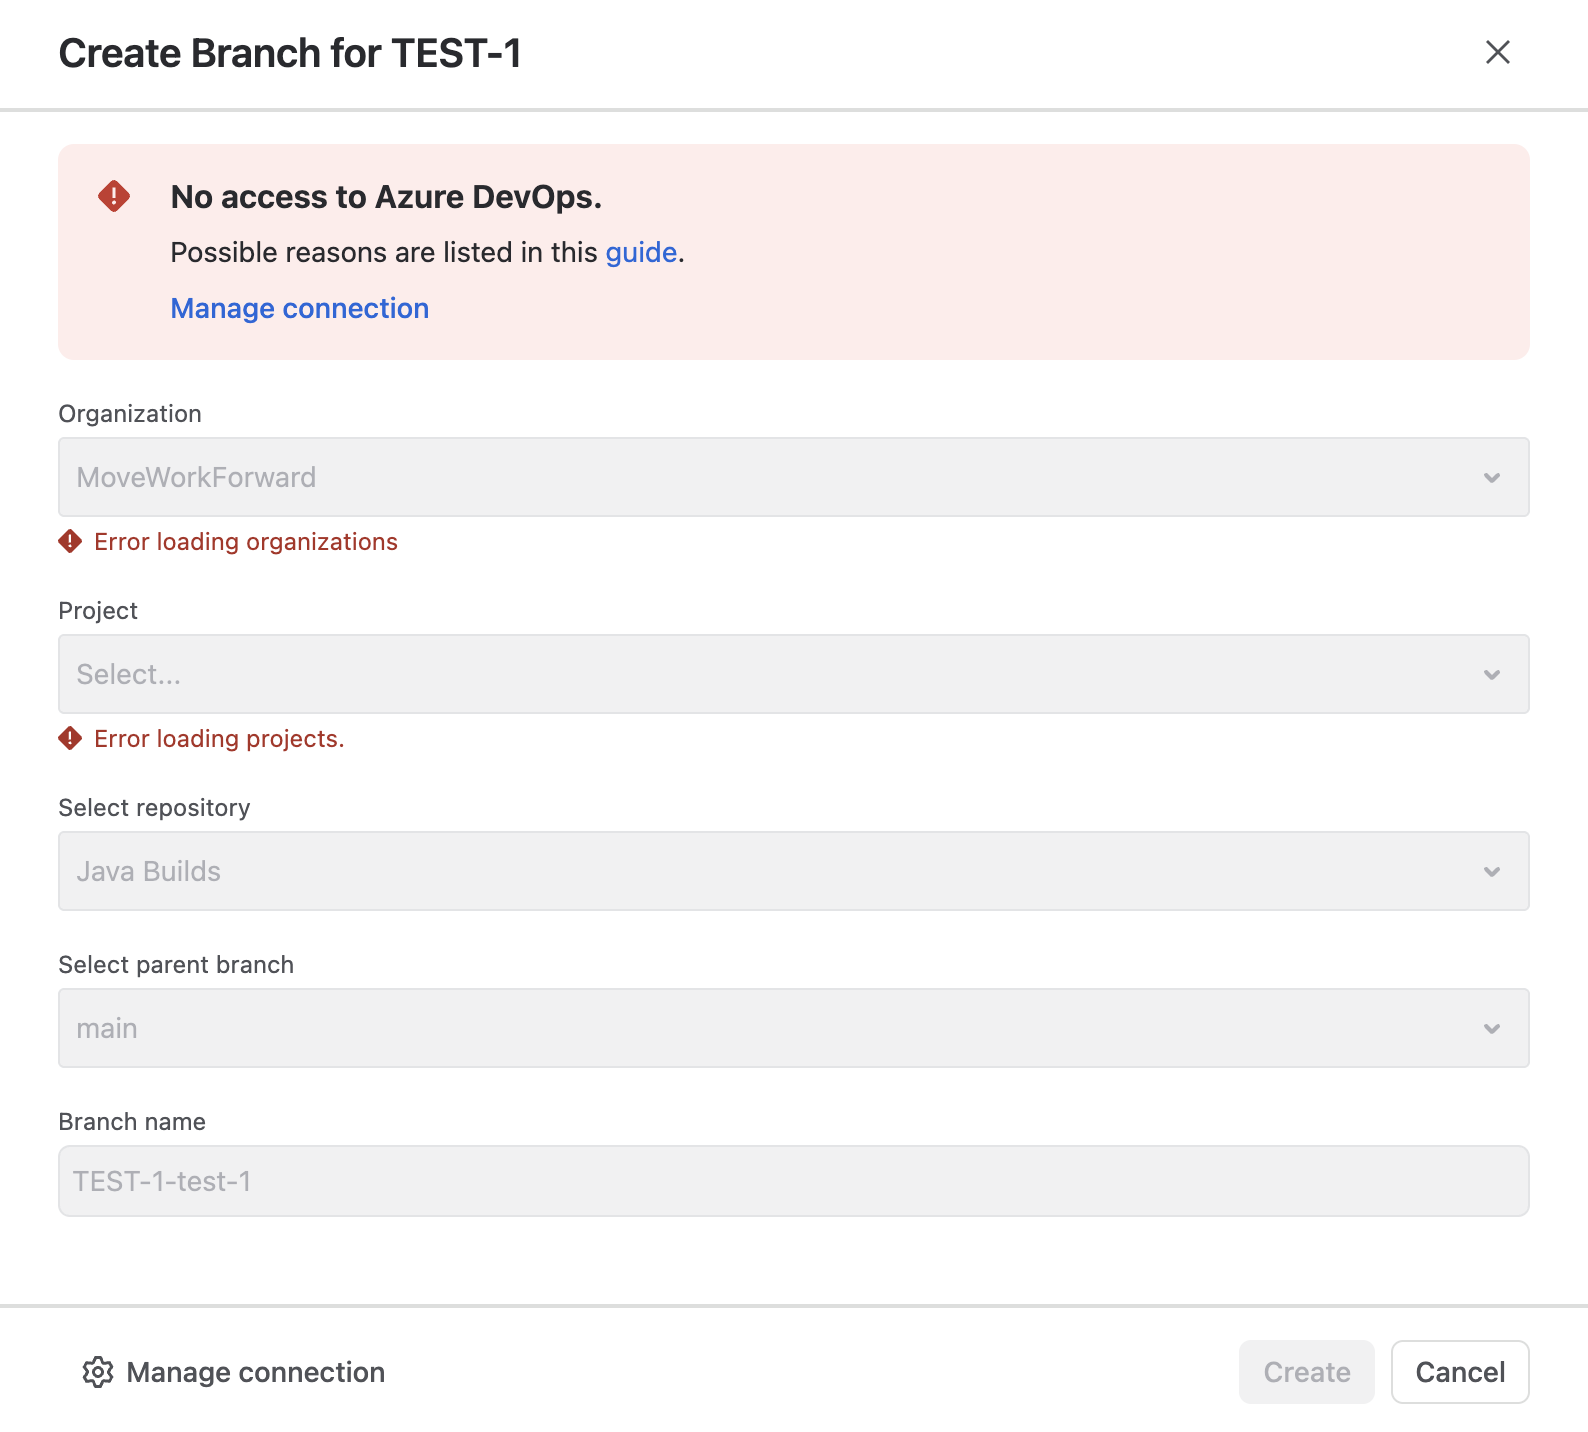
Select Manage connection (either the link in the error banner or the one at the bottom of the screen) to reconnect. For other causes of this same error - an expired token, a missing permission, or an unreachable on-premises server - see How to fix "No access to Azure DevOps" error when creating a branch?.
Related guides
Updated: August, 2026