

To set up notifications to be sent to the Microsoft Teams channel using 1-way integration you have to generate an Incoming Webhook URL for a particular Microsoft Teams channel.
Learn more in this guide: Notifications to the Microsoft Teams channels
Please note, due to the upcoming retirement of Incoming Webhook connector in Microsoft Teams, you must use the Workflows Microsoft Teams app to generate webhook URLs to receive notifications in Microsoft Teams channels.
Please follow this guide: How to create webhook URL with Workflows app?
Take into consideration the following deadlines:
-
August 15th, 2024: All new Incoming Webhook URLs creation will be blocked;
-
December 31st, 2024: All created Incoming Webhook URLs will stop working.
Generate Incoming webhook URL
To generate an Incoming webhook in Microsoft Teams, follow these steps:
-
Open Microsoft Teams and navigate to the channel where you want to add the Incoming webhook.
-
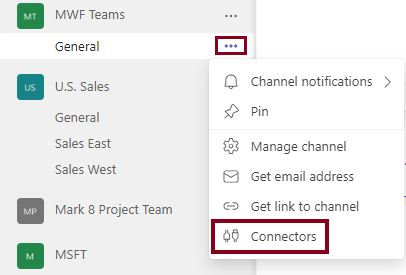
Click on the three dots (...) next to the channel's name and select Connectors from the dropdown menu.
-
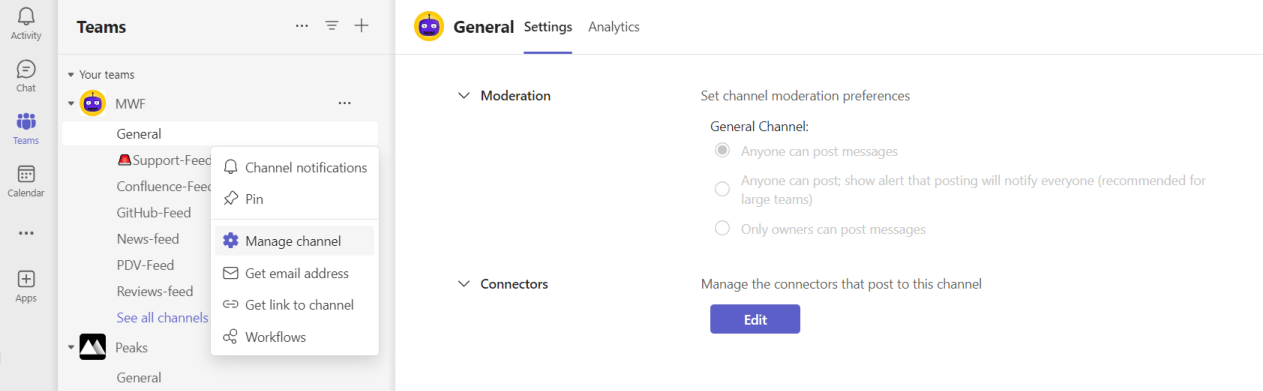
If you use the updated version of Microsoft Teams you should go to Manage channel section and click on Edit next to Connectors.
-
-
In the Connectors window, search for "Incoming Webhook" and click on it.
-
Click on the Configure button to add a new Incoming Webhook URL.

-
Give your webhook a name and, optionally, upload an icon for it.

-
Click on the Create button to create the incoming webhook.
-
Copy the webhook URL that is generated. This URL is unique to your webhook and will be used to send messages to a particular channel.
-
Click on the Done button to finish creating the incoming webhook.
In case the connector wasn’t added to the particular channel before instead of the button Configure you will see the button Add. Add the connector to the channel and repeat all the steps from points 4-8.
Once Incoming Webhook URL is generated, you can:
-
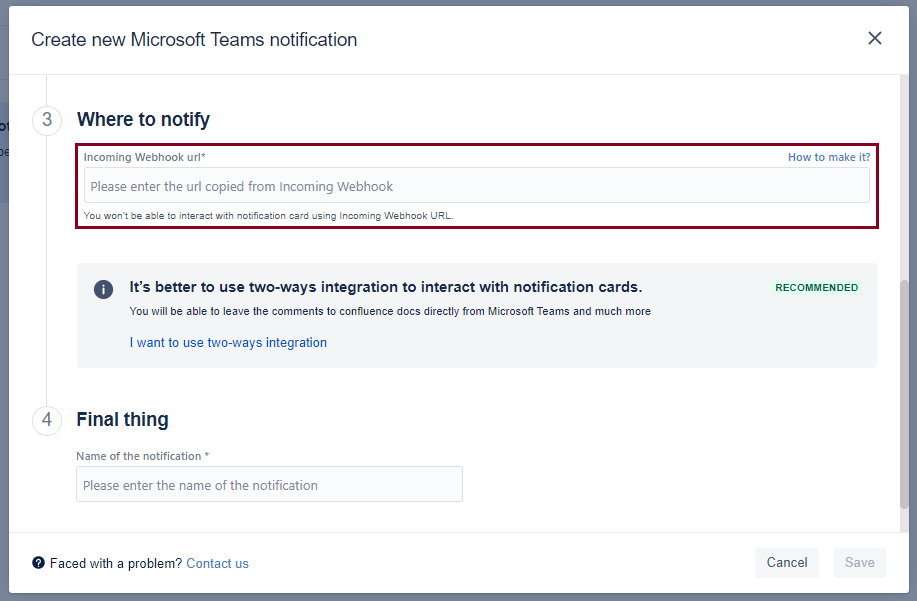
insert it straight into Where to notify section (notification rule creation modal window) to use 1-way integration.
-
save it for other team members on the Managed URLs tab on the Global Configuration page (only for Jira admins)
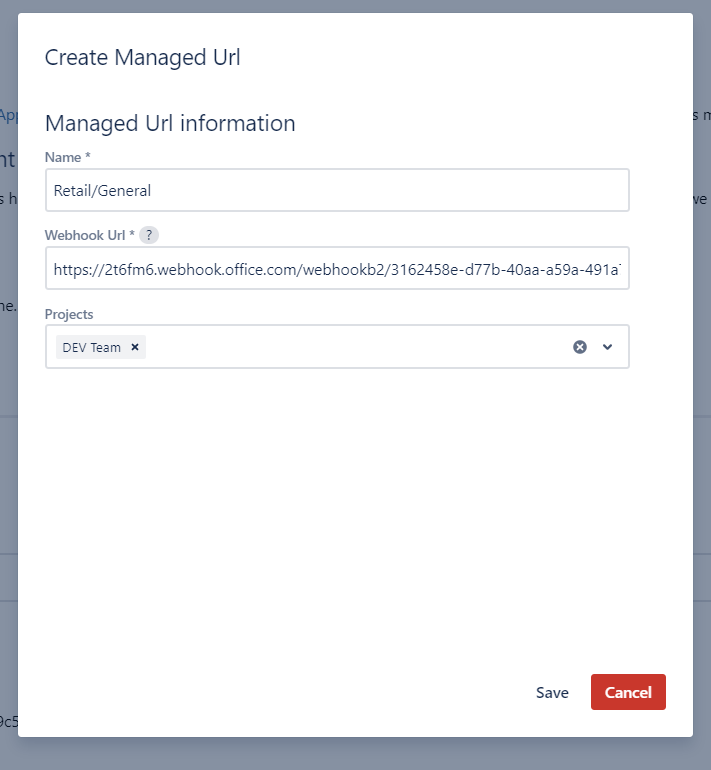
Managed Webhook URLs
With Webhook URLs management, you can configure named Microsoft Teams Incoming Webhook URLs and optionally restrict them to particular Jira projects.
Please note, the Webhook URLs management is available only for Jira administrators.
Managed URLs are useful for several reasons:
-
simplified Webhook URL creation;
-
you can identify URLs by name, which provides much more flexibility to administer;
-
restrictions by the Jira project enable your project admins to use them without asking for a new URL.
For instance, you can create a URL for the Customer Success team and permit them to use it only by the Customer Success Jira project. It means that during the notification rule creation in Where to notify section this URL will be avaible only for Customer Success project.
To create a new Managed Url follow these steps:
-
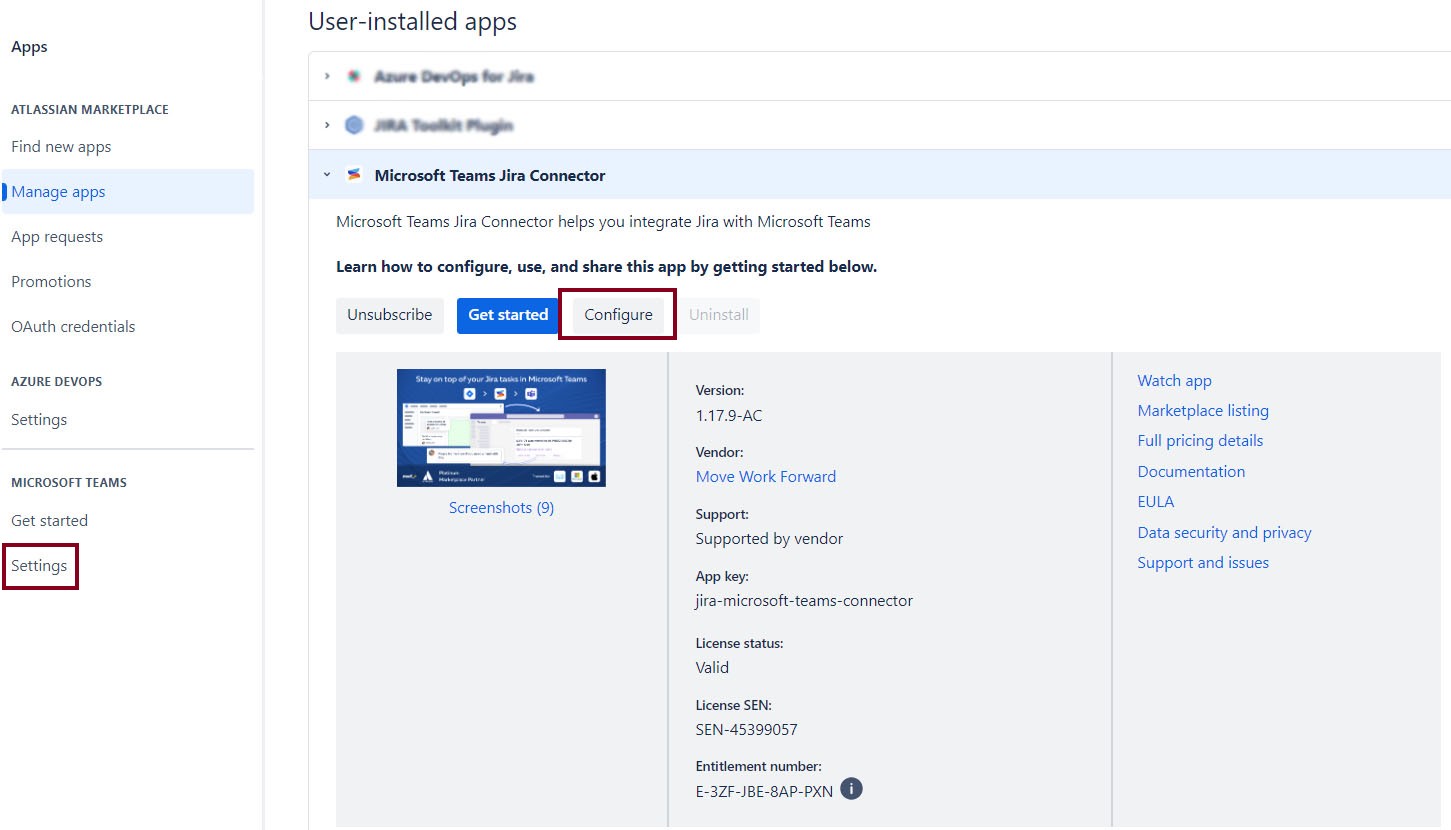
On the global navigation menu click on Apps and select Manage Apps section.
-
Find our app in Manage apps section or Microsoft Teams section in the left-hand sidebar.
-
Click on Settings or Configure button to navigate to Global Configuration page.
-
On the Global configuration page go to Managed URLs tab.
-
Click on Create URL button.
-
Insert the Incoming Webhook URL you generated (see the instruction above) and indicate the rest parameters.
-
Click on Save. To use this Webhook URL you need to switch on the toggle Use Managed URL and select the URL you need from the dropdown below.

Important: The restriction by project for a particular Incoming Webhook URL works only on project level. On Global level Jira admin can use all created Webhook URLs.
Get started guide for Jira administrator
Updated: