

Connect Advanced Microsoft Teams Connector for Jira to your Microsoft 365 tenant. Once connected, your team can start receiving notifications, creating discussion channels, and using the AI assistant.
1. Install the app
-
Log in to Jira as an Administrator
-
Go to Atlassian Marketplace and search for: "Advanced Microsoft Teams Connector for Jira"
-
Click Try it free.
-
Select the site where you want to install it and click Review.
-
Review the permissions and click Start Free Trial.
2. Open the Get Started page
-
Select the Settings (⚙️) icon in the top-right corner of Jira.
-
Select Marketplace apps.
-
In the left-hand navigation, expand Microsoft Teams.
-
Select Get Started.
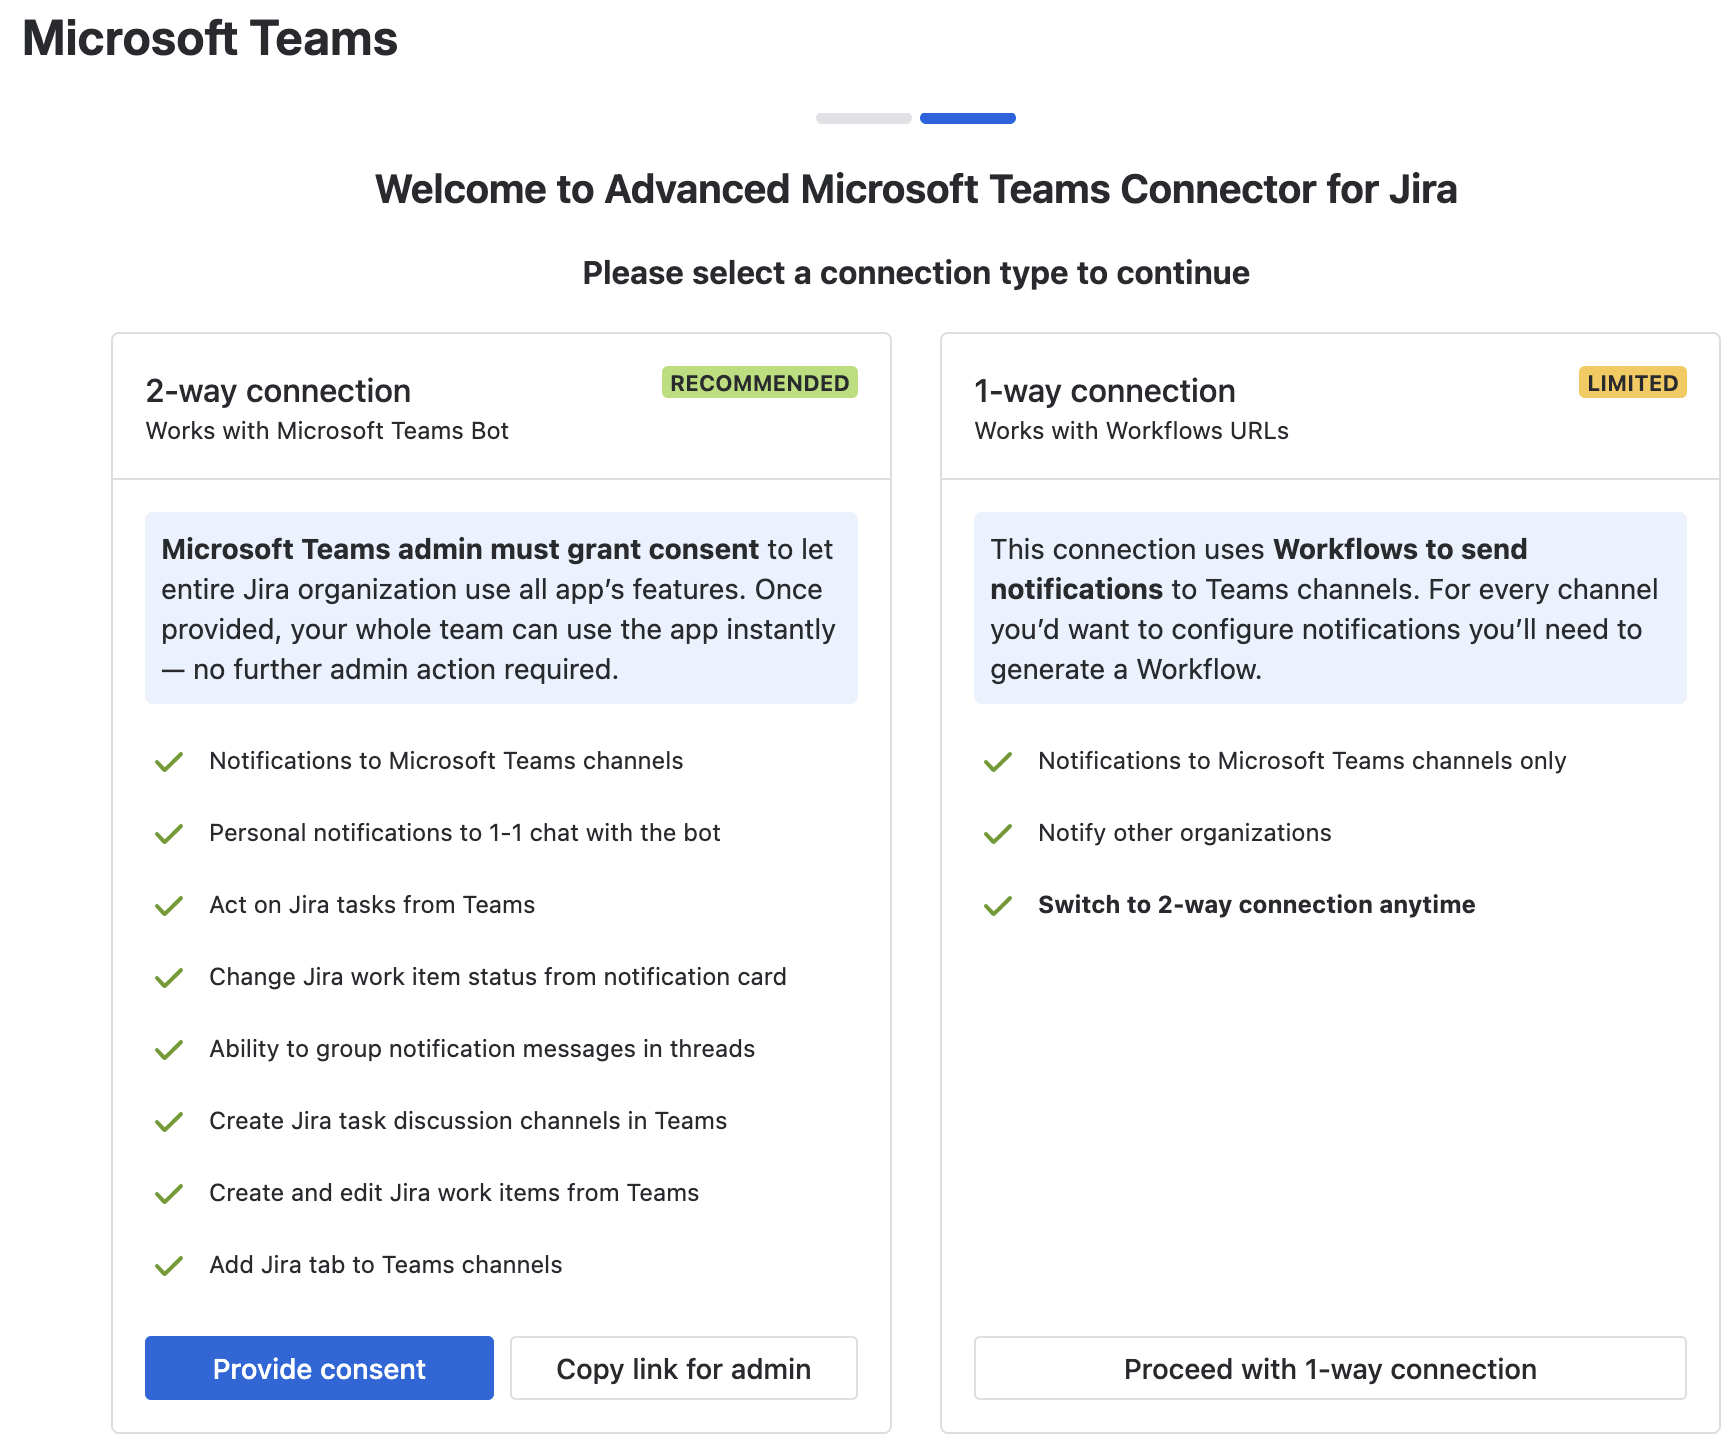
3. Grant Microsoft Teams admin consent
This is a one-time, tenant-wide authorization - it isn't tied to any one person's Microsoft account, and it only needs to be done once per Microsoft 365 tenant. Until it's granted, features that need the Microsoft Teams Bot (channel notifications, discussion channels, Jira tabs) stay unavailable across your whole organization.
-
Go to Marketplace apps > Microsoft Teams > Global Settings. If you're logged in to Microsoft Teams but consent hasn't been granted yet, a banner reading "Teams admin consent is required" appears there.
-
Click Provide consent. This takes whoever completes it through Microsoft's admin-consent screen - any tenant administrator can do this, not necessarily the person who installed the app in Jira.
-
If someone else needs to grant it, use Copy link to send them the consent URL directly.
-
Use Check consent again once it's been granted elsewhere - the app also polls automatically for about 40 seconds after you return to the tab.
Full detail on what this consent covers, and how individual users get linked afterward, is in Connecting & Disconnecting Microsoft Teams.
What's next
-
Share the Getting Started Guide for Jira Users with your team.
-
Set up Global & Space Notifications so channels start receiving updates.
-
Review Security & Privacy to control which Teams tenants can connect.
Updated: