Features overview
Jigit - Jira GitHub & GitLab integration (Server & DC) ensures a seamless way to track and manage development activities directly from Jira. It provides integration between Jira and Git repositories hosted on platforms like GitHub, GitLab, Azure DevOps, and Gerrit Code Review.
Feature | Description | Configuration |
|---|---|---|
Commit indexation | Link Git commits to specific Jira issues and track them within the Jigit Development Panel on the issue view screen. | Enabled by default; to disable it select the Use Only for Development Panel when creating a new configuration. Learn more |
Pull-request indexation | Link pull/merge requests to specific Jira issues and track them within the Jigit Development Panel on the issue view screen. | To enable ensure that one of the properties is enabled when creating a new configuration:
|
Branch indexation | Link branches to specific Jira issues and track them within the Jigit Development Panel on the issue view screen. | To enable ensure that one of the properties is enabled when creating a new configuration:
|
Smart commits | Special commit messages that allow you to change the status of a Jira issue. | To enable, ensure that Smart commits is enabled and Smart commits period is indicated when creating a new configuration. Learn more |
Create branch | Initiate the feature branch creation within Jira. | To enable any of these functionalities, ensure that:
|
Link branch | Link an existing Git feature branch from your Git repository to the Jira issue. | |
Create code review | Initiate the code review creation within Jira. | |
Link code review | Link an existing Git code review from your Git repository to the Jira issue. | |
Webhooks | Bidirectional communication between the Jigit plugin and the Git system: updates come into the plugin as soon as the Git system sends the notification, and Jigit has a configuration that can handle it. | To configure, navigate to Global settings and select Enable webhook support. Learn more |
GitHub DependaBot alerts | Review and address GitHub DependaBot vulnerabilities directly from your project in Jira. | It can only be set on the Jira project-level configuration page within the Security configurations tab. Learn more |
GitHub Advanced Security integration | Review and address Azure DevOps GitHub Advanced Security vulnerabilities directly from your project in Jira. | It can only be set on the Jira project-level configuration page within the Security configurations tab. Learn more |
Gerrit code review integration | Link Gerrit changesets and reviews with your Jira issues. | To configure, navigate to the Gerrit tab on the global configuration page (available only for Jira administrators) and enable the integration. Learn more |
Activity report | View git activity reports in Jigit. | To view Git Activity reports in Jigit you need to setup it on the project level. |
Configuration details
Commit indexation
To disable Commit indexation, select the Use Only for Development Panel when creating a new configuration or editing the existing one:
Go to the app configuration page on the global or project level.
Navigate to the Configurations tab.
Click on Add new configuration or Edit for existing configuration.
Select the Use Only for Development Panel.
After specifying all the necessary parameters, click the Ok button to save it.
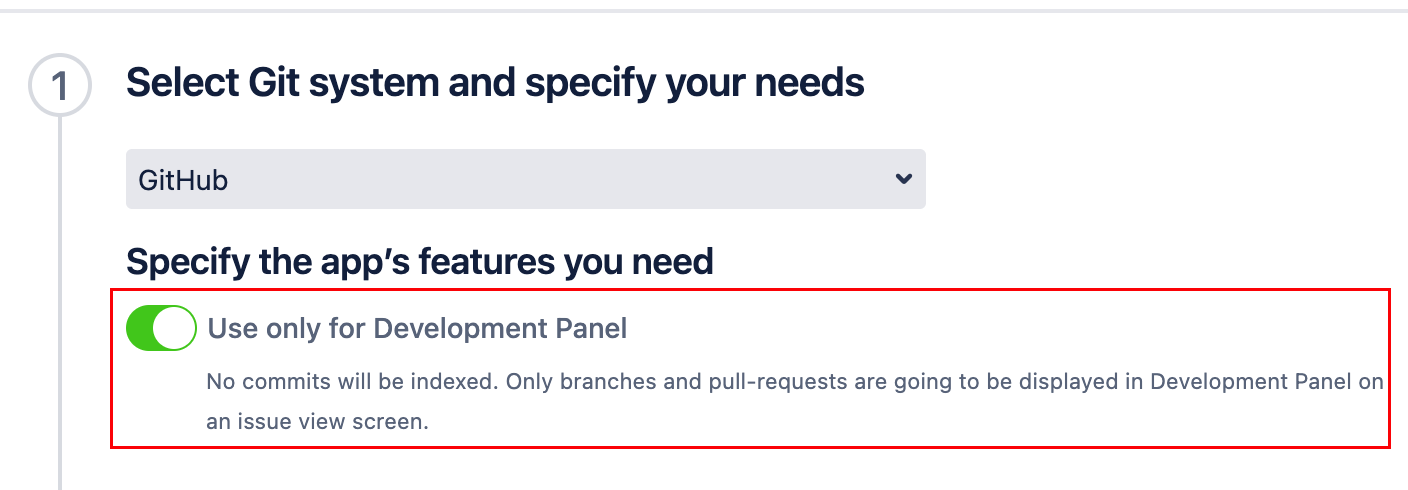
More information here: Jigit Configuration, Jigit Development Panel.
Pull-request indexation
To enable pull-request indexation, one of the following properties should be checked: Use only for Development Panel or Index pull-requests in repositories or Display repositories in the Development Panel.
Go to the app configuration page on the global or project level.
Navigate to the Configurations tab.
Click on Add new configuration or Edit for existing configuration.
Select the Use only for Development Panel or Index pull-requests in repositories or Display repositories in the Development Panel.
After specifying all the necessary parameters, click the Ok button to save it.

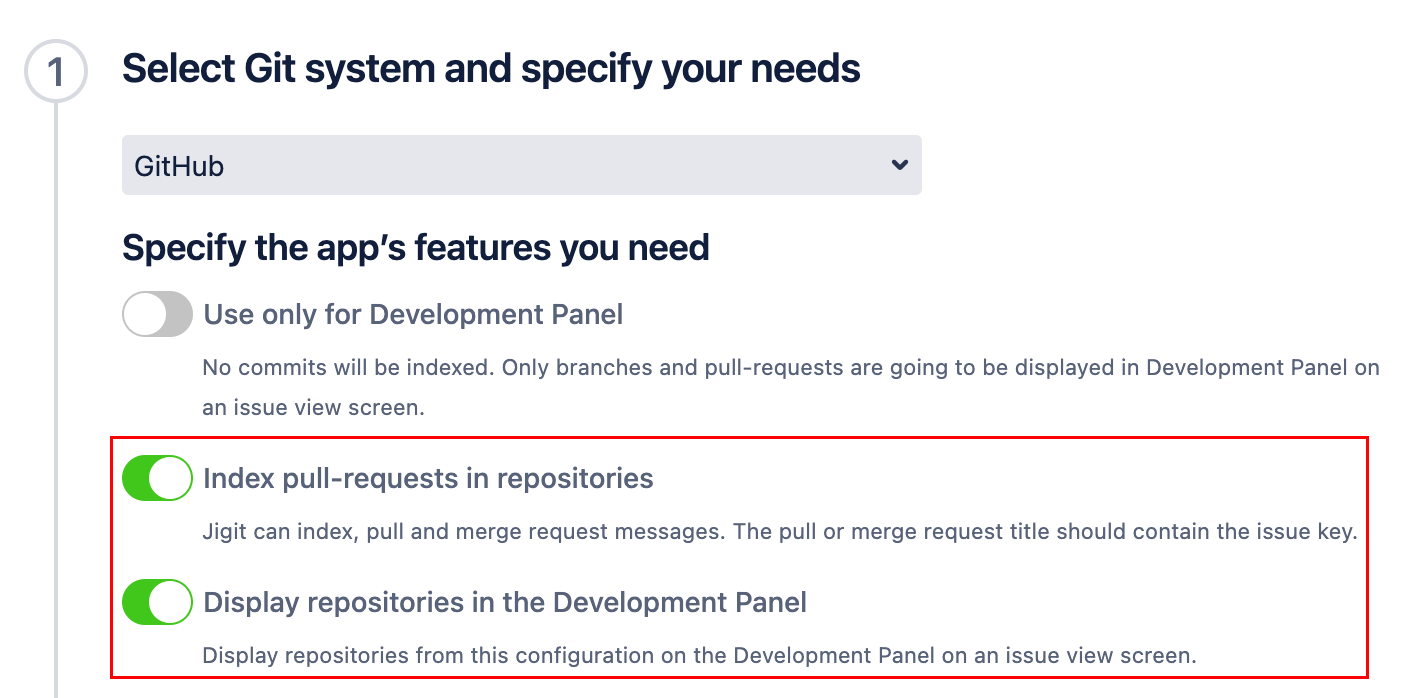
If it is selected Use only for Development Panel or Display repositories in the Development Panel, pull requests will be visible in the Jigit tab and the Jigit development panel on the Jira issue view screen:
.png?inst-v=85910a4c-ff03-4cf8-a26f-e717f0501436)
If it is selected Index pull-requests in repositories, pull requests will be visible along with commits in the Jigit tab on the Jira issue view screen :

More information here: Jigit Configuration, Jigit Development Panel.
Branch indexation
To enable, ensure that Use only for Development Panel or Display repositories in the Development Panel parameter is enabled when creating a new configuration or editing the existing one::
Go to the app configuration page on the global or project level.
Navigate to the Configurations tab.
Click on Add new configuration or Edit for existing configuration.
Select the Use only for Development Panel or Display repositories in the Development Panel.
After specifying all the necessary parameters, click the Ok button to save it.
.png?inst-v=85910a4c-ff03-4cf8-a26f-e717f0501436)
.png?inst-v=85910a4c-ff03-4cf8-a26f-e717f0501436)
More information here: Jigit Configuration, Jigit Development Panel.
Smart commits
To enable, ensure that Smart commits is enabled and Smart commits period is indicated when creating a new configuration or editing the existing one:
Go to the app configuration page on the global or project level.
Navigate to the Configurations tab.
Click on Add new configuration or Edit for existing configuration.
Select the Smart commits and specify the Smart commits period.
After specifying all the necessary parameters, click the Ok button to save it.
.png?inst-v=85910a4c-ff03-4cf8-a26f-e717f0501436)
.png?inst-v=85910a4c-ff03-4cf8-a26f-e717f0501436)
More information here: Jigit Configuration, Smart commits.
Create branch, Link branch, Create code review, Link code review
To enable any of these functionalities, the configuration should have Use only for Development Panel or Display repositories in the Development Panel selected, and the corresponding action should be chosen in the Jigit Development settings:
When creating a new configuration or editing the existing one:
Go to the app configuration page on the global or project level.
Navigate to the Configurations tab.
Click on Add new configuration or Edit for existing configuration.
Select the Use only for Development Panel or Display repositories in the Development Panel.
After specifying all the necessary parameters, click the Ok button to save it.
.png?inst-v=85910a4c-ff03-4cf8-a26f-e717f0501436)
.png?inst-v=85910a4c-ff03-4cf8-a26f-e717f0501436)
Enable necessary actions in the Jigit Development settings (available only for Jira administrators):
Go to the Global Configuration page.
Navigate to the Settings tab and click the Jigit Development.
Go to Enable actions for and select the actions you need.
.png?inst-v=85910a4c-ff03-4cf8-a26f-e717f0501436)
Webhooks
To enable Webhook support:
Go to the Global Configuration page.
Navigate to the Settings tab.
Enable Webhooks support and provide the Webhook secret.
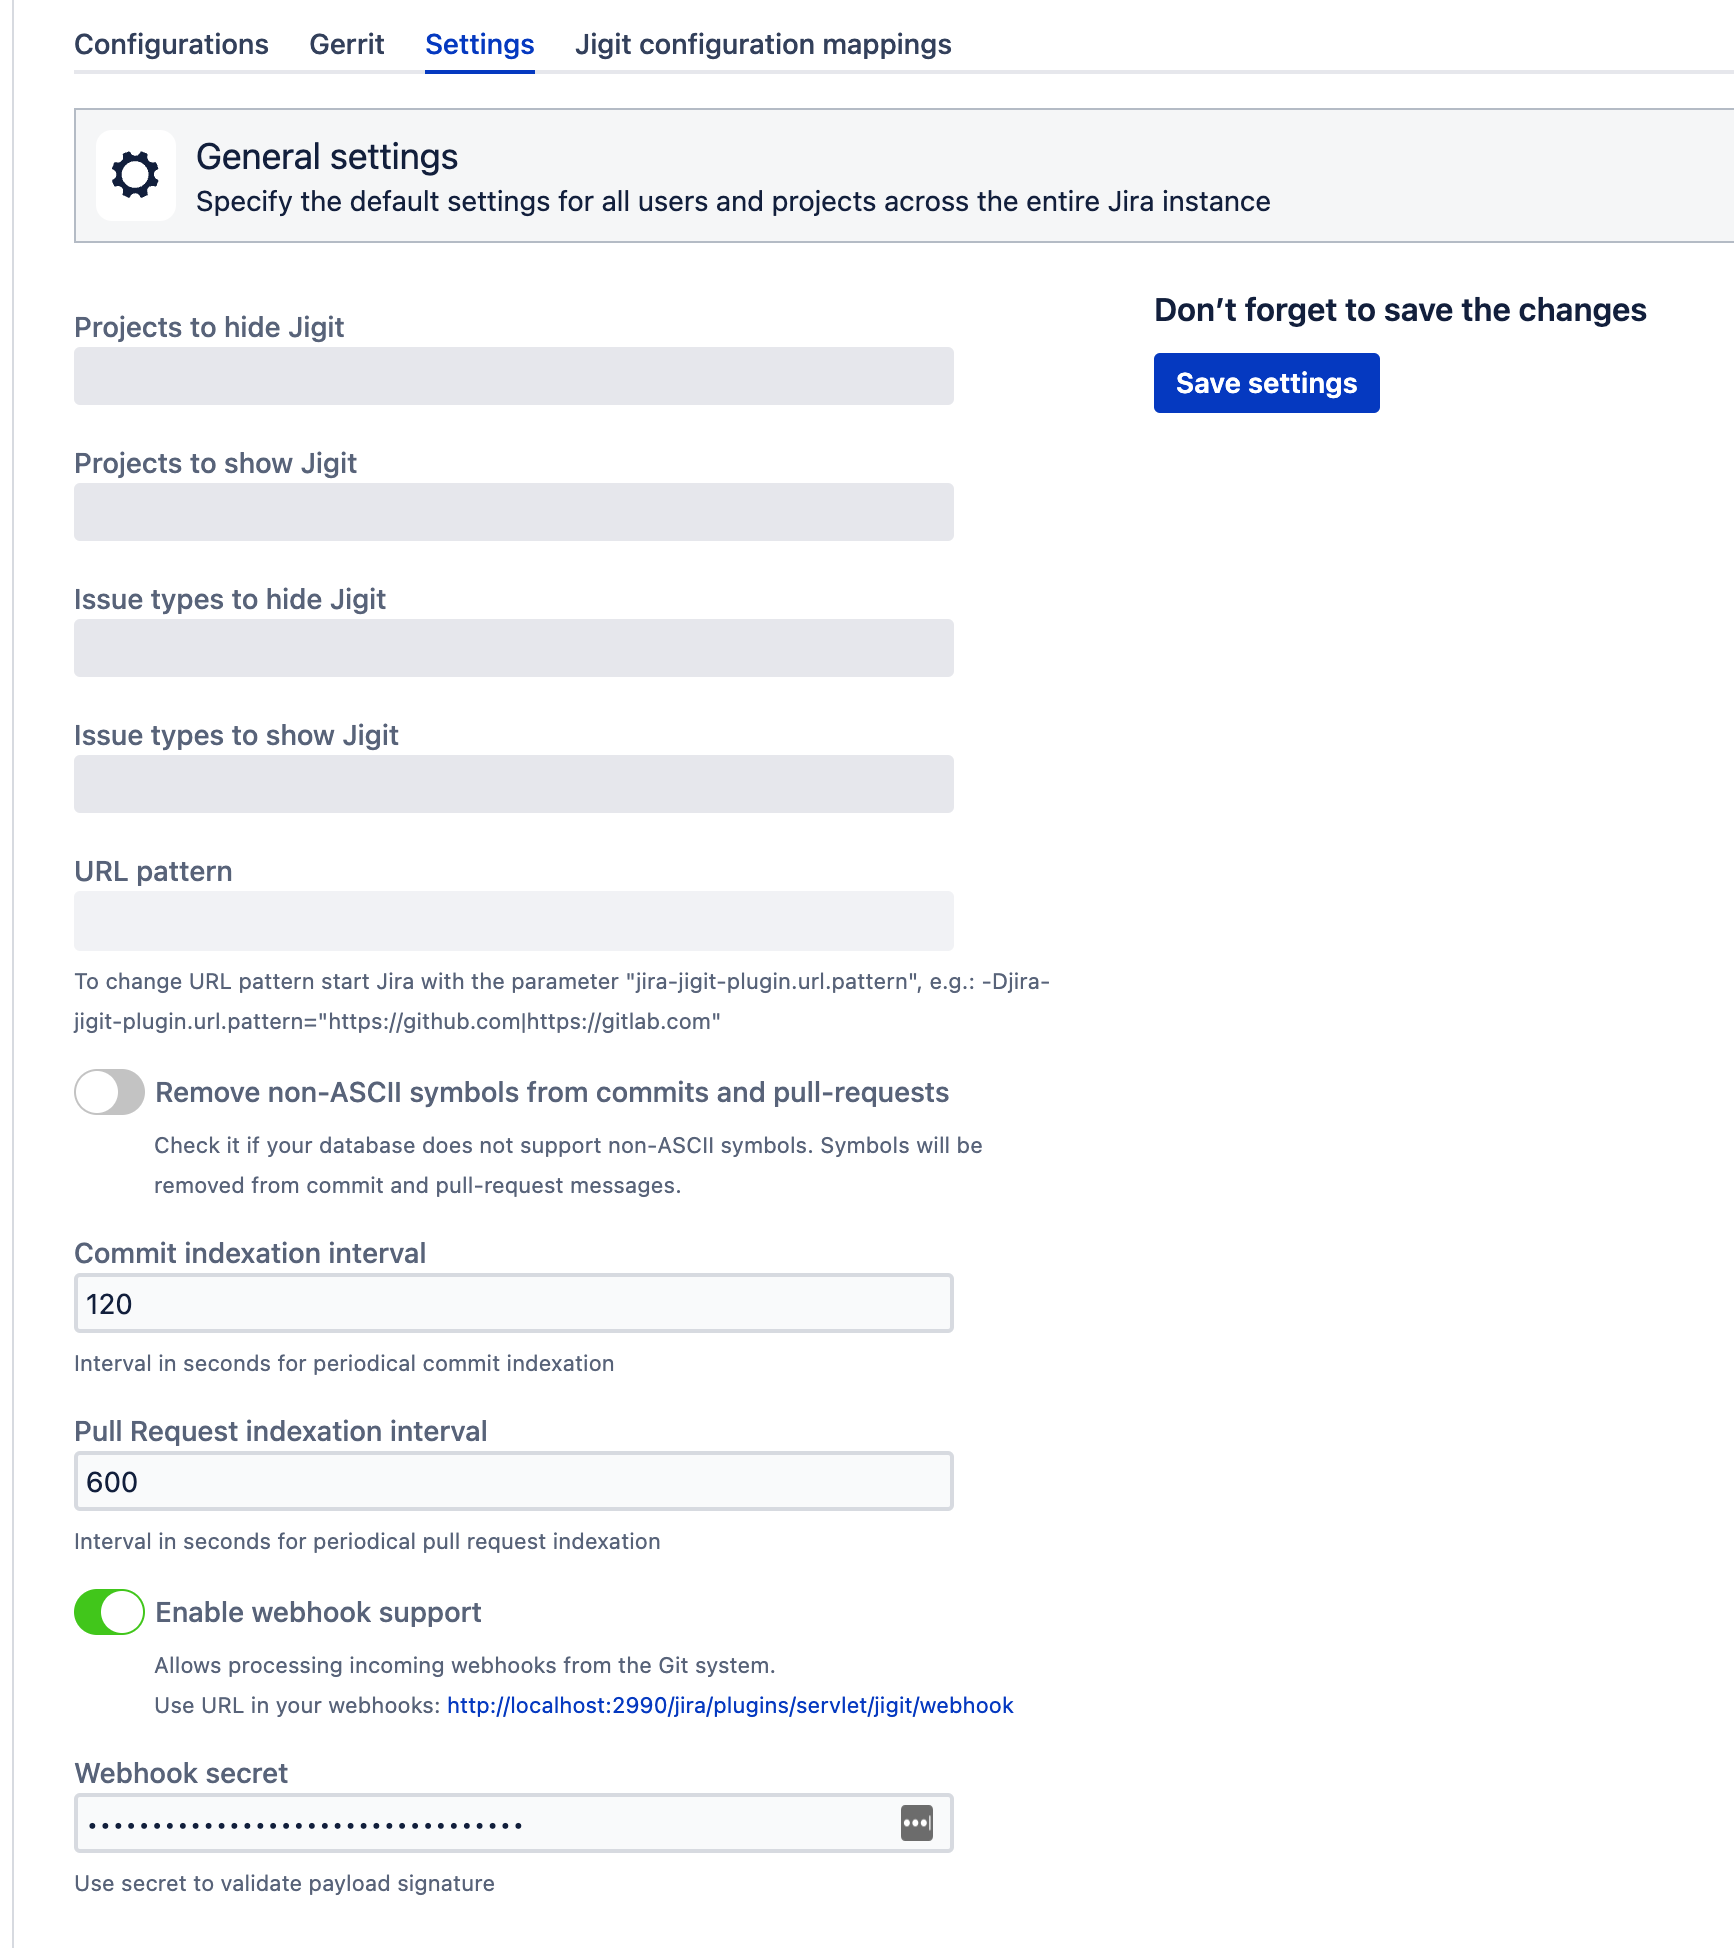
More information here: How to configure webhooks with Jigit
GitHub DependaBot alerts
Create configuration within GitHub security alert configurations tab on the project-level configuration page.
Go to the Project Settings of the Jira project you want to set up GitHub DependaBot alerts for.
Click on Jigit Plugin Config app on the left sidebar.
Navigate to the GitHub security alert configurations tab and create a new configuration.
.png?inst-v=85910a4c-ff03-4cf8-a26f-e717f0501436)
More information here: How to integrate Jigit with GitHub Dependabot
Gerrit code review integration
To configure Gerrit code review integration:
Go to the Global Configuration page.
Navigate to the Gerrit tab.
Create a new configuration by clicking on the Add button.
After specifying all the necessary parameters, click the OK button to save the new rule.
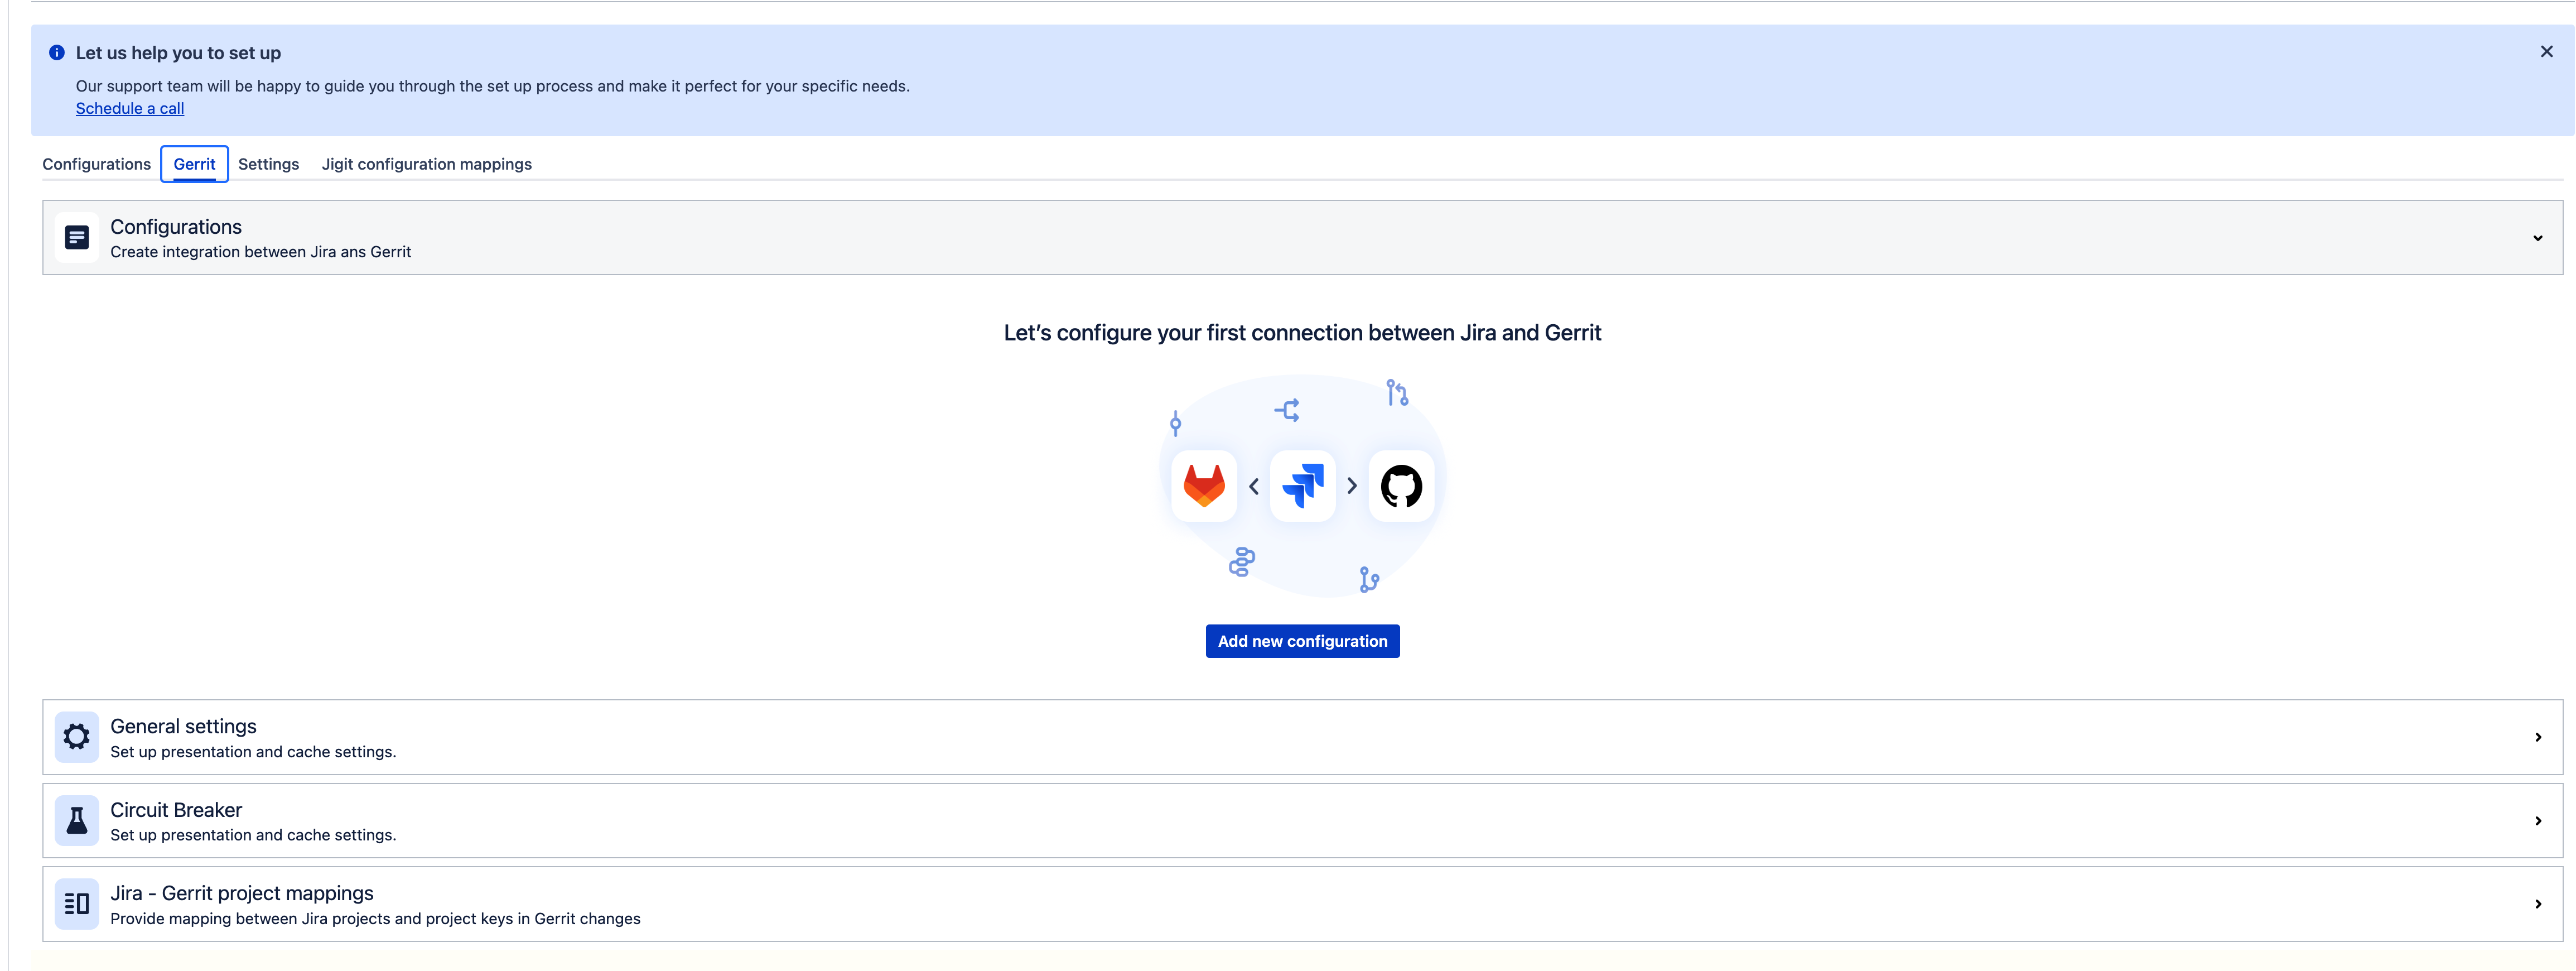
More information here: Gerrit Code Review
Updated:
