

This guide explains how to backfill historical commits, pull requests, and branches from Azure DevOps into Jira using Azure DevOps for Jira.
Backfill works with both Azure DevOps Cloud and Azure DevOps Server (On-Premises). If you haven't connected Azure DevOps to Jira yet, see Get started for Jira administrators or How to configure Azure DevOps On-Premises first.
Before you begin
Before running a backfill, make sure that:
-
You are a Jira administrator.
-
Azure DevOps for Jira is already installed, with at least one Azure DevOps integration and one connected project.
-
The Azure DevOps project you want to backfill has development activity from before it was connected to Jira, since that's what backfill is for.
Watch the demo
New to backfill? This short walkthrough covers starting a run, scoping it to a project, and what to expect in the Breakdown and Audit trail tabs.
What does backfill import?
Connecting an Azure DevOps project only brings in new development activity from that point forward. Backfill imports what already existed beforehand, so it shows up on the relevant Jira issues too.
A backfill run imports:
-
Commits
-
Pull requests
-
Branches
Branches are imported as a point-in-time snapshot of what currently exists in the repository. Builds and deployments are not included in a backfill run.
Step 1. Open the Backfill tab
-
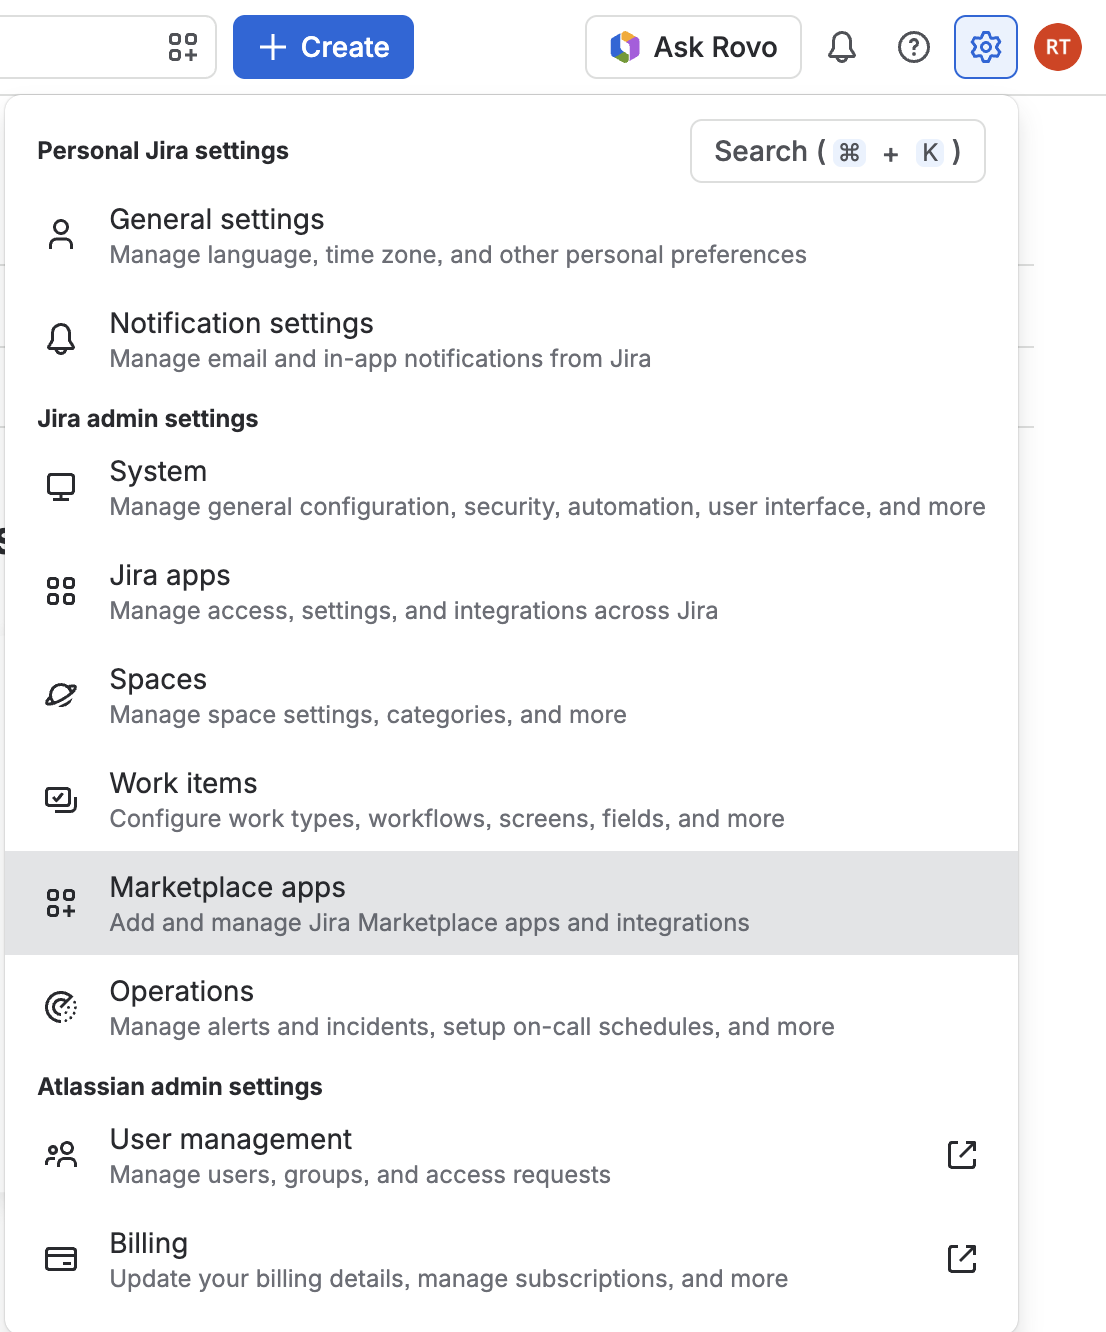
Go to the Marketplace apps section of your Jira administration by clicking the Settings cogwheel in the top-right corner and selecting Marketplace apps.
-
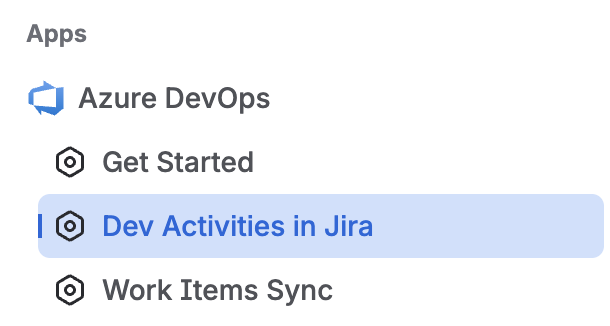
Expand Azure DevOps and select Dev Activities in Jira.
-
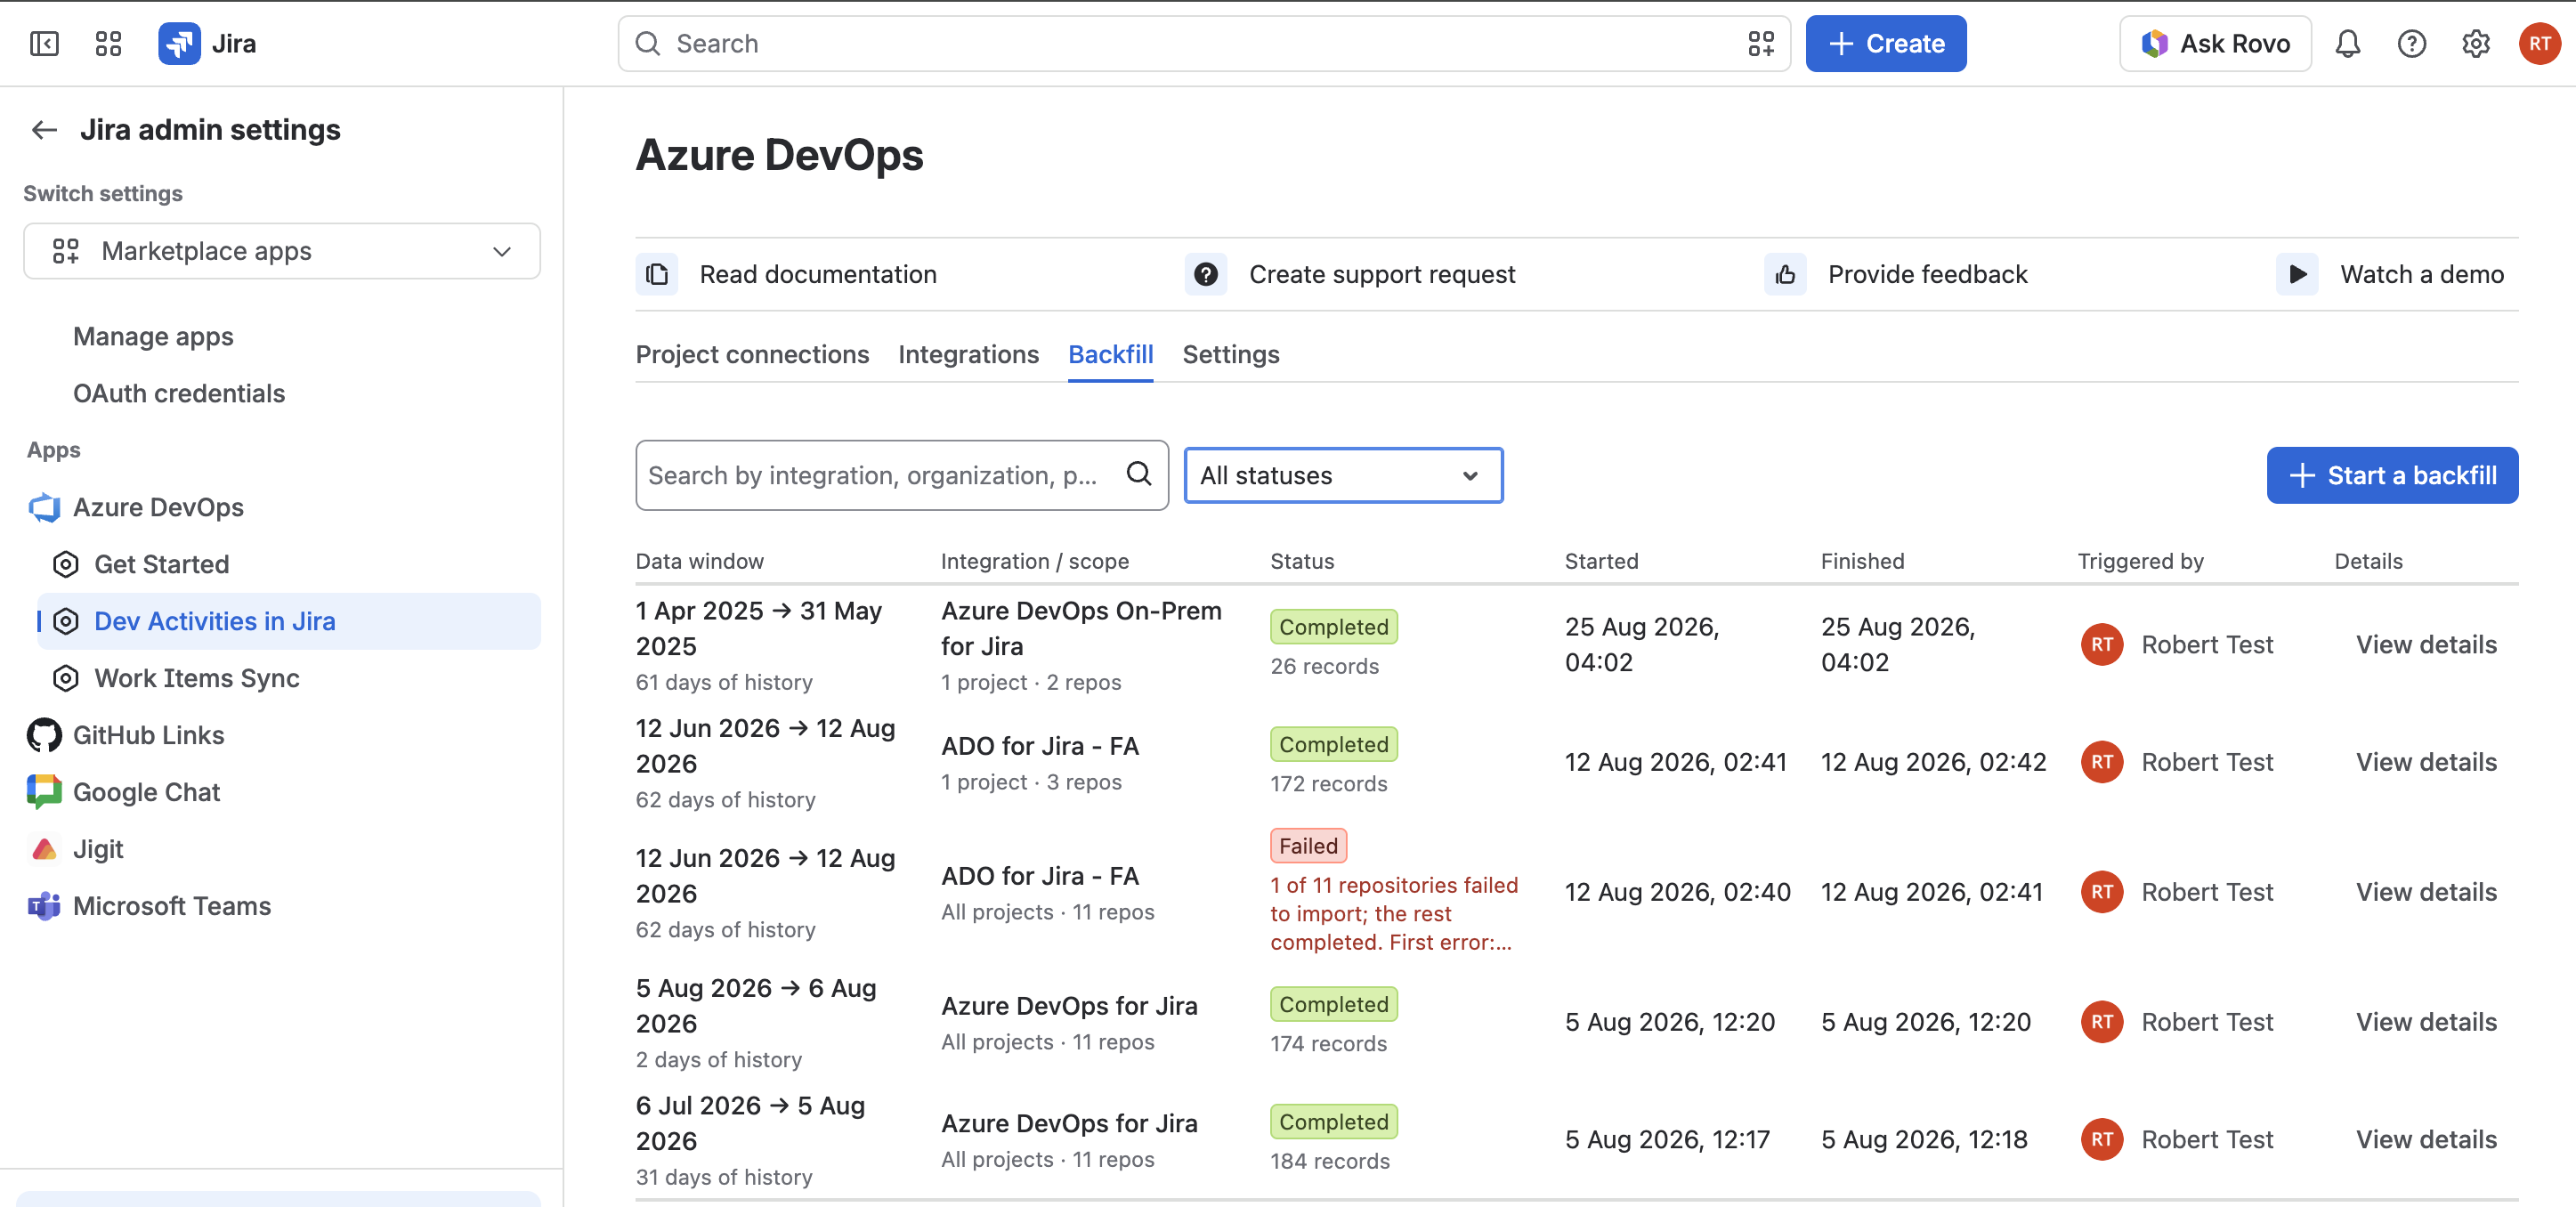
Select the Backfill tab.
Step 2. Start a backfill run
-
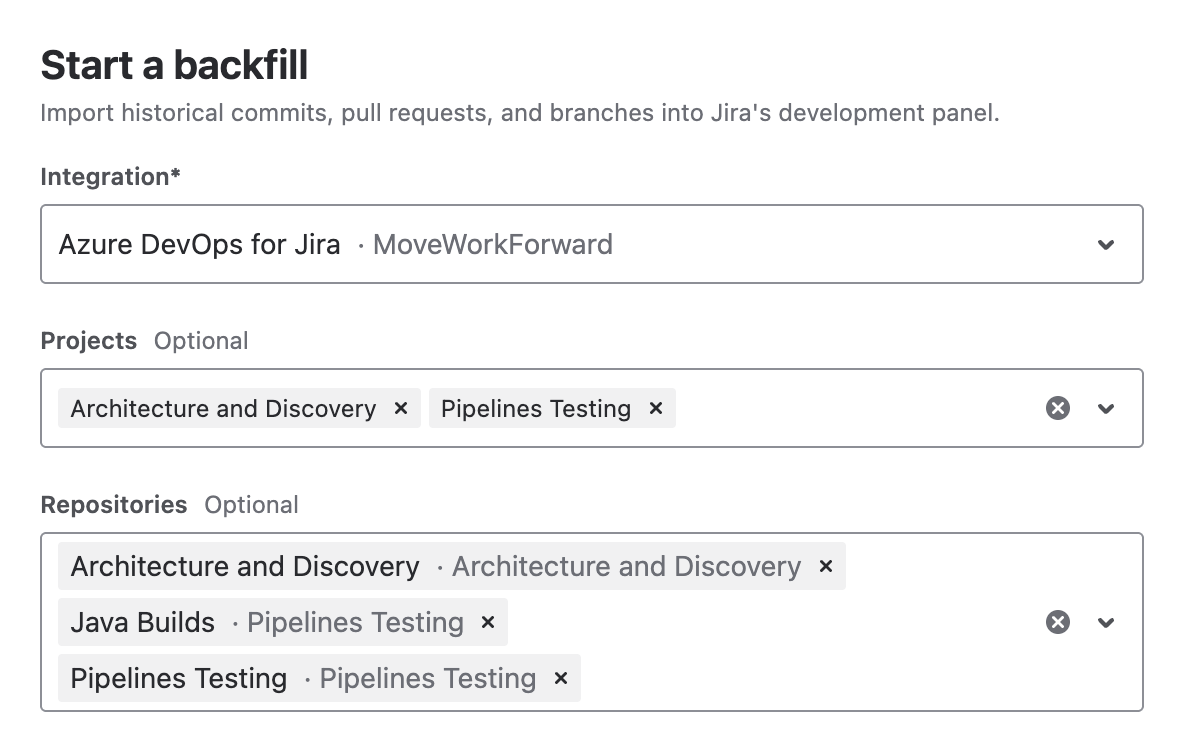
Select Start a backfill.

-
Select the Integration you want to backfill.
-
Optionally, select specific Projects. Leave this empty to include every project connected through that integration.
-
Optionally, select specific Repositories. Leave this empty to include every repository in the selected projects.
-
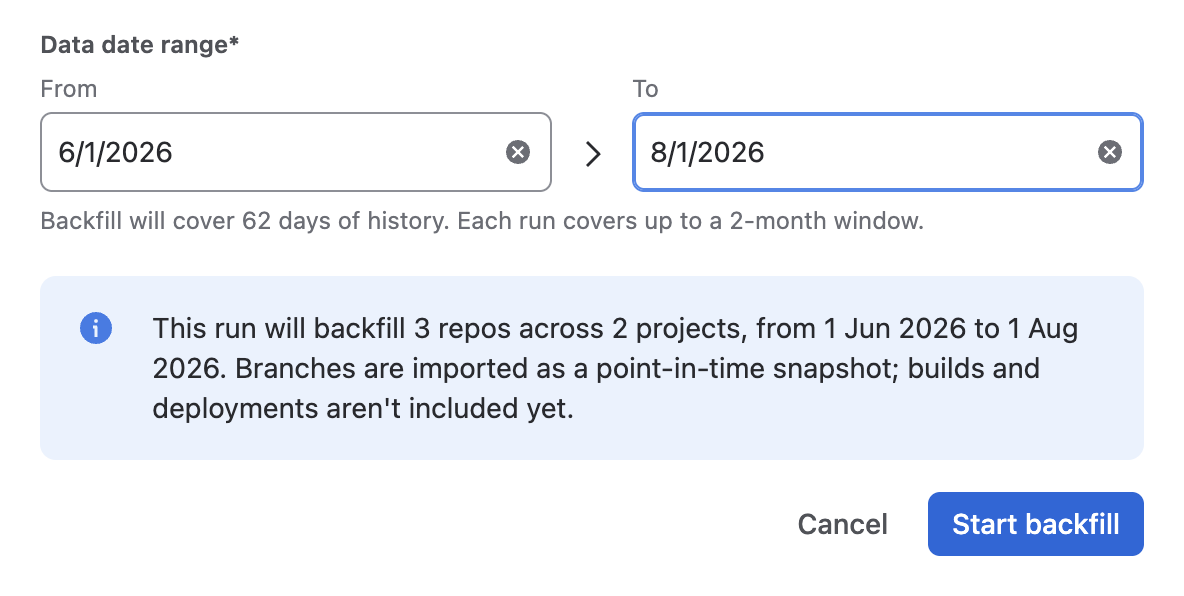
Choose a date range. Each run can cover up to two months, and can't start more than two years ago. Run the backfill again, using a different range, to cover a longer period.
-
Review the summary, for example "This run will backfill 3 repos across 2 projects, from 1 June 2026 to 1 August 2026," then select Start backfill.
If Azure DevOps temporarily rate-limits the request, the run pauses and resumes automatically. This appears as a temporary stall in the run's status, not a failure.
Step 3. Monitor and manage backfill runs
Every backfill run appears in a history table on the Backfill tab, showing its data window, scope, status, when it started and finished, and who triggered it.
QUEUED IN PROGRESS COMPLETED FAILED STOPPED
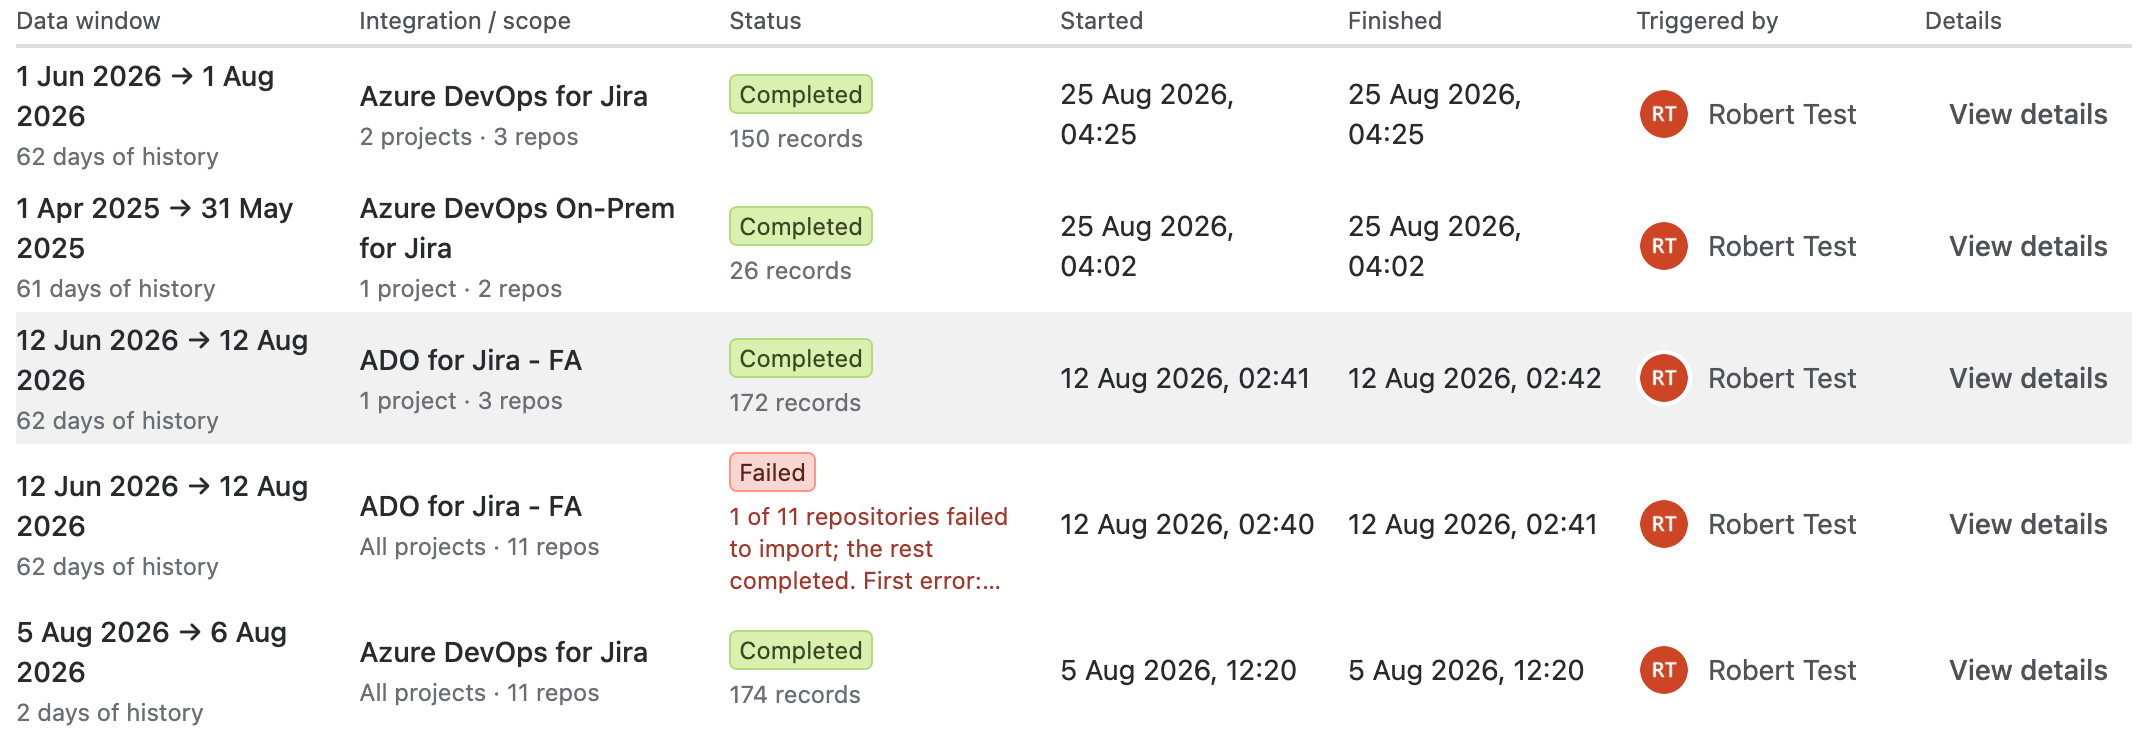
Select a run to see its Breakdown, a per-project and per-repository count of what was imported, and its Audit trail.
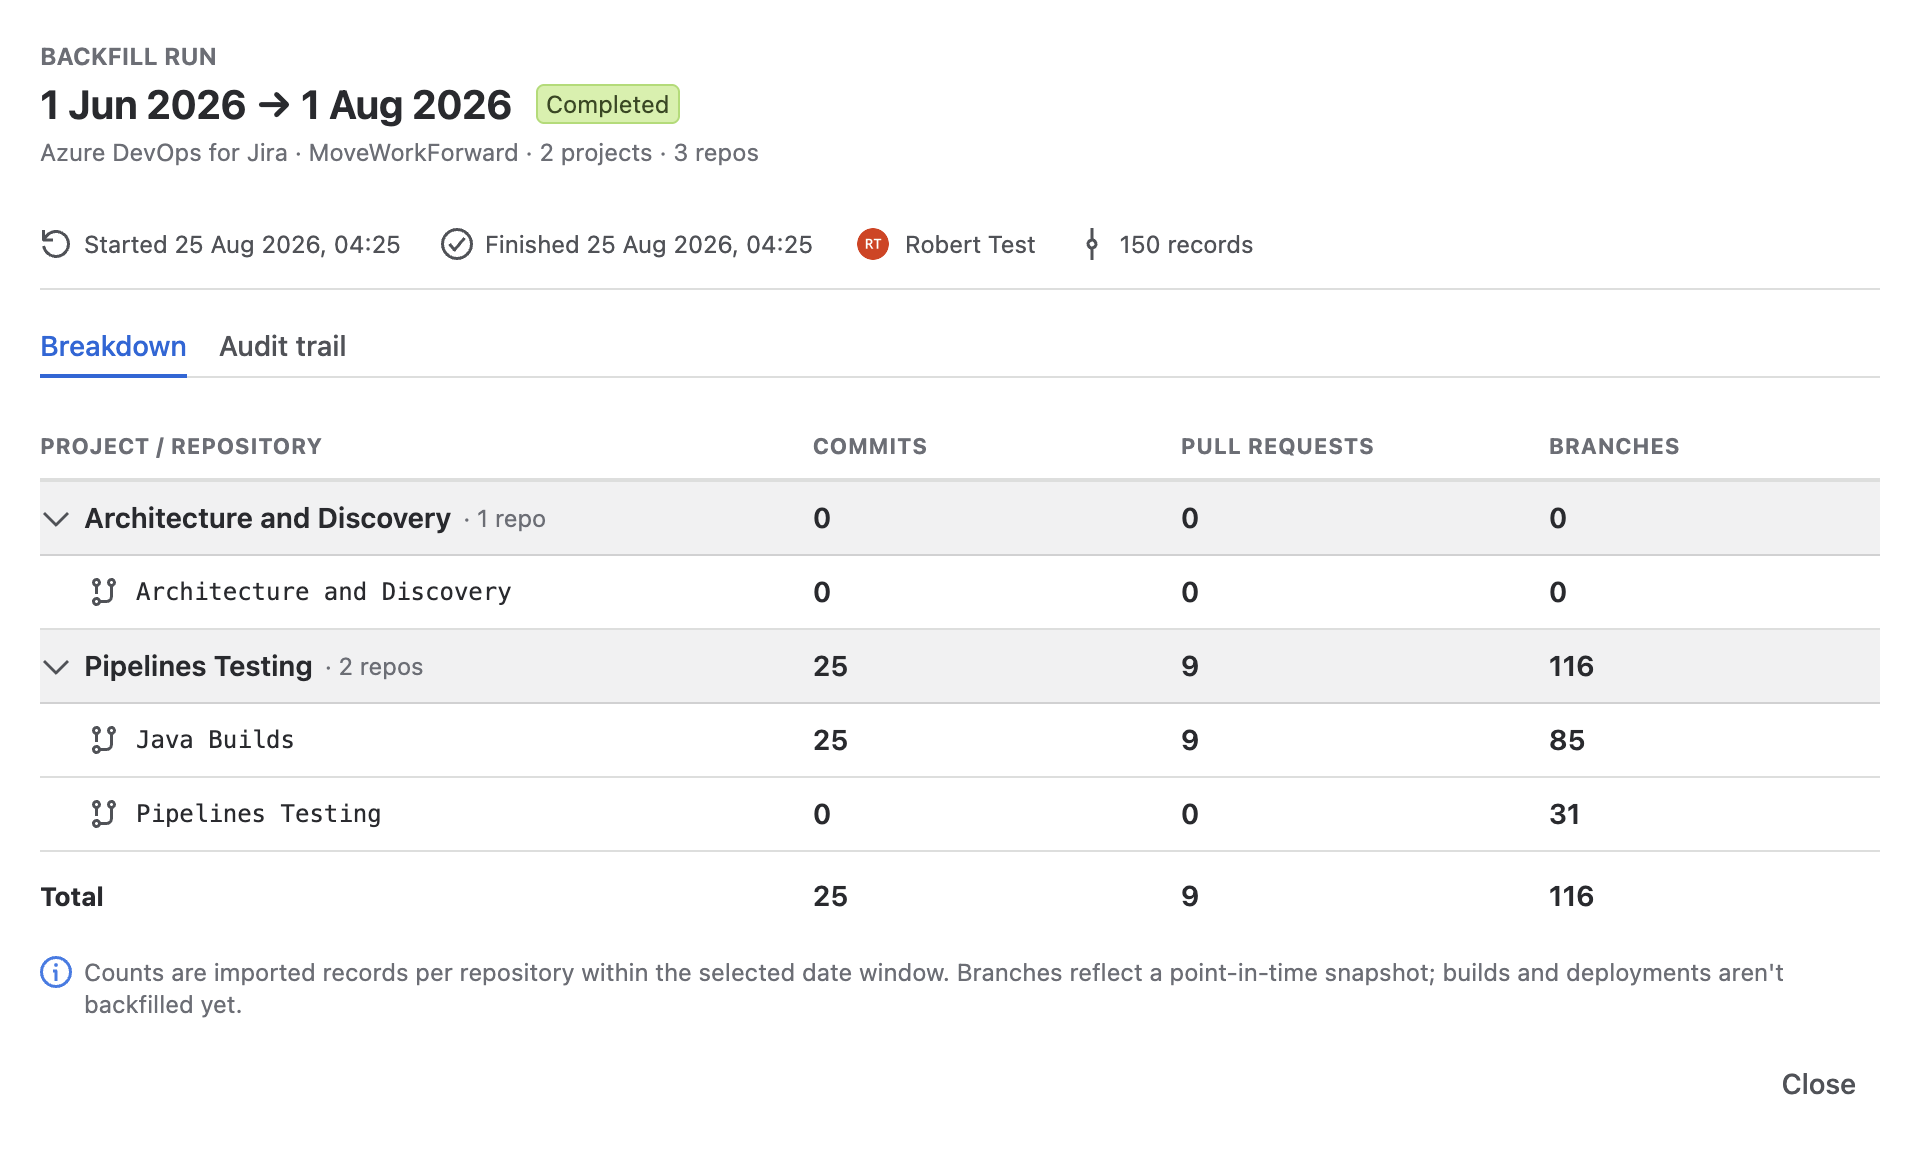
From here, you can:
-
Stop a run that's in progress.
-
Retry a run that failed.
-
Start a new run to cover an earlier or later window once an existing one finishes.
Related guides
Updated: August, 2026